Whenever you connect to public or corporate WiFi networks, there appears a ‘Action needed’ prompt in which you’ve to hit Connect button. Then Windows connects successfully to the WiFi network. Following the screenshot of that prompt:
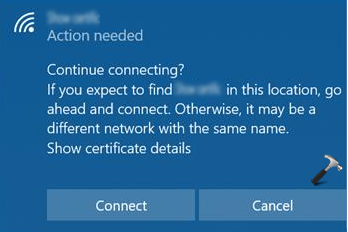
This is actually by design and the prompt appears so that users are well aware of the fact that they do not mistakenly connect to unknown WiFi network with same name because it could be risky.
But if you’re pretty sure that you’ve only same work public/WiFi network, and often connecting to it bypassing this warning is annoying, here is how to disable the warning. First, we should understand why this warning appears.
So according to Microsoft, this is expected to happen because of Network Location Awareness (NLA) service. This service basically identifies network and their properties so Windows knows how to manage connectivity to a network. NLA uses a components called Network Connectivity Status Indicator (NCSI) which checks whether the connected network is Internet or Intranet based.
Now the NCSI employs active and passive probes. Due to active probe, the above mentioned prompt appears. You can perform the below described registry manipulation to disable active probe and bypass the warning.
FIX: ‘Action Needed’ Prompt While Connecting To WiFi Network In Windows 10
Registry Disclaimer: The further steps will involve registry manipulation. Making mistakes while manipulating registry could affect your system adversely. So be careful while editing registry entries and create a System Restore point first.
1. Press  + R and type
 regedit in Run dialog box to open Registry Editor (if you’re not familiar with Registry Editor, then click here). Click OK.
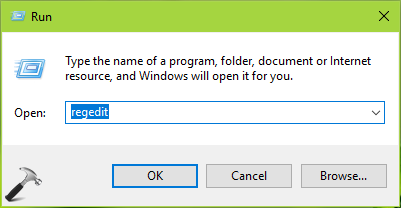
2. In left pane of Registry Editor window, navigate to following registry key:
HKEY_LOCAL_MACHINE\SYSTEM\CurrentControlSet\Services\NlaSvc\Parameters\Internet
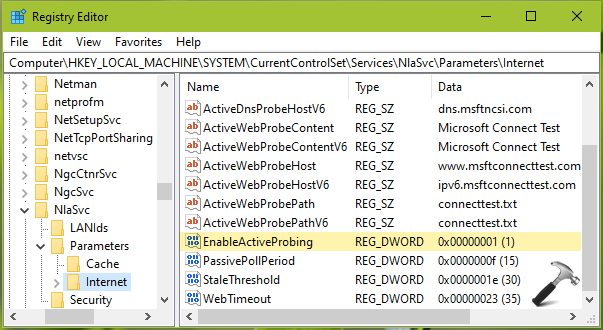
3. In right pane of Internet registry key, look for EnableActiveProbling registry DWORD (REG_DWORD). It must be set to 1 by default. Double click on it to modify its Value data:
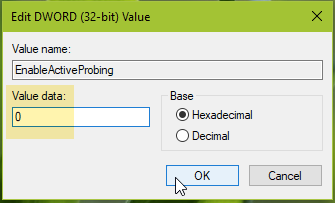
4. Finally, set the Value data to 0 and click OK. Close Registry Editor and reboot.
NOTE: Microsoft and we don’t recommend disabling active probe because of the fact that many system components depends upon NCSI. Some of the features on system may not work, for example, downloading Windows Updates or checking for mail via Outlook. You should only disable active probe, when it is badly required.
After restarting the system, the ‘Action needed’ prompt will not appear and Windows will directly connect to public or corporate WiFi networks.
We recommend to restore EnableActiveProbling to 1, when you don’t connect to work WiFi networks.
Hope this helps!