When your PC suddenly slows down, you may go to the Task Manager and realize that the DISM Host Servicing Process is taking up a huge amount of your memory or CPU. The “DISM Host servicing Process consuming high memory usage problem has been experienced by many Windows 11 users, and fortunately, it is very easy to fix. In this guide, we will discuss what this process is, why it makes use of high memory usage, and how you can correct it in a step-by-step manner.
Page Contents
Why Does DISM Host Servicing Process Use So Much Memory?
The DISM Host Servicing Process (dismhost.exe) belongs to Windows Deployment Image Servicing and Management (DISM). It is a valid Windows component, which comes to fix, update, or prepare Windows system images.
There are occasions, though, when the process begins taking up too much CPU or RAM, thus slowing down. Common reasons include-
- Corrupted system files
- Malware in the form of dismhost.exe
- Background Windows updates
- Unauthorized access or broken system graphics
The knowledge of the cause will enable you to select the correct fix between the following steps.
Fix DISM Host Servicing process high memory usage
The DISM Host Servicing Process high memory usage problem can be a pain, but it can be resolved in a short time using these 6 effective approaches. Always ensure you check the authenticity of the file, scan with anti-malware, and ensure you update the Windows.
Check File Location and Properties
It should first be verified that the DISM Host Servicing Process is authentic. Other malware poses itself as dmshost.exe, and it was found in unrecognizable folders.
1. Click Ctrl + Shift + Esc to get Task Manager. Or open it from the Start menu.

2. Find DISM Host Servicing Process or dismhost.exe in the Process tab. Click on it with the right-click to choose Open file location.

The actual file can be found on either of the following paths-
C:\Windows\System32
C:\Windows\WinSxS
3. When it occurs in other places, chances are that it is malicious and must be eliminated.
Run DismHost.exe Safely in Windows Sandbox
In case you do not understand the behavior of this file, then another execution of the file in Windows Sandbox will serve as a safe haven where any malicious behavior can be tormented.
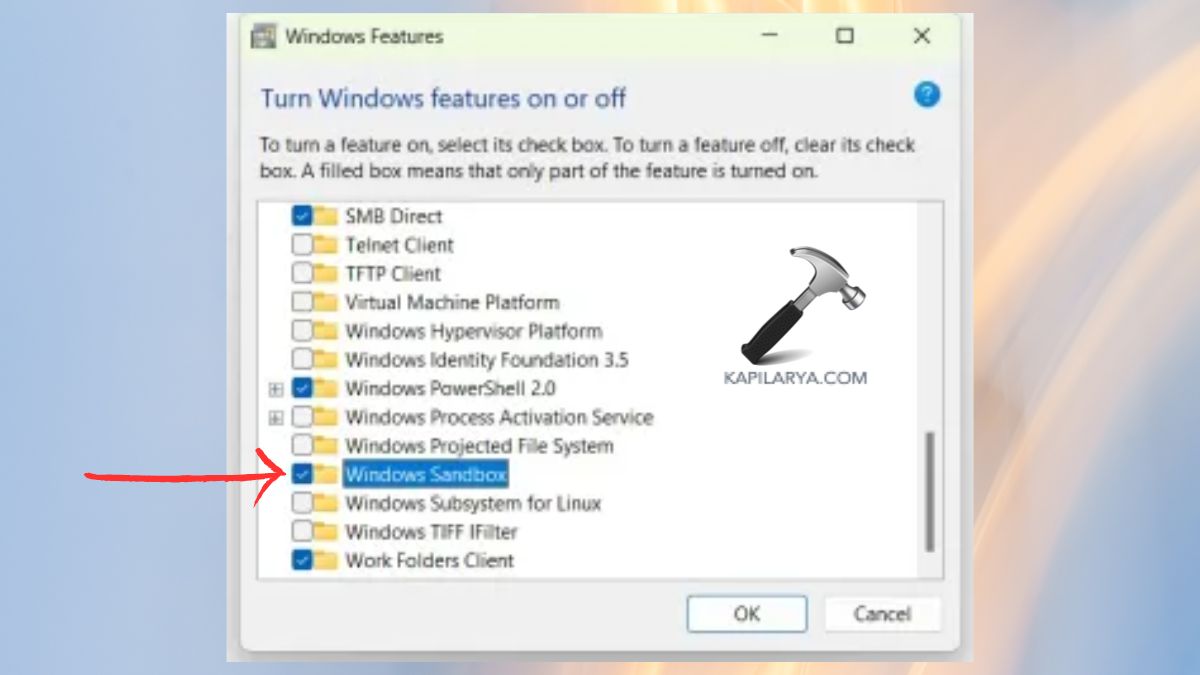
1. Open from Start menu by searching – “Turn Windows Features on or off”.

2. Then, enable Windows Sandbox. Restart your PC.
3. Open Windows Sandbox in the Start Menu. Now, start the “DismHost.exe” within the sandbox and trace its performance.
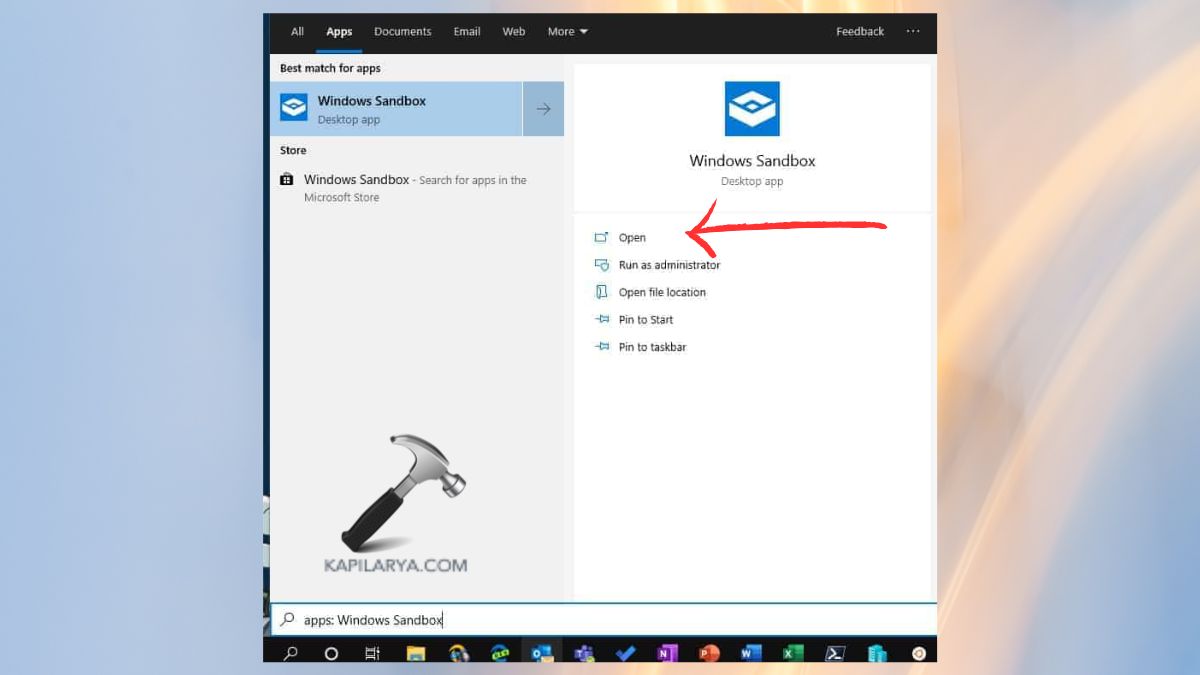
Provided that it acts normally, then you are probably alright in your original system. Otherwise, it is possible to either replace the file or fix your Windows installation.
Verify the Publisher and Digital Signature
The Microsoft corporation has to publish a legitimate copy of the DismHost.exe file. A digital signature can be checked to verify its authenticity.
Right-click on the “DismHost.exe” file. Select the Properties option > go to Digital Signatures tab.
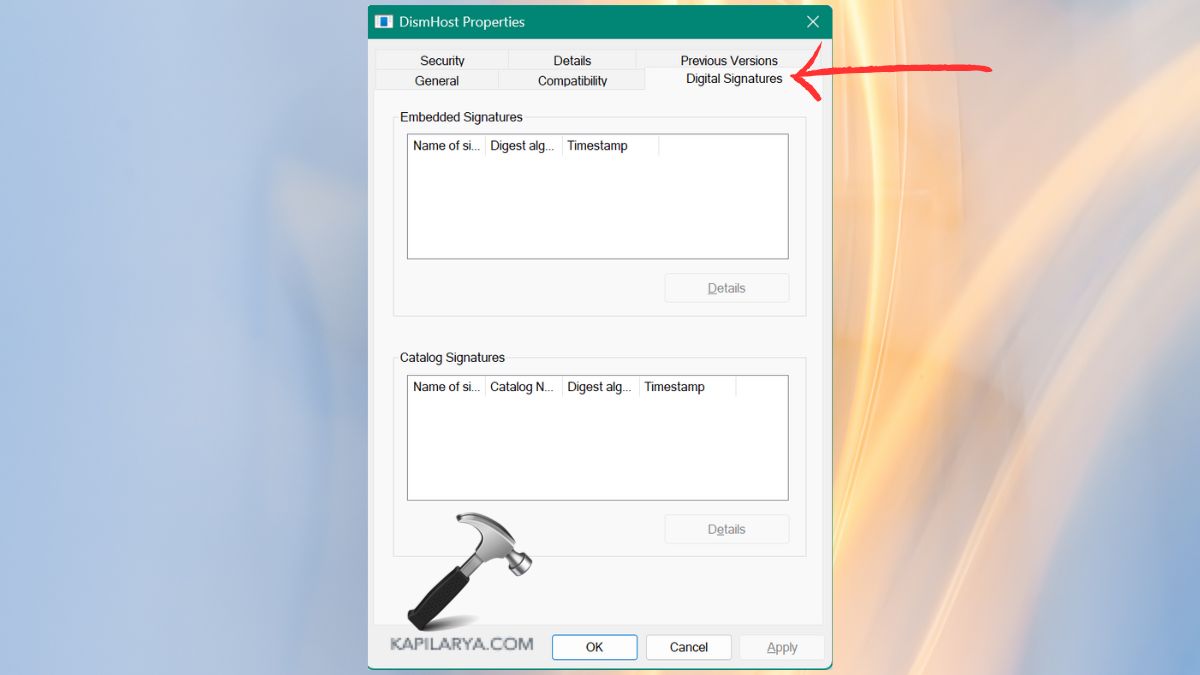
Ensure the name of the signer is Microsoft Windows or Microsoft Corporation. The lack of the signature or the publisher is unknown, which is a red flag. If it doesn’t match, delete the file and do a complete security scan.
Scan DISM Host Servicing Process with Security Software
However, malware may still infect a file, although it may appear that it is at the right location. Have Windows Defender or your antivirus software perform a deep security scan.
1. Right-click on the suspicious “DismHost.exe” file. Choose Scan with Microsoft Defender (or the antivirus that you use).
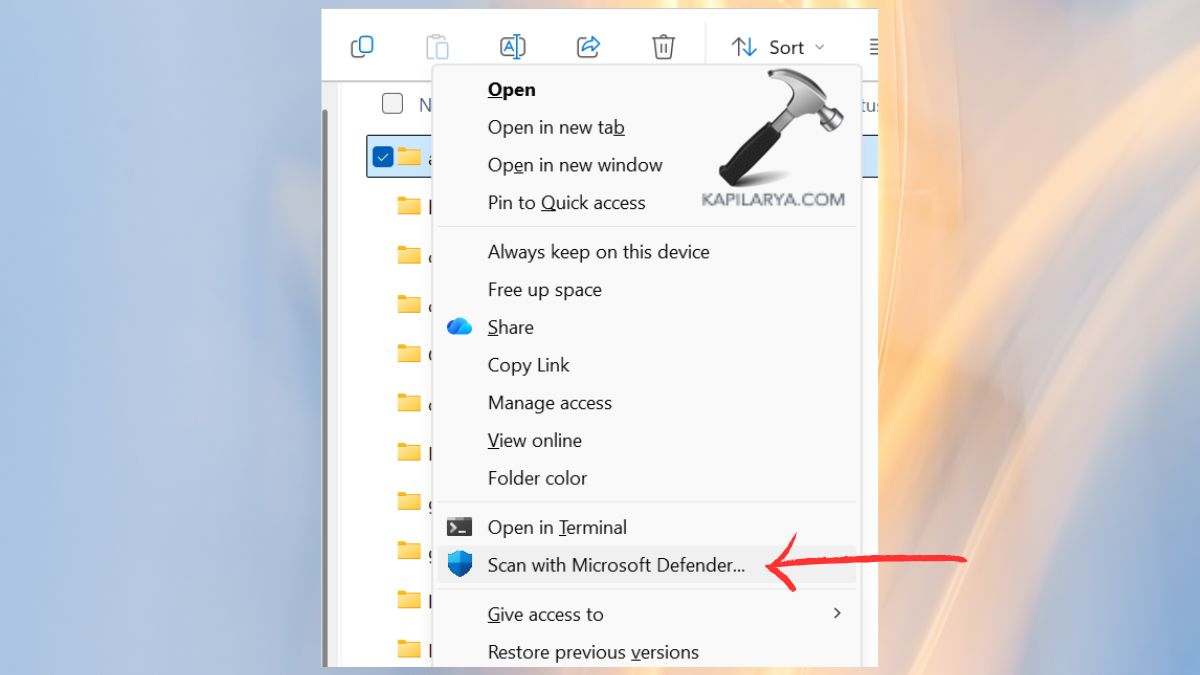
2. Wait for the scan to finish. Should there be malware, then quarantine or delete it.
Get It Scanned with an Online Malware Scanner
In case your local antivirus does not identify something suspicious, it is most prudent to use an online malware scanner to do so.
To scan the virus, you are required to drag the “DismHost.exe” file to your trusted antivirus applications. Wait for the scan results. Should there be any threats, then these should be removed or substituted as soon as possible.
Verify File Integrity Using Hash Value
Another significant cause of high memory usage by DISM Host Servicing Process is file corruption. This is by comparing the hash of the file with that of the one provided by Microsoft, which ensures that it is original.
1. To begin with, open the Command Prompt as an administrator.

2. Enter the following command and press Enter.
certutil -hashfile "C:\Windows\System32\DismHost.exe" SHA256
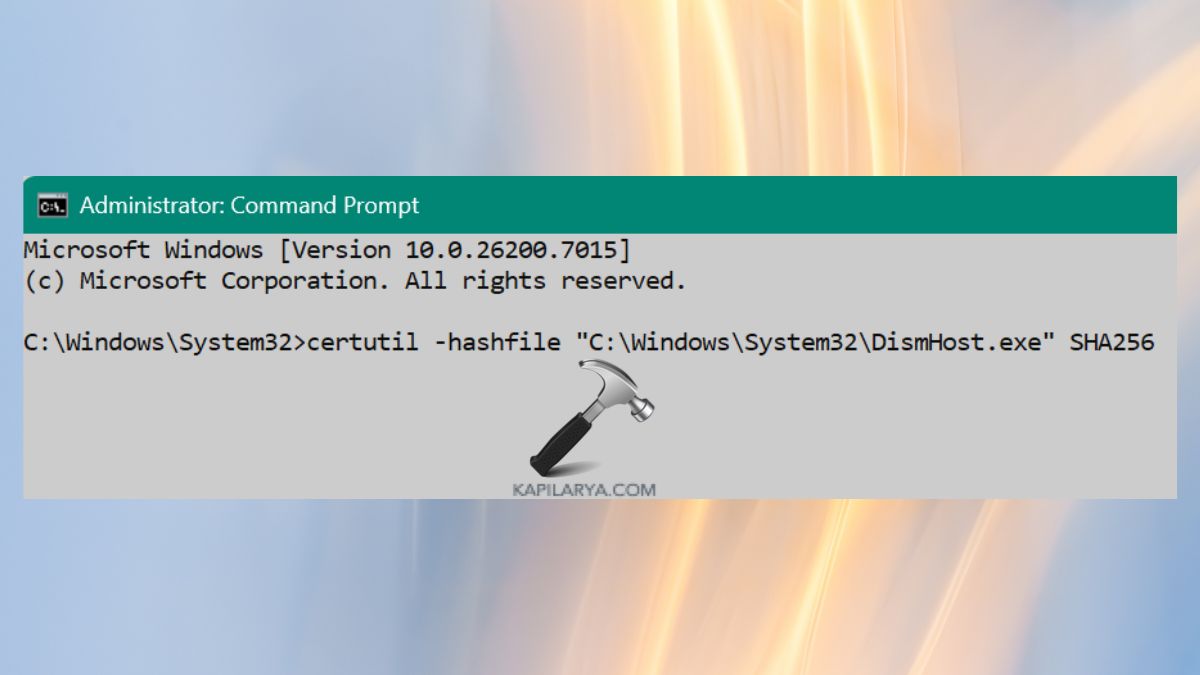
3. Check the hash generated against that of Microsoft (in documentation or trusted sources). When they do not coincide, the file is corrupted. To correct the situation, you should change it to a clean version.
Bonus Tip: Use a DISM Command to Repair Windows Files
And even when you have tried these fixes and you are not satisfied with your memory issues, then you can repair your Windows image using the DISM command itself in Command Prompt.
DISM /Online /Cleanup-Image /RestoreHealth

This order takes a system scan and recovers damaged system files, which may be triggering DismHost.exe’s elevated consumption of memory.
Frequently Asked Questions (FAQs)
That’s it!