When you are upgrading to Windows 11 from Windows 10, and the upgrade process may interrupted by the error code 0x80070070, it means you have a storage space issue. Specifically, you are low on disk space on your Windows drive. Then you have to free up your space on the drive, and then upgrade the OS. In this articles, we will explain you how to fix error code 0x80070070 while upgrading to Windows 11 from Windows 10.
Page Contents
Fix Error Code 0x80070070 while upgrading to Windows 11
Method 1: Delete Download History and Recycle Bin
The Recycle Bin will not automatically remove files after a certain period of time. As long a files are in the Recycle Bin, they will continue to take up space on your drive. They do not leave your system until you remove them from the Recycle Bin.
1. Open Recycle Bin. You can open it either by searching it in search box or by using shortcut key.
2. Select the files which are in recycle bin. Hit Enter.
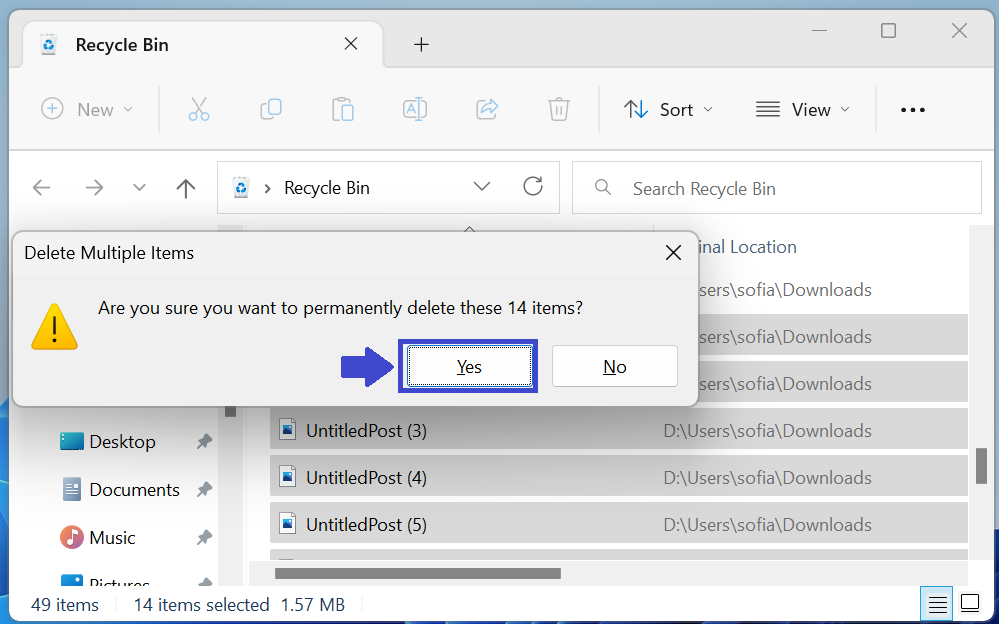
3. You will receive confirmation message “Are you sure you want to permanently delete theses items?”.
4. Click Yes.
Method 2: Disk Cleanup
Disk Cleanup is by Microsoft to get more free space on the drive. It can delete the files that are usually running on the background to constantly consume the disk space. The steps are as follows:
1. Type “Disk Cleanup” in search box and hit Enter.
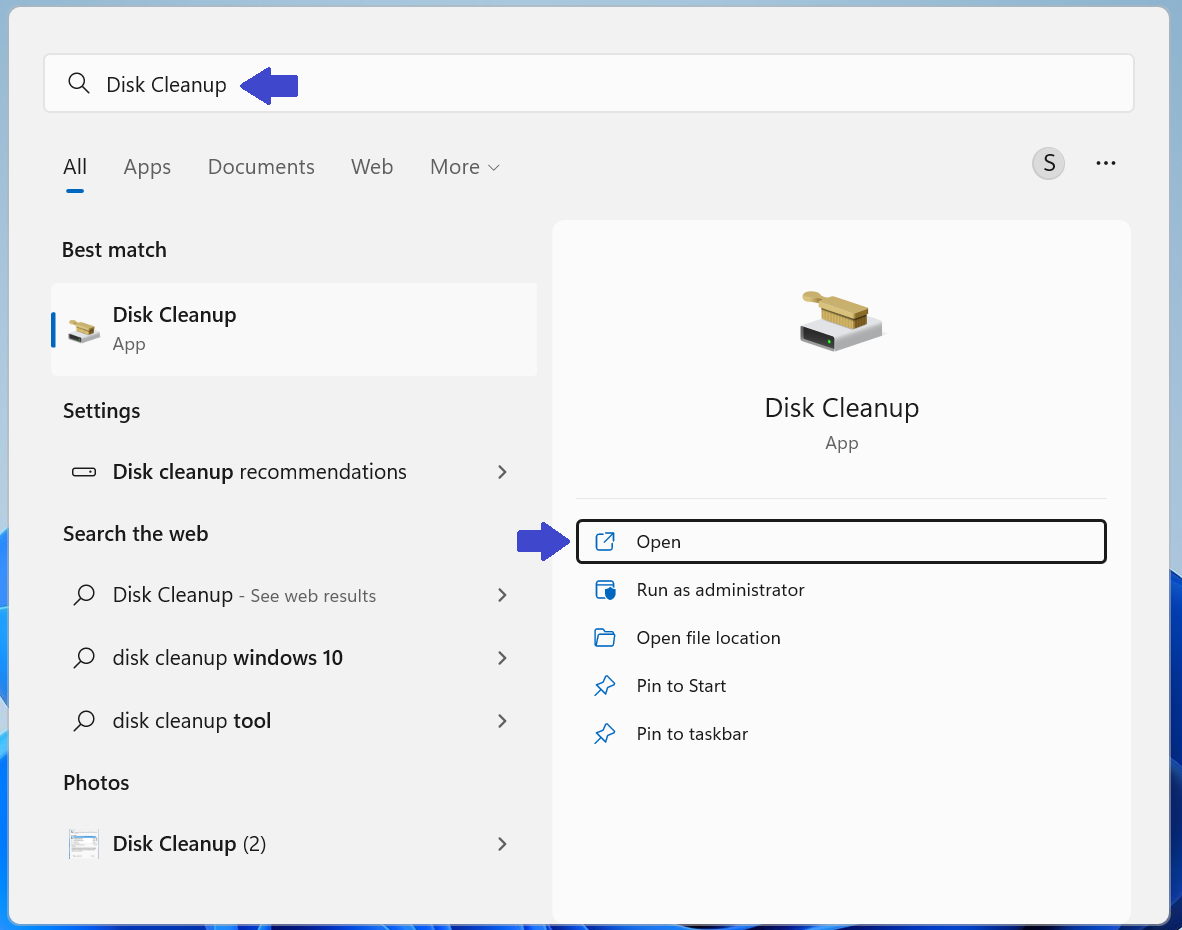
2. Select the disk which you want to clean and click OK.

3. For example, I have selected OS(C:). So prompt box will appear (see below image).
4. Select the files which you want to delete and click OK.

5. After clicking OK, you will receive a confirm message “Are you sure you want to permanently delete these files?”.
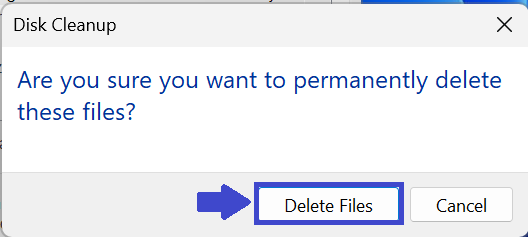
6. Click “Delete Files”.
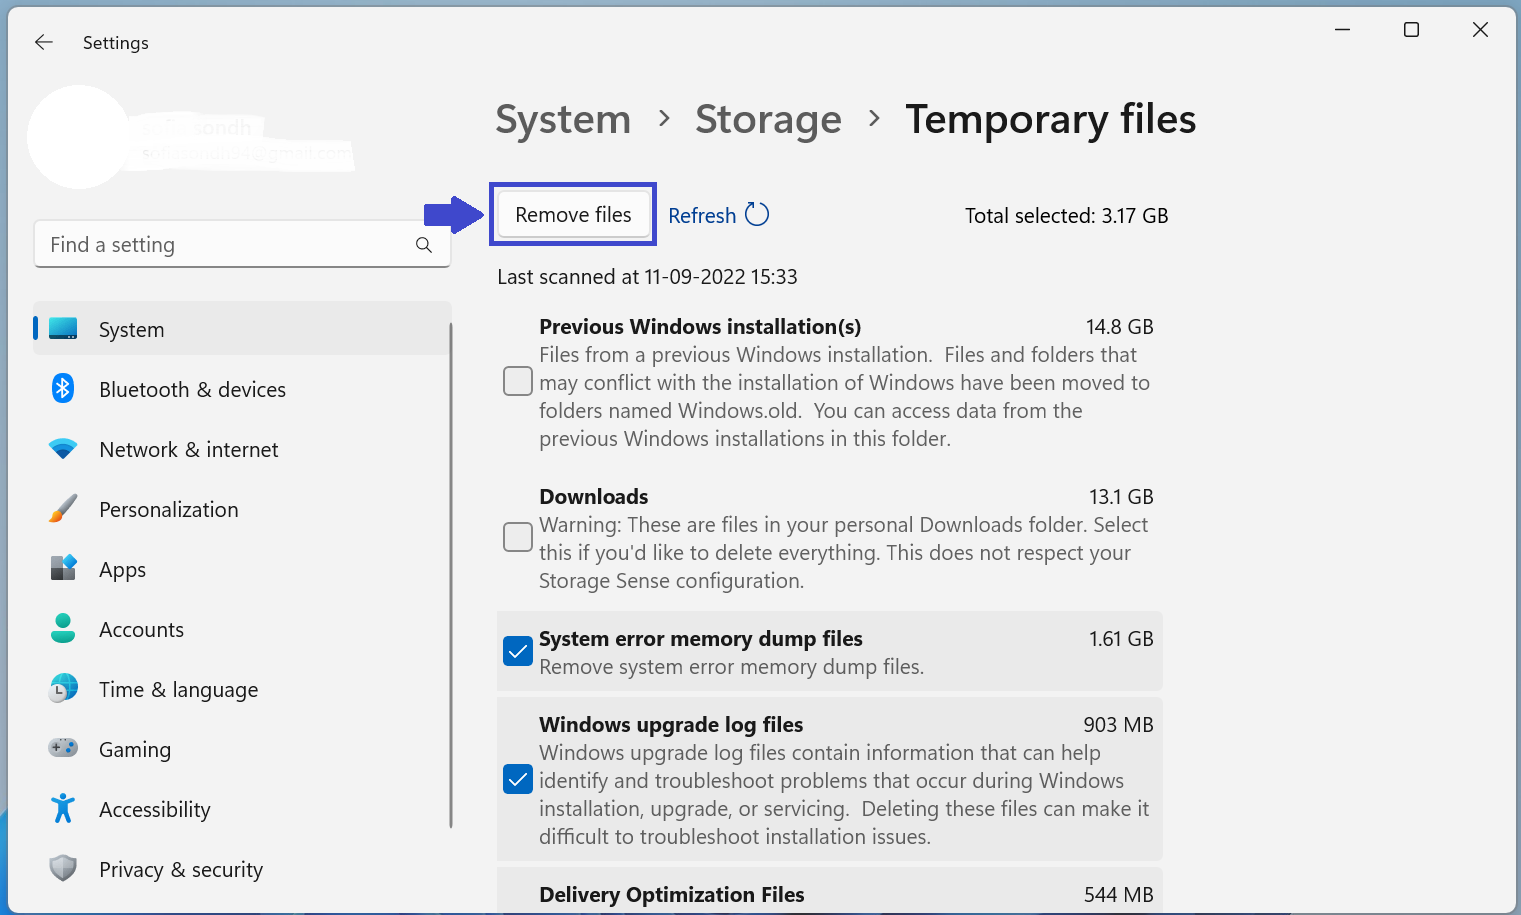
Method 3: Delete Temporary Files
Temporary Files can end up taking several GBs of space on your drive. These files are often residual files left after previous updates have been installed.
1. Type “Delete Temporary Files ” in search box and click “open”.
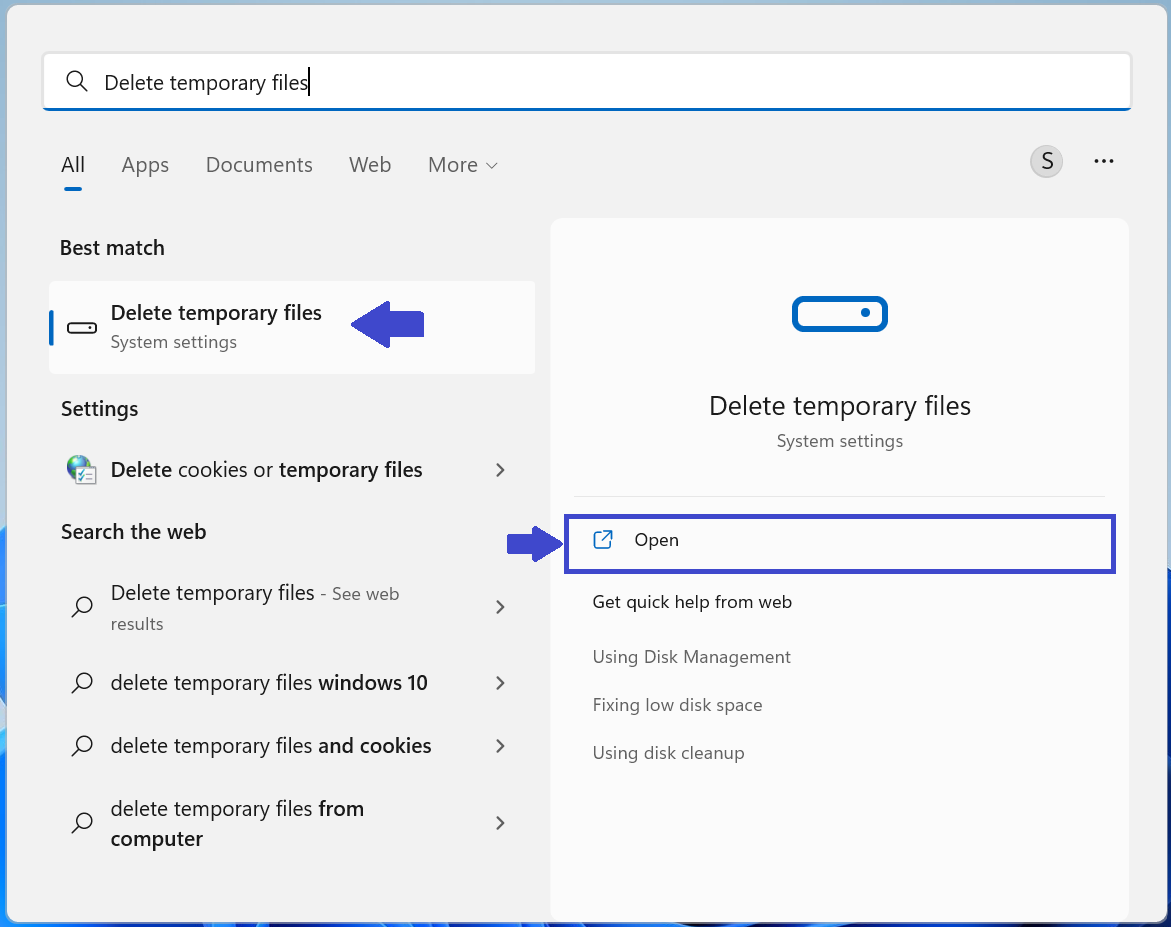
2. Select “Temporary files”.
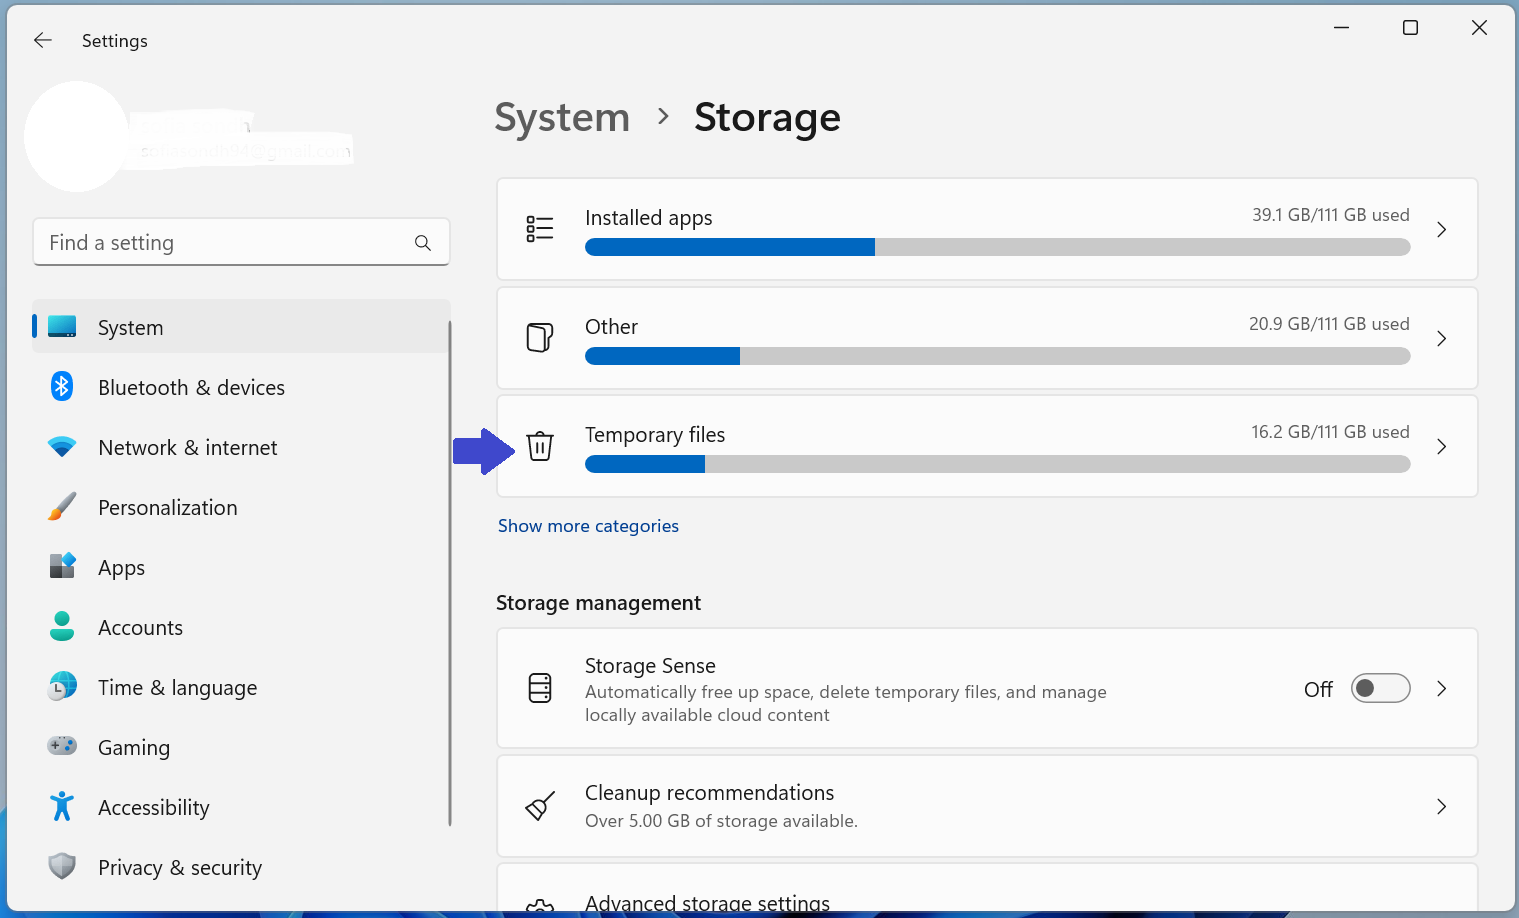
3. Select which files you want to delete from the given list and then click on “Remove Files”.
Method 4: Uninstall App
If you have apps installed on your system that you do not use, remove them. They may seem like small apps that take little space, but if you have a large number of them, you can end up wasting a lot of space.
1. Go to “Settings” and Select Apps => Installed apps.

2. After selecting “Installed apps” there will be list of Installed apps below. Select the apps which is no longer in use.
3. There you will get three options (see the below image):
- Advanced Option
- Move
- Uninstall
With Advanced Option, you can see the battery usage of your apps and permission to run in background or not? If anyone of your app’s battery usage is not good you can uninstall it.
If your app is important and you cannot delete it. For that you can move your app to another drive. This will also help to free up your space.
Or if your app is no longer in use, you can simply uninstall your app.
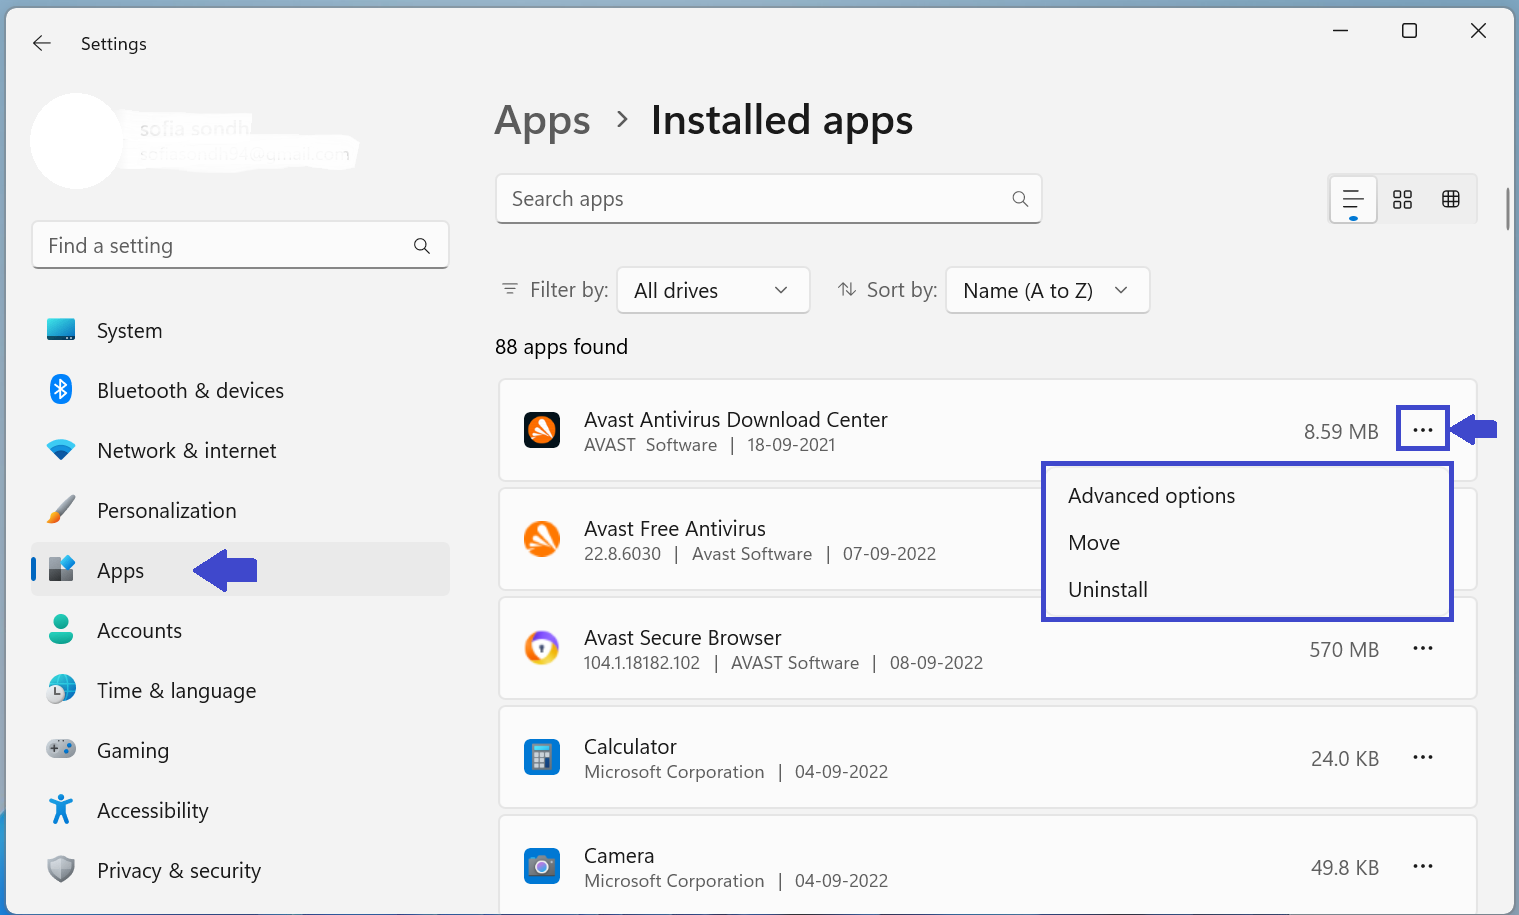
Deleting larger apps will give you more space as they consumes more space as compared to Files, Documents or Pictures.
Professional Solution
That’s it!