Do you also experience Network Problems after the Windows 11 25H2 update? Most users report damaged Wi-Fi, slow data and the Ethernet, and the No Internet message immediately after installing the latest 25H2 release. The problem-solving instructions in this guide can be used to troubleshoot any of the network issues after Windows 11 25H2 upgrade.
Page Contents
Fix Network issues after Windows 11 25H2 upgrade
The most reliable and useful methods are provided below to fix Network issues after Windows 11 25H2 upgrade. Test each of them until your network begins to work normally once again.
Fix 1: Flush DNS and Reset TCP/IP (Fix DNS-Related Issues)
One of the most typical causes of the Windows 11 25H2 network problems, including the inability to load a site, slowness, or DNS_PROBE_FINISHED_NO_INTERNET, is a bad DNS cache.
1. Press Windows + S and type “cmd”. Right-click Command Prompt and select Run as administrator.

2. Execute the commands below individually.
ipconfig /flushdns
ipconfig /release
ipconfig /renew
netsh int ip reset
netsh winsock reset
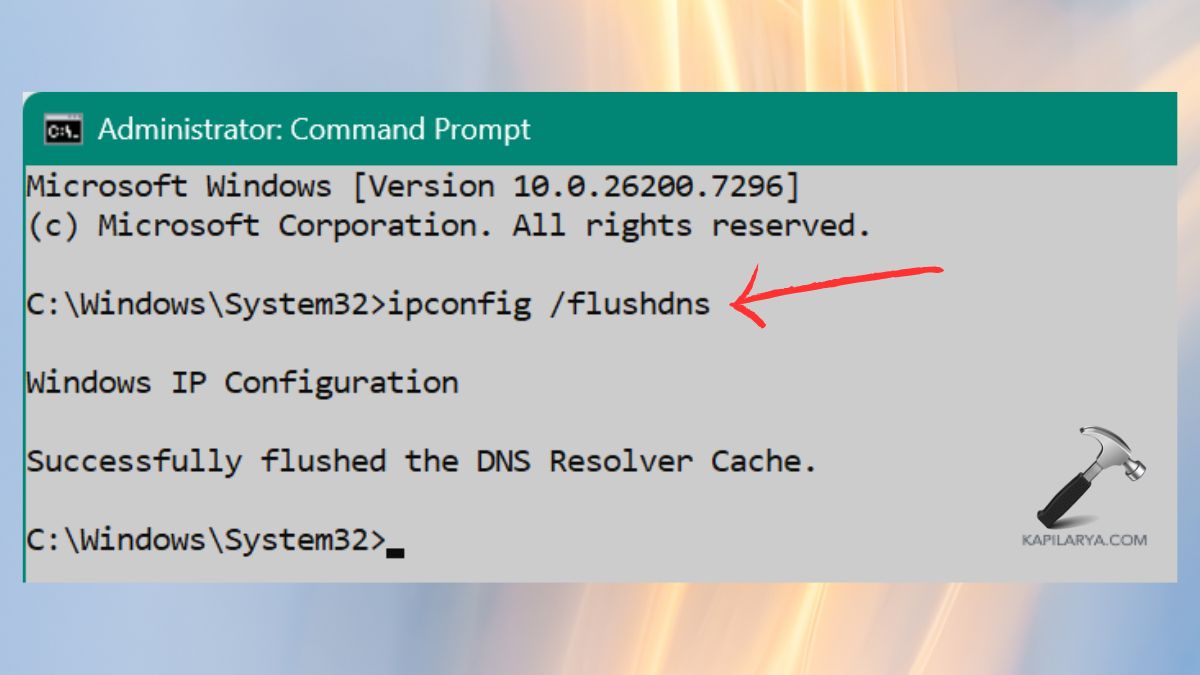
3. Restart your PC. It erases corrupted DNS cache and restarts TCP/IP settings, which aid in correcting various network connection and connectivity problems.
Fix 2: Update Network Drivers
Most of the old drivers might not work properly after Windows 11 25H2 is installed.
1. Press Windows + X and choose Device Manager.
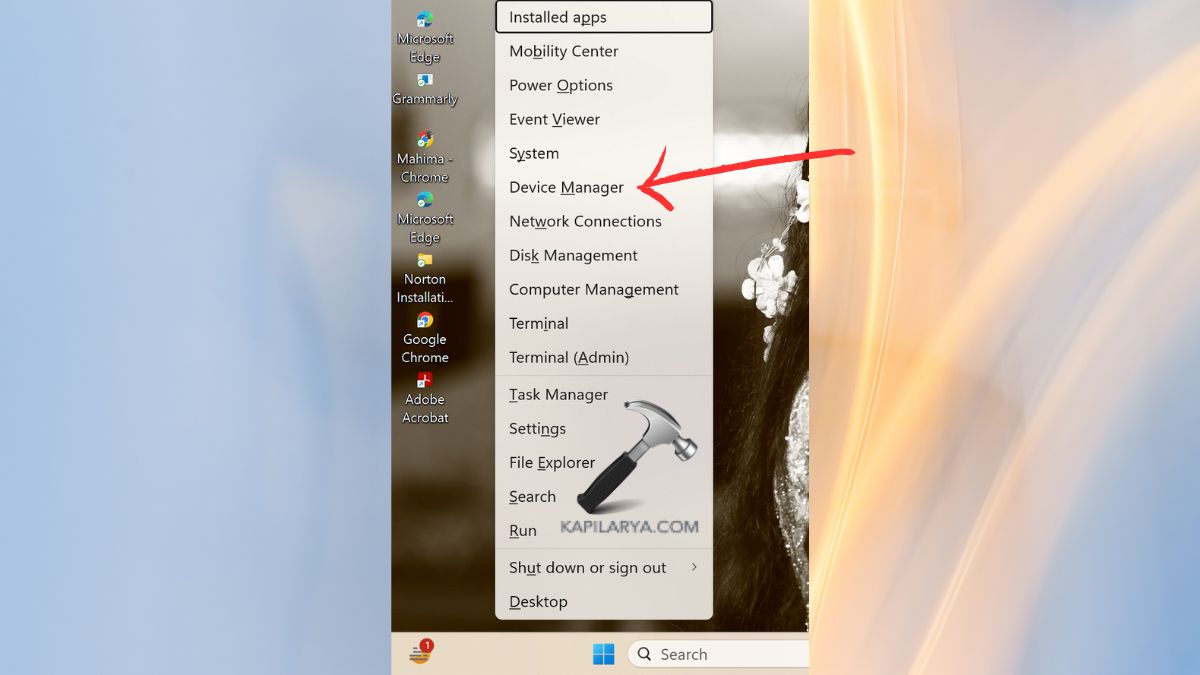
2. Expand Network adapters. Click the Internet in the right-hand corner.
3. Click Update driver > Search automatically for drivers.
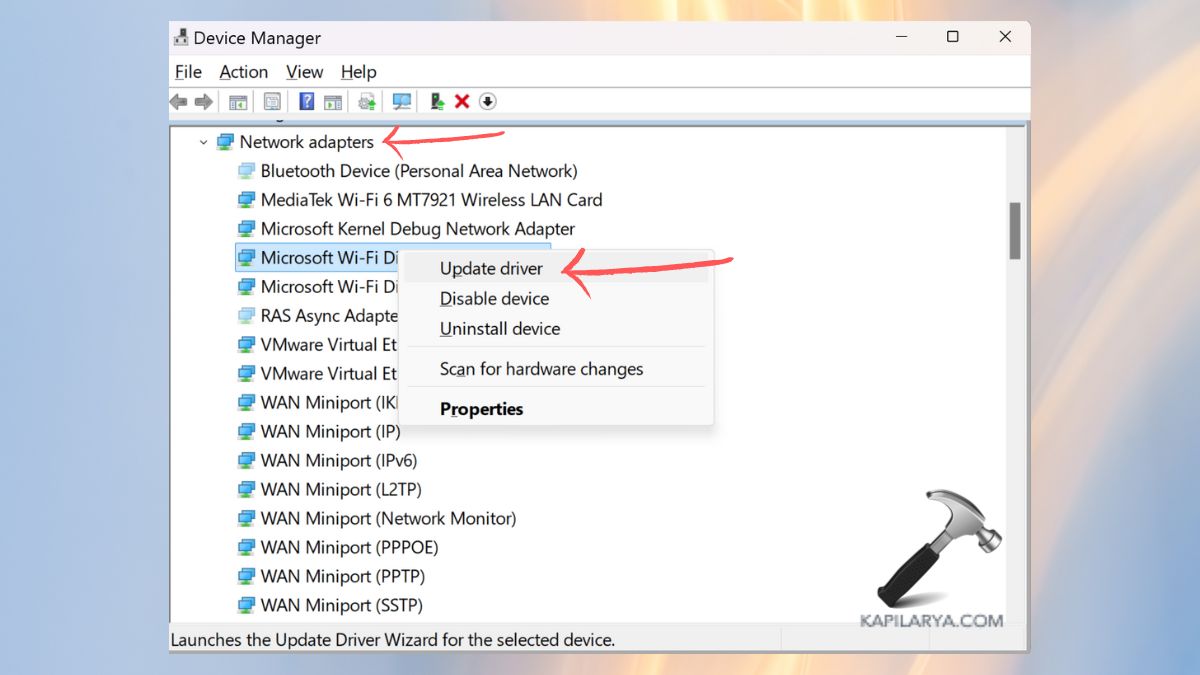
Restart the PC.
Fix 3: Configure WinHttpAutoProxySvc From Registry Editor
WinHttpAutoProxySvc manages auto-proxy discovery. This service may cease to work correctly after the 25H2 upgrade, leading to network failures.
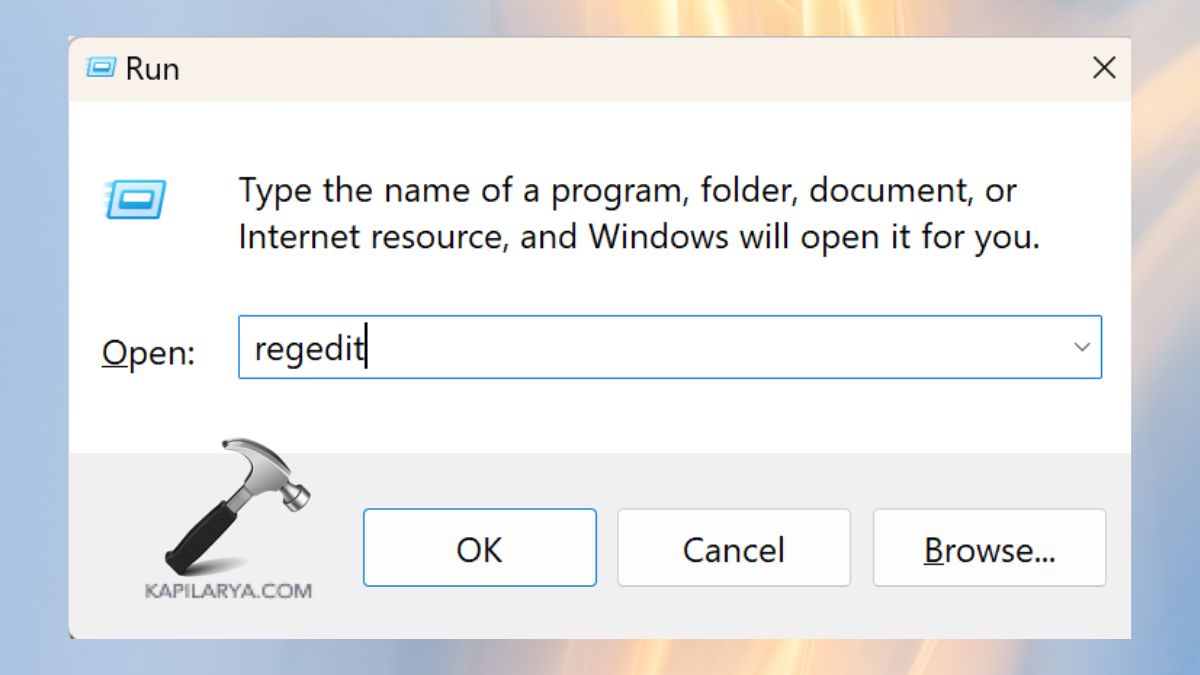
1. Hit the “Win + R”, type the following command and press Enter.
regedit
2. Navigate to this path.
HKEY_LOCAL_MACHINE\SYSTEM\CurrentControlSet\Services\WinHttpAutoProxySvc
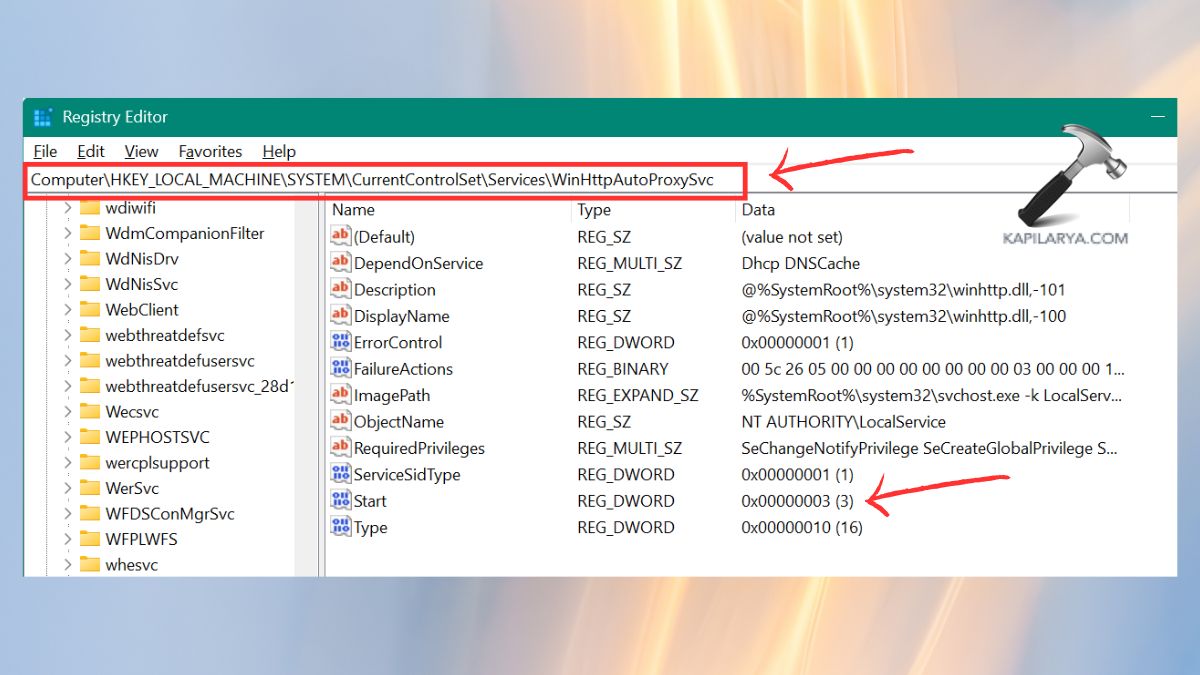
3. Double-click Start to edit its attributes. Set the value to “3” (Manual).
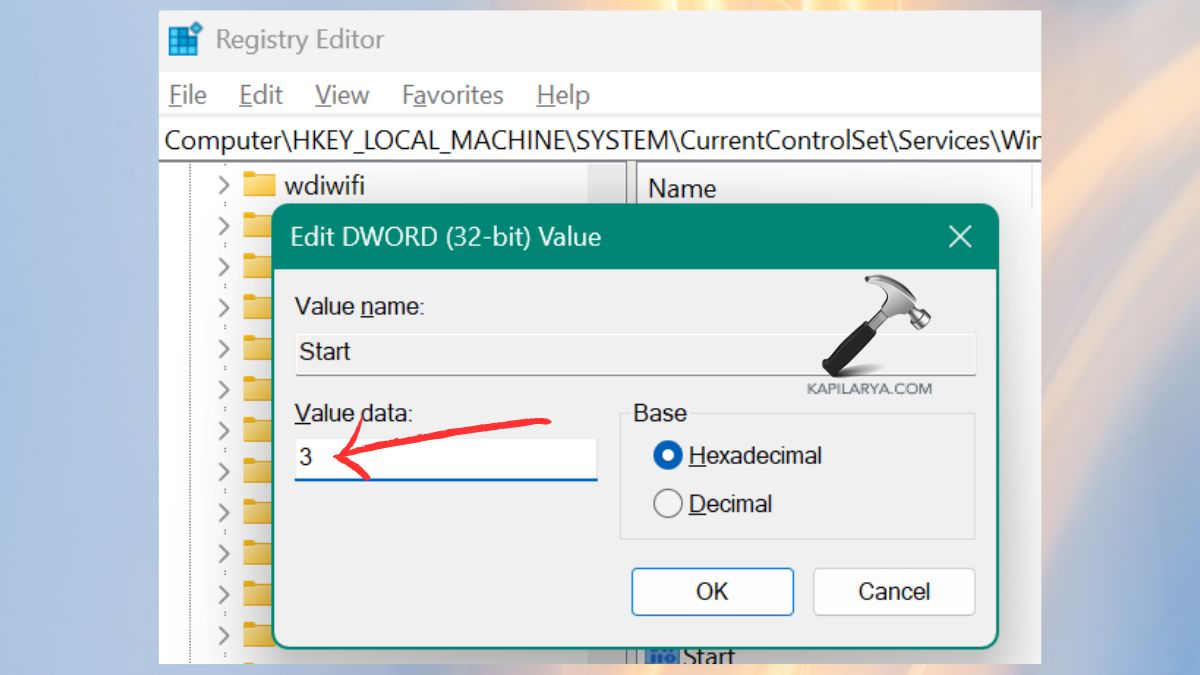
4. Click OK and restart your PC. This reconfigures the proxy service of Windows and auto-detection failure.
Fix 4: Configure a Static IP Address
The Windows 11 25H2 update can result in the loss of Internet Explorer due to conflicting IPs provided by your router.
1. Click on Settings > Network and Internet. In either Wi-Fi or Ethernet, Select Hardware properties.
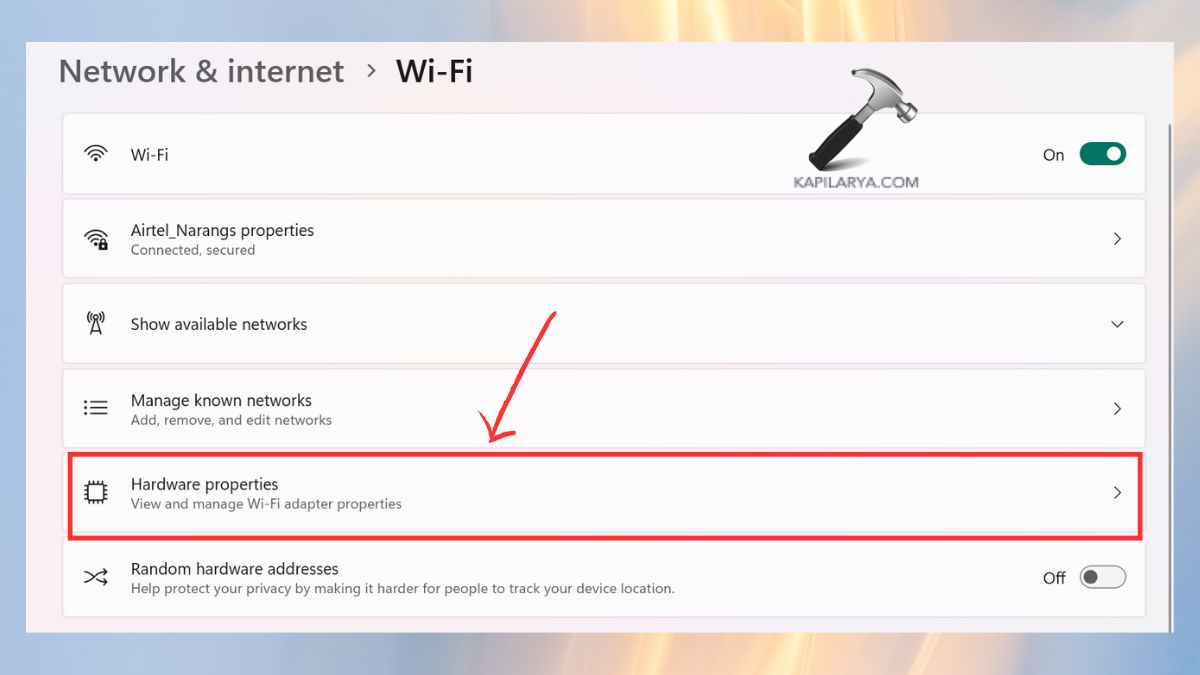
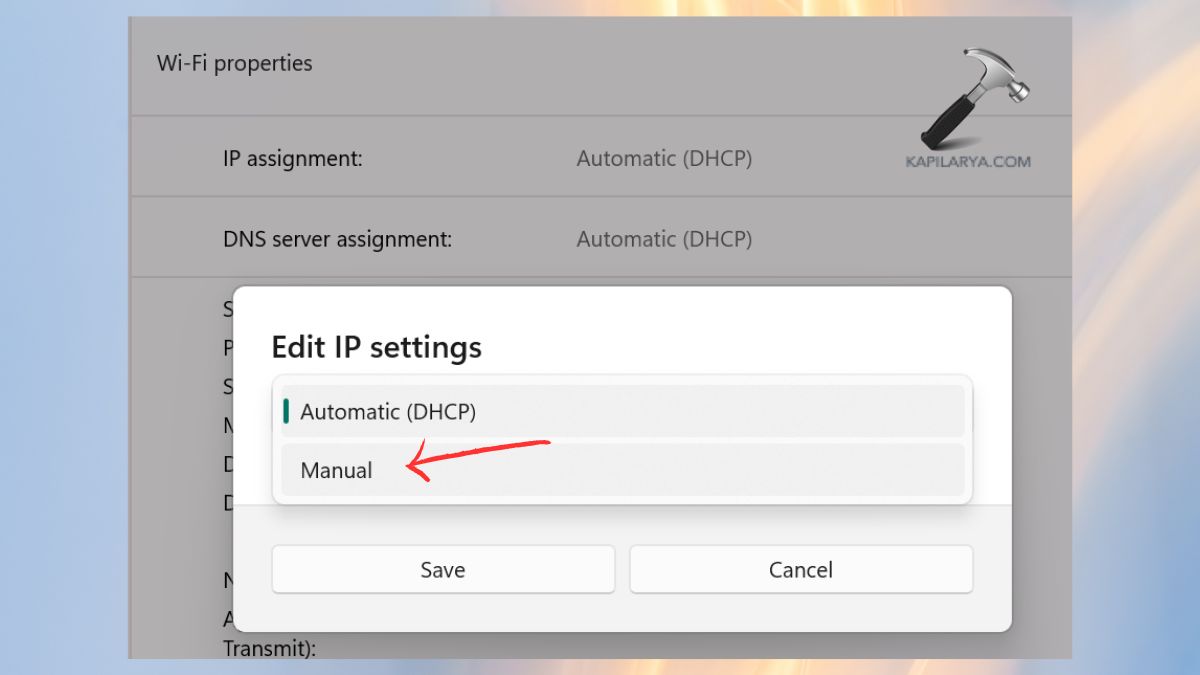
2. Click IP assignment > click edit.
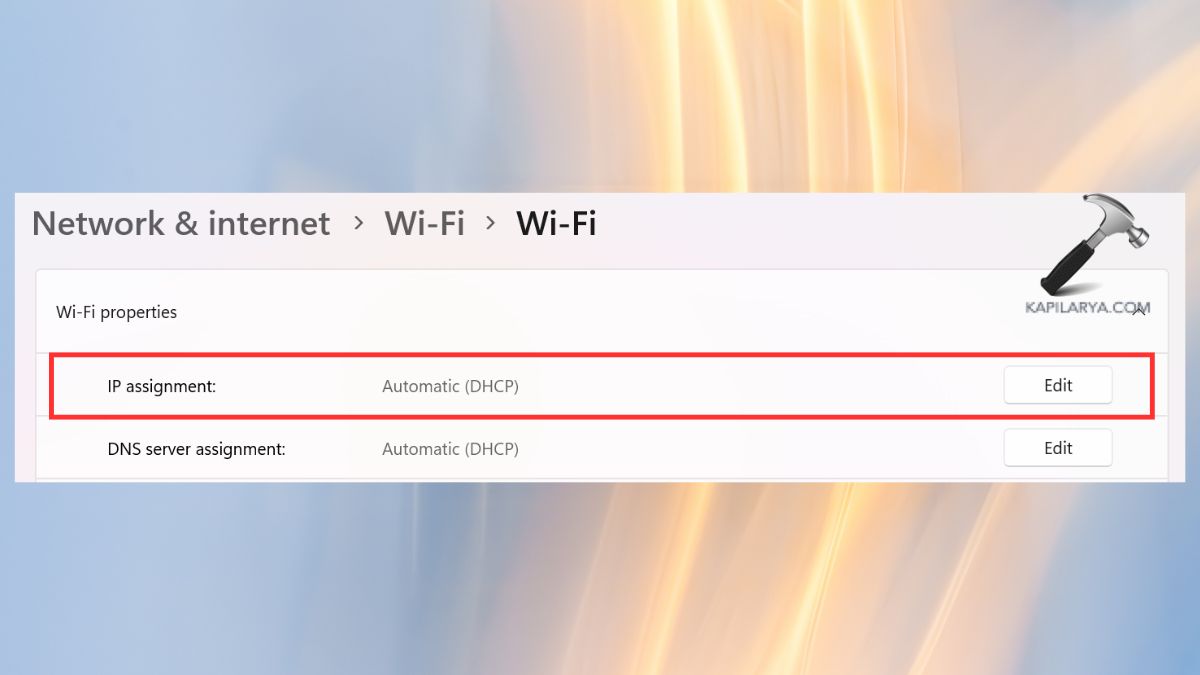
3. Switching Automatic (DHCP) to Manual.
4. Turn on IPv4 and write the following settings.
- IP address: 192.168.1.xxx
- Subnet mask: 255.255.255.0
- Gateway: 192.168.1.1
- DNS: 8.8.8.8 or Cloudflare 1.1.1.1
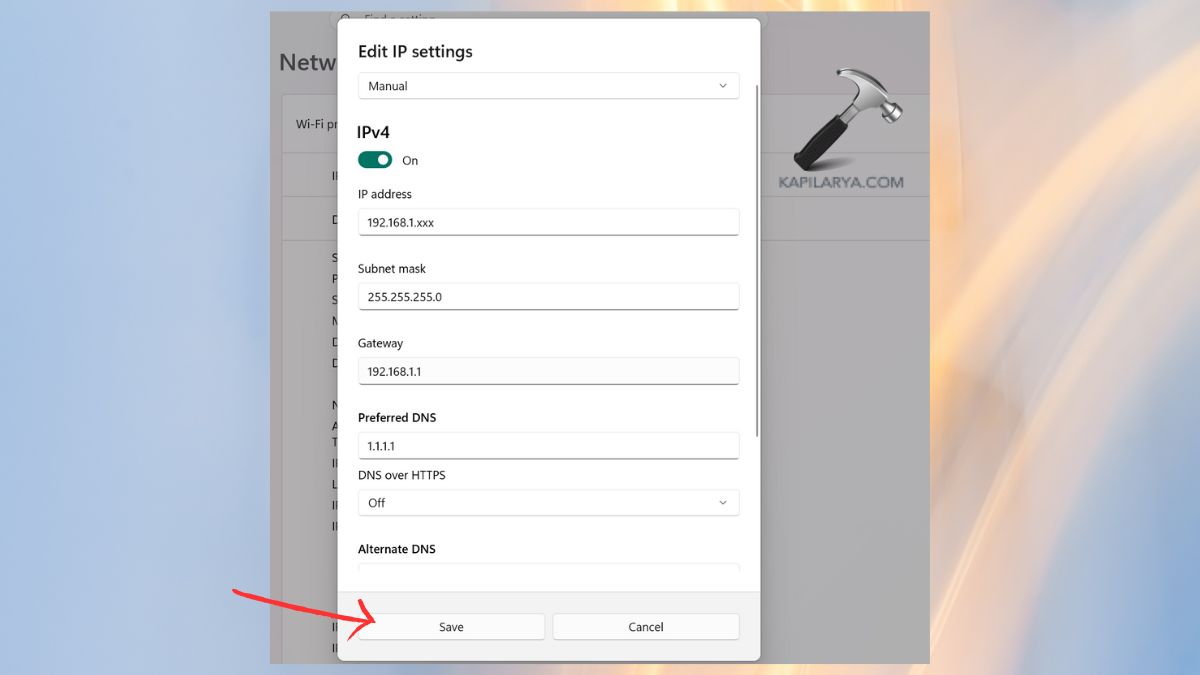
Save the settings. This stabilizes the network connection and clears the DHCP errors.
Fix 5: Reset Network Settings in Windows 11
When several settings were corrupted in the process of updating 25H2, a complete restart of the network was very successful.
1. Open Settings. Go to Network & Internet. You can scroll on and select Advanced network settings.

2. Select Network reset.

3. Click Reset now > Confirm.
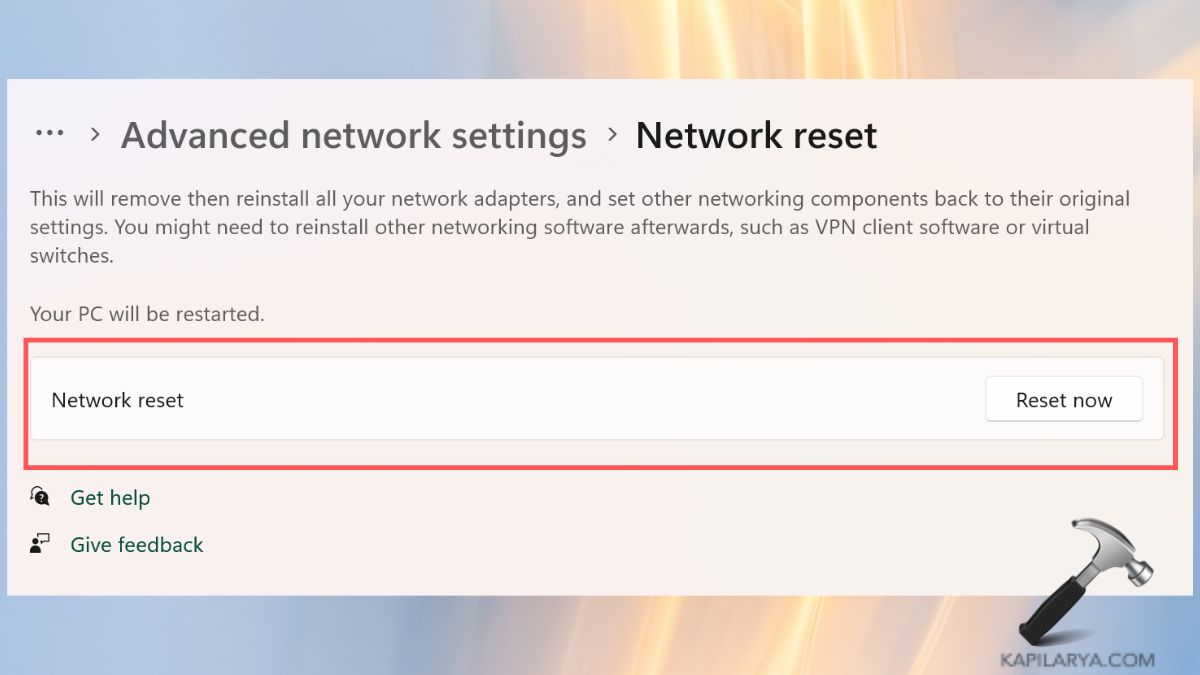
Your personal computer will boot up again and install all network adapters. This fixes the majority of Wi-Fi problems, as well as Ethernet problems.
Fix 6: Disable and Re-Enable Network Adapter
At times, the adapter does not boot up properly after an update. The reboot of this adapter would most times recover the internet immediately.
1. Open Control Panel > Network & Internet > Network connections.

2. Click Change adapter options. Click right on the Wi-Fi/ Ethernet adapter, then Disable.
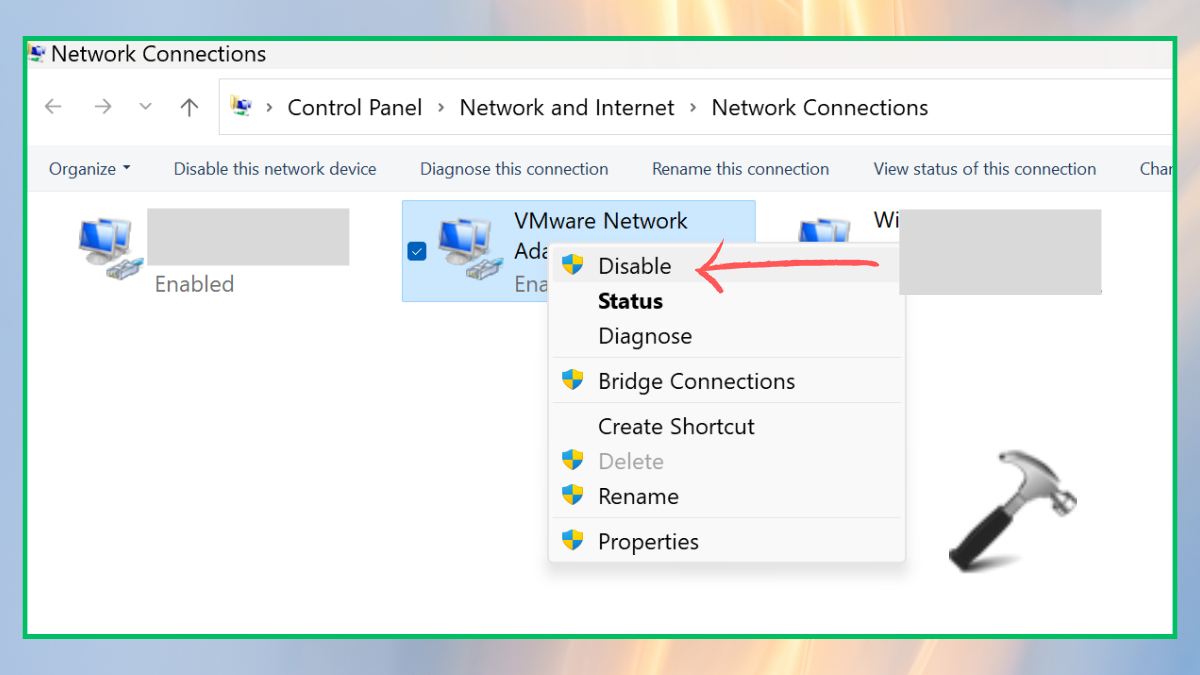
3. Wait for 10 seconds. At this point, right-click one more again and tap Enable.
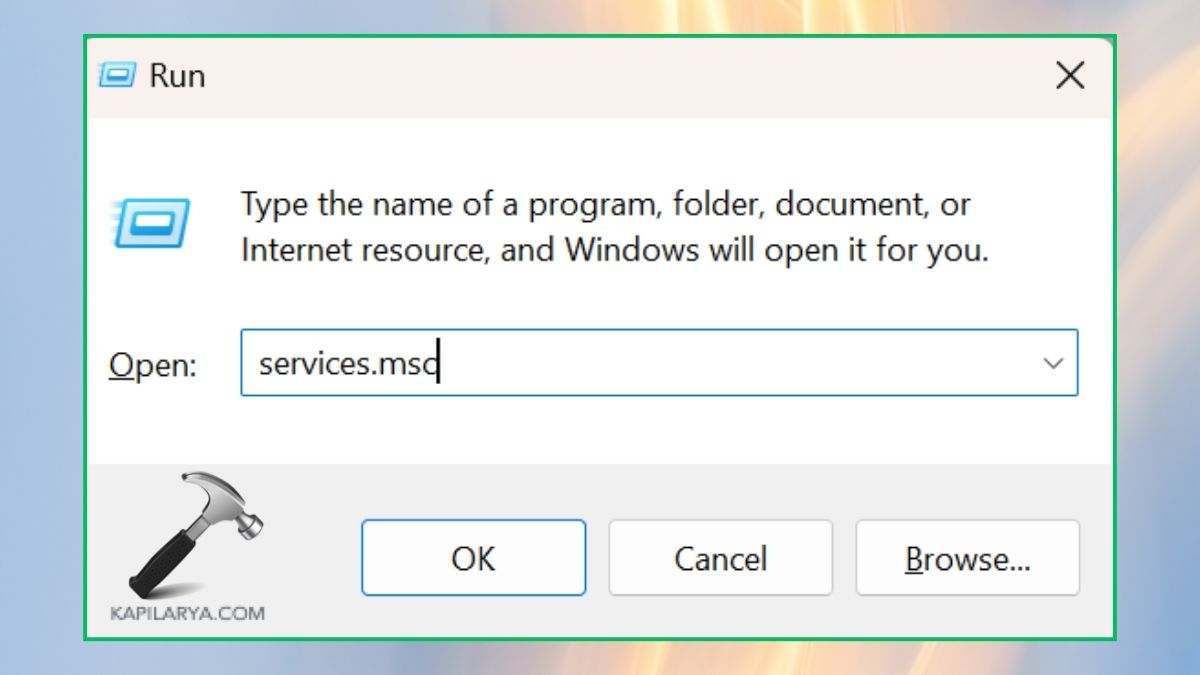
Fix 7: Restart Essential Network Services
Windows updates have the capability of stopping vital network services inadvertently. All these steps are necessary to make sure that all background processes running during the upgrade are fine.
1. Type this command by opening the Run box, then press Enter.
services.msc
2. Restart these services.
- DHCP Client
- DNS Client
- Network Connections
- WLAN AutoConfig
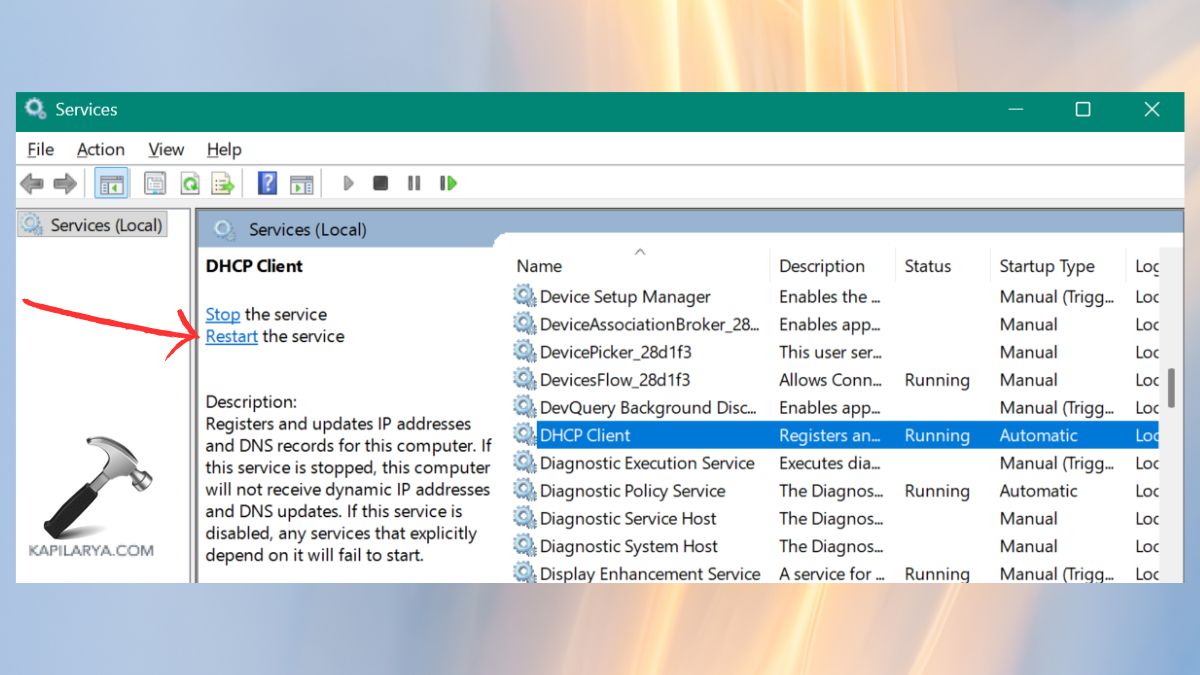
Restart your system.
Frequently Asked Questions
That’s it!