The users of Windows 11 can at times face a blue screen error while starting the PC. The Blue Screen of Death or BSoD on startup disrupts the system and leads to shutting down of the PC on its own, frequent restart, etc. It can even cause permanent damage to the PC. Thus, this article will provide all the fixes which will help the users in solving the Windows 11 Blue Screen error startup.
Page Contents
Fix Windows 11 Blue Screen error startup
There can be various causes which may be the reason behind the blue screen error on startup. These reasons may include the following-
- Existence of malware
- Incompatibility third-party applications
- Corrupted system files
- Problematic drivers
- Hardware problems
- Faulty external devices
- BCD corruption
Therefore, let us now check at all the fixes in detail which will allow the users to solve the blue screen error in Windows 11.
Fix 1: Disconnecting all External Devices
The issue of Blue Screen error startup may be a driver related problem. Thus, to solve it, at first try disconnecting all the external devices connected to the PC. Thereafter, check if this solves the problem.
Fix 2: Updating Disk drives
Corrupted or outdated disk drives can be another reason for the existence of this issue. Thus, update the drivers with the steps provided below.
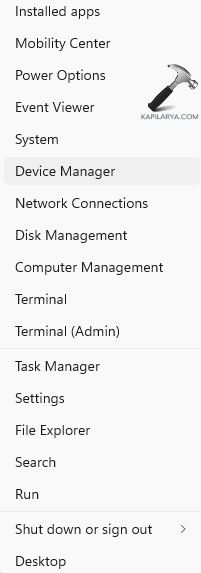
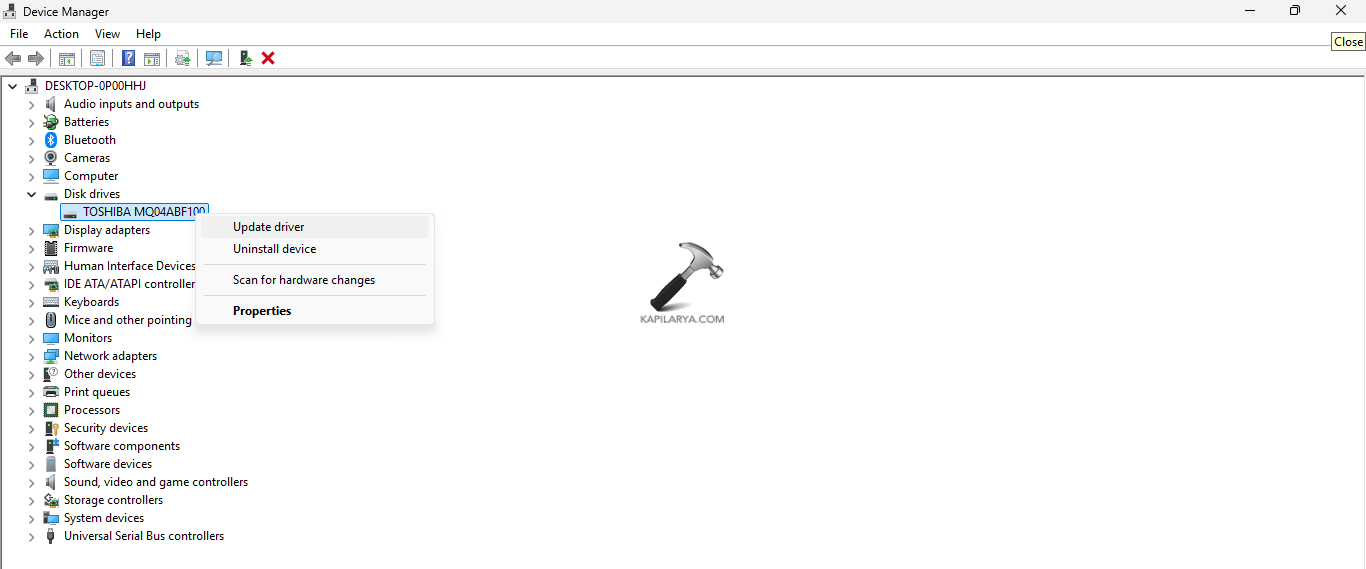
Step 1- Firstly, open Device Manager.
Step 2- Next, expand Disk Drives and right-click the latest installed drive.
Step 3- Select Update driver. Further select, Search automatically for drivers when asked.
Step 4- Lastly, download the latest driver. Then, restart the PC and see if this solves the PC.

Fix 3: Scanning the PC for Malware
The existence of virus or malware in the system can lead to various problems in the PC. Solving it using the steps below can help in fixing the blue screen error problem.
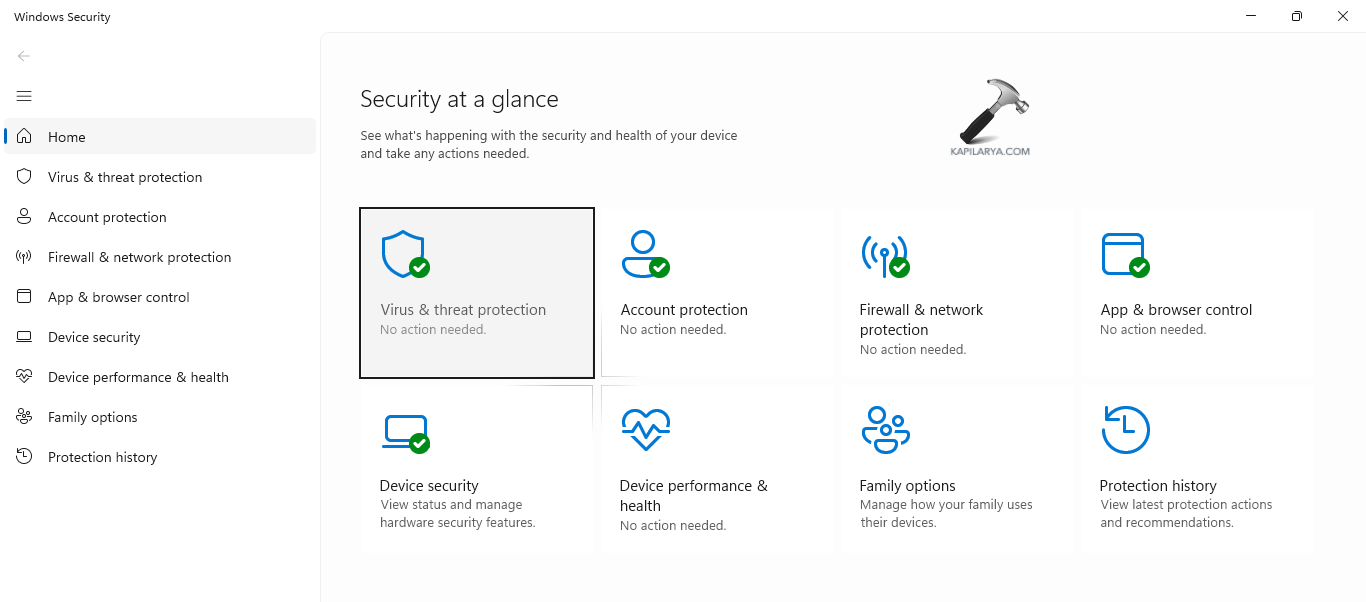
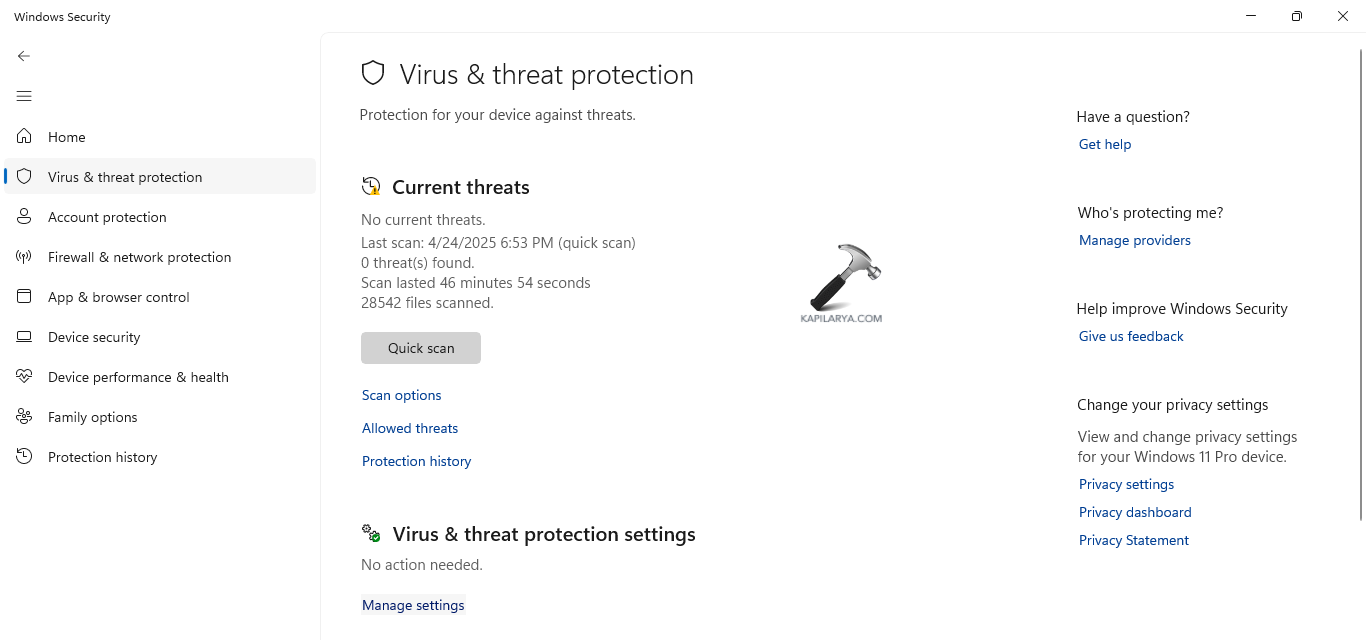
Step 1- Open Windows Security.

Step 2- Next go to Virus & threat protection.
Step 3- Open Current threats and press Scan options.
Step 4- Now, press Microsoft Defender Offline scan and select Scan now.
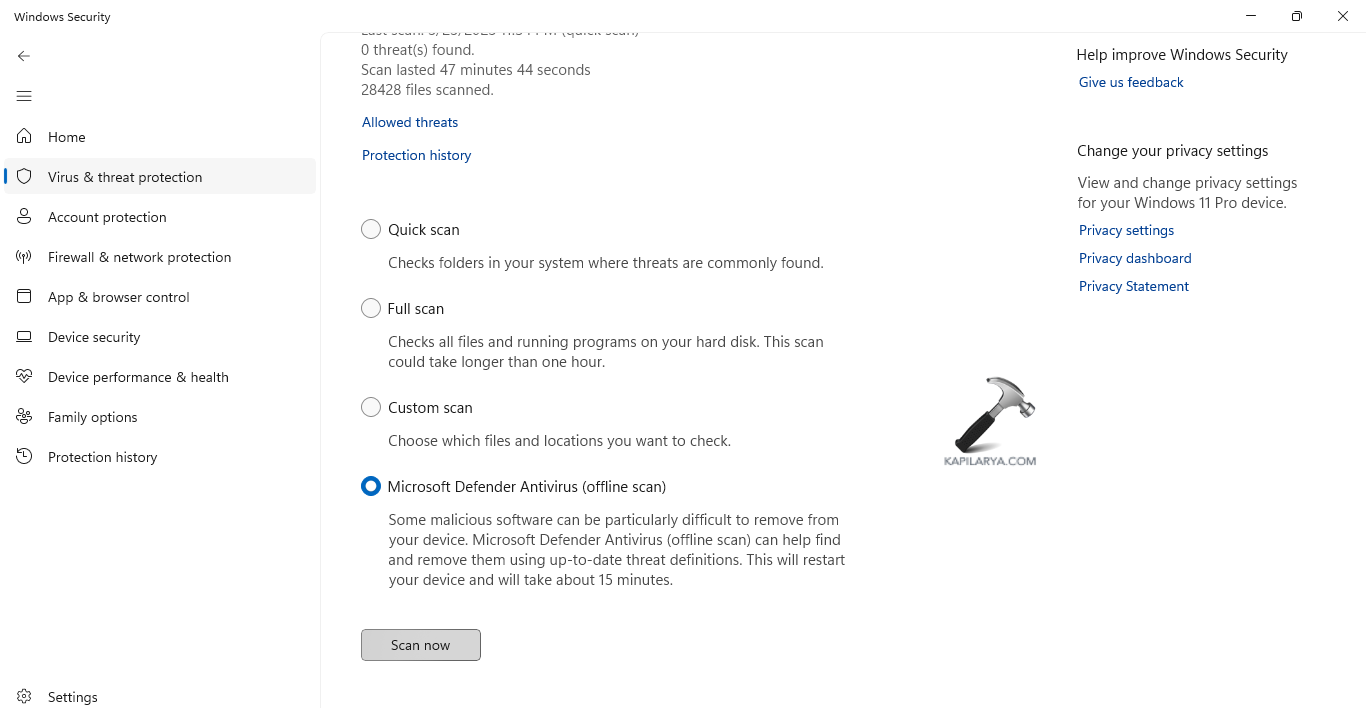
Step 5- When the PC reboots, Microsoft Defender Offline will perform a scan.
Step 6- After the scan is finished, the PC will restart. This should fix the issue.
Fix 4: Factory resetting the PC
Apart from the fixes above, the users can also try factory resetting the PC using the steps below and see if this solves the error.
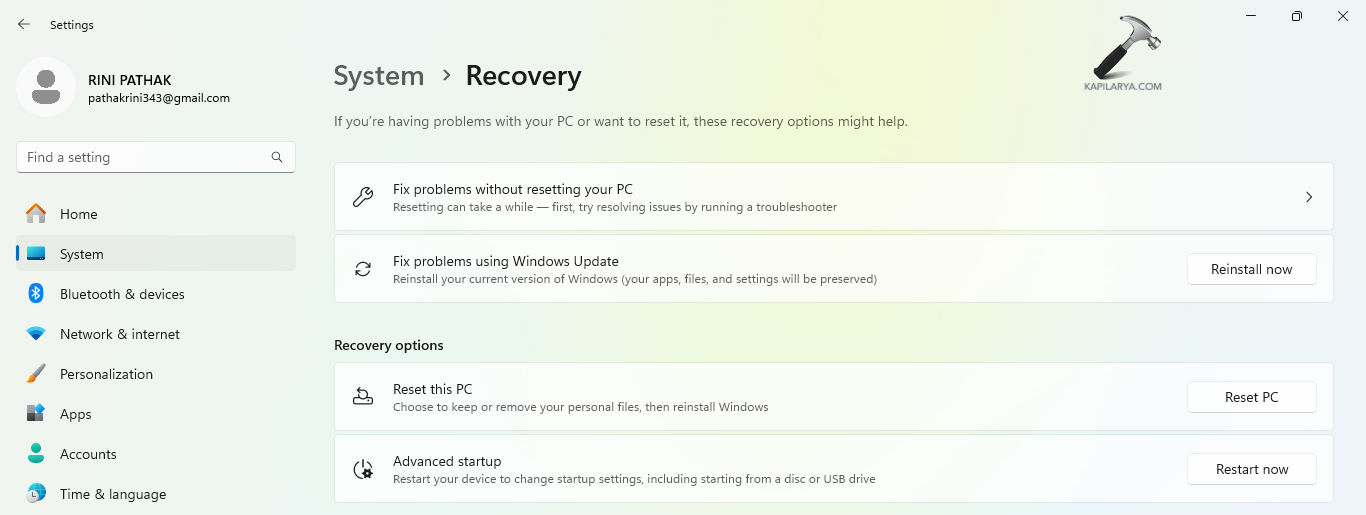
Step 1- Primarily, open Windows Search and search Reset this PC. Open the result.
Step 2- Now, press Reset PC under Recovery.
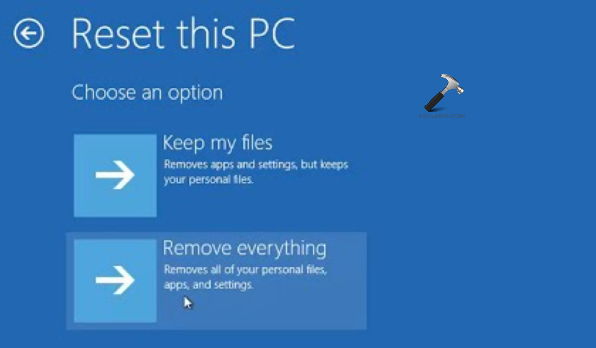
Step 3- Next, select Remove Everything when prompted.
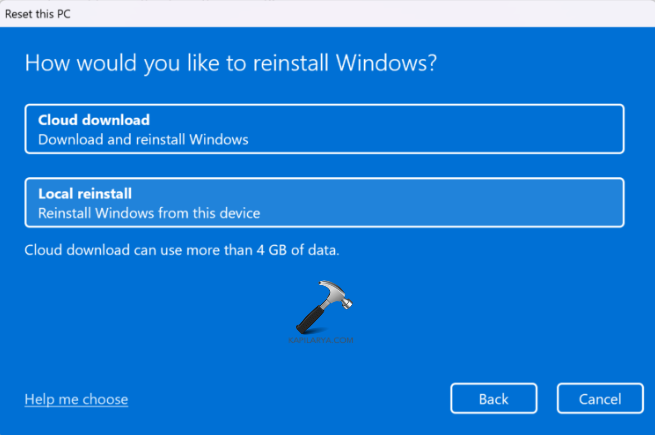
Step 4- Here, select either Cloud download or Local reinstall for resetting Windows 11.
Step 5- Further, select Change settings in Additional settings dialog box.

Step 6- Enable all the options and press Confirm.

Step 7- Finally, press Next > Reset for resetting the PC.

Fix 5: Performing Startup Repair
If the above fixes do not solve the issue, then try performing startup repair with the help of the instructions below. This can help in fixing it.
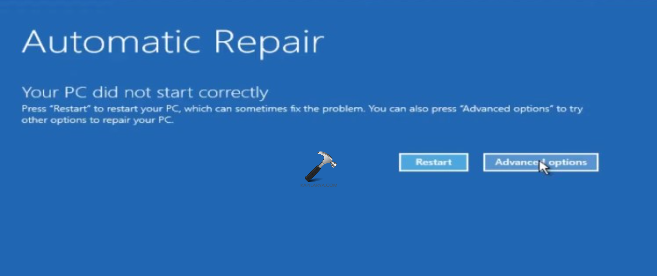
Step 1- Turn off the PC and reboot it again. After the Windows logo appears on the screen, turn off the PC again.
Step 2- Repeat the above step 3 times. Thereafter, the system will boot into the Windows Recovery Environment.
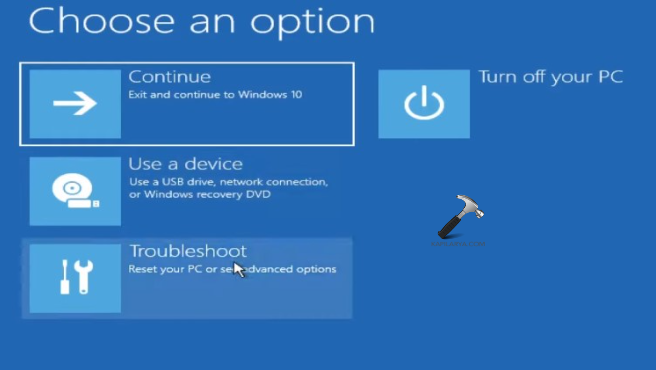
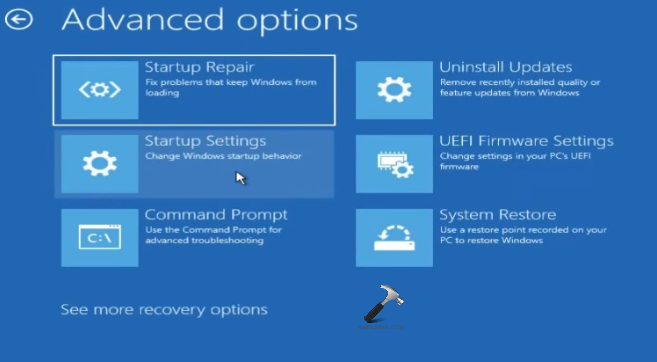
Step 3- Here, press Advanced options > Troubleshoot > Advanced options > Startup Repair.
Step 4- Lastly, shut down the PC restart it. This should solve the problem.
Fix 6: Uninstalling problematic Applications
The presence of problematic third-party applications in the system can lead to various issues. Thus, for uninstalling them, follow the steps.
Step 1- Firstly, open Settings. Then select Apps > Installed apps.
Step 2- Now, check the recently installed third-party application.
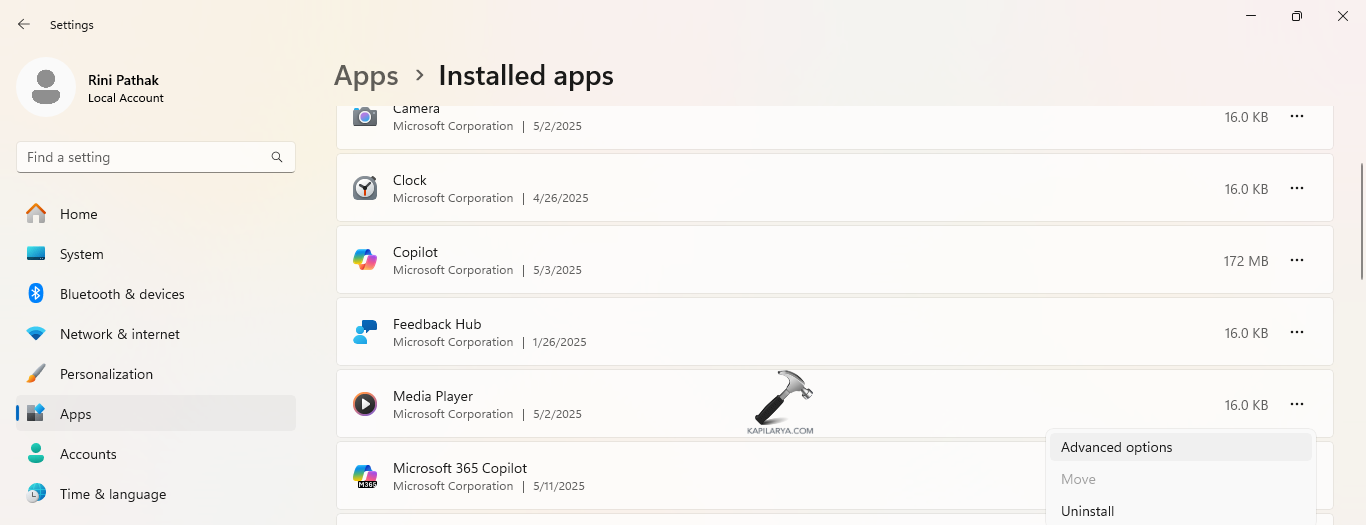
Step 3- Uninstall it. Select Yes for confirming the uninstallation.
Step 4- After the process of uninstallation, reboot the PC and check if the issue is solved.
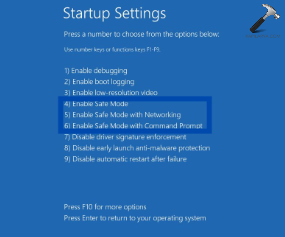
Fix 7: Booting the PC in Safe Mode with Networking
Further, booting the PC in Safe Mode with networking can even aid in fixing the problem. Thus, for that follow the steps given below.
Step 1- Firstly, boot into Windows Recovery Environment again.
Step 2- Now, click Advanced options > Troubleshoot > Advanced options.
Step 3- Next, choose Startup Settings > Restart.
Step 4- Once the PC reboots into Startup Settings, press F5 for restarting the PC in Safe Mode with Networking.
Fix 8: Rebuilding Boot Configuration Data
Rebuilding boot configuration data can prove to be another solution which the users can attempt using the steps provided below to solve the problem.
Step 1- Run Command Prompt as an administrator.
Step 2- Now, in the Command Prompt, run the commands given below one by one and press Enter.
bootrec /fixmbr

bootrec /fixboot

bootrec /scanos

bootrec /rebuildbcd

Step 3- After the completion of the process exit the Command prompt and restart the PC. See if it fixes the problem.
Fix 9: Reinstalling Windows
Sometimes, just reinstalling the Windows 11 may lead to fixing the blue screen error. Choose the appropriate drive for Reinstalling Windows 11 and follow the given steps below to do the same-
Step 1- Backup all the files on the PC.
Step 2- Now, put the Windows 11 bootable USB drive into the PC.
Step 3- Next, restart the PC in BIOS with the F2 or DEL button (depending upon the PC).
Step 4- Choose the first bootable device as the USB device. Thereafter, save and restart the PC.

Step 5- After the restart, the conventional setup of Windows Installation will be visible.
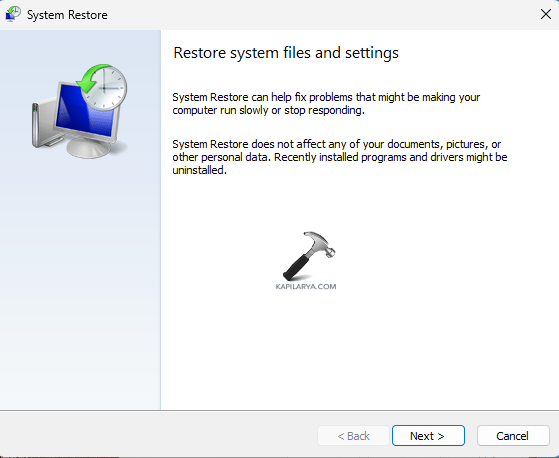
Fix 10: Performing System Restore
Using an already created one will aid in restoring the computer to its earlier point. This will also ensure to solve the mentioned issue. Now, complete the given steps to perform System Restore-
Step 1- Go to the Start menu. Next, type create a restore point and open the result.
Step 2- From the System Properties window, select the System Restore option.
Step 3- Select Next on the System Restore Window.
Step 4- A list of all the previously created Restore points will appear on the screen. Choose the required restore point.
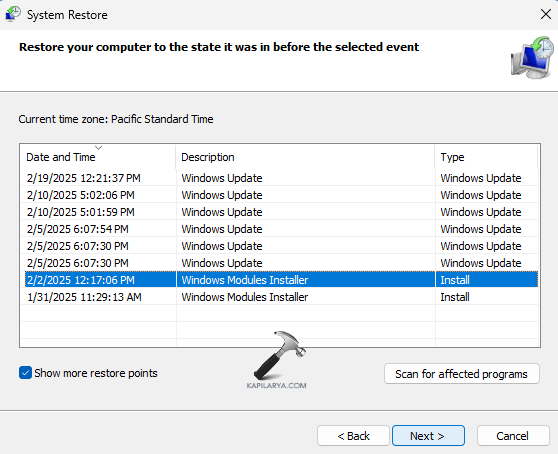
Step 5- Furthermore, choose the Restore point and select Next as per the date, name and time. Moreover, if the desired restore points are not visible, select Show more restore points.
Step 6- Choose the desired drive that is to be restored and click Next.
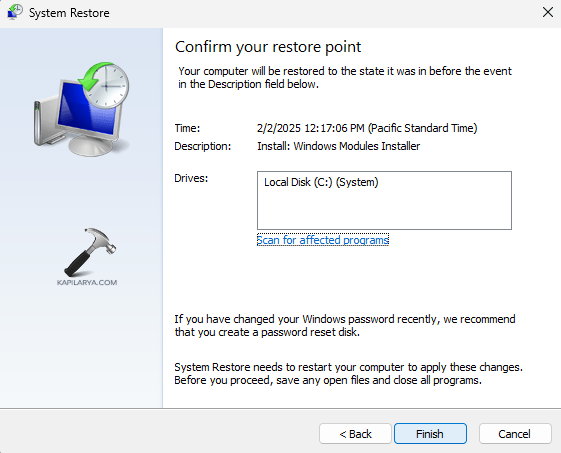
Step 7- A final pop-up window will appear. It will consist of the selected restore point, the to-be affected drive. It will also contain a warning telling to create a password reset disk.
Step 8- Finally, select the Finish button. This will restart the Windows 11 PC and begin the process of System Restore. After the restoration process, see if the issue is resolved.
Hope that these approaches will help in fixing the problem!