
Rundll32 is a software component of Windows. It loads and runs 32-bit dynamic-link libraries. However, problems in this component may result in the occurrence of the issue of Windows Host Process (Rundll32) has stopped working. This may prevent the users of Windows 11 from opening various applications and their respective data. This might also cause int the disfunction of the system. Thus, in this guide we will discover all the detailed solutions for fixing the issue of Windows Host Process stopped working.
Page Contents
Fix Windows Host Process (Rundll32) has stopped working
There may be several reasons for the existence of this issue such as missing Rundll32.exe file, wrong settings, malware, etc. Users can mainly face this problem while viewing file properties, printing documents, etc. Now, let us further look at the main fixes for solving the issue in detail
Fix 1: Scanning PC for Malware
Presence of any malware or virus in the PC system can be one of the main reasons for the existence of the issue of Windows Host Process has stopped working. Therefore, follow the steps for scanning any malware in the PC.
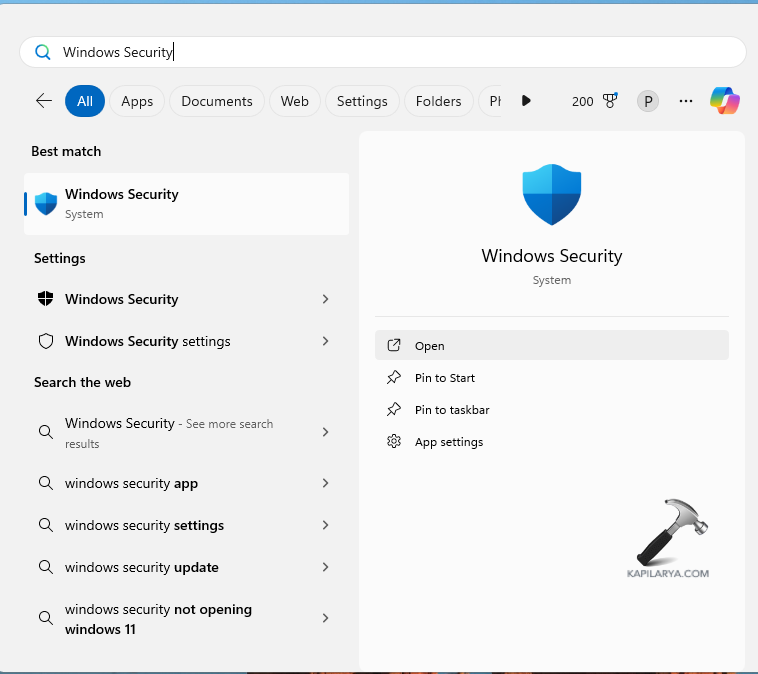
Step 1- Open Windows Security.
Step 2- Next go to Virus & threat protection > Current Threats > Scan options.

Step 3- Further, click Microsoft Defender Offline scan > Scan now. After the scan is completed, restart the PC and see if the issue still persists.

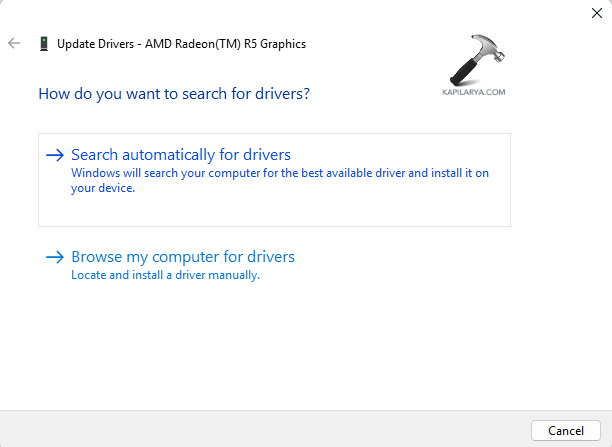
Fix 2: Updating Drivers to the latest version
Updating the graphics driver too can help in fixing the issue. Hence, let us take a look at the steps to do that.
Step 1- At first, go to Device Manager > Display Adapters.
Step 2- Next, right-click on the graphics driver and open Properties.
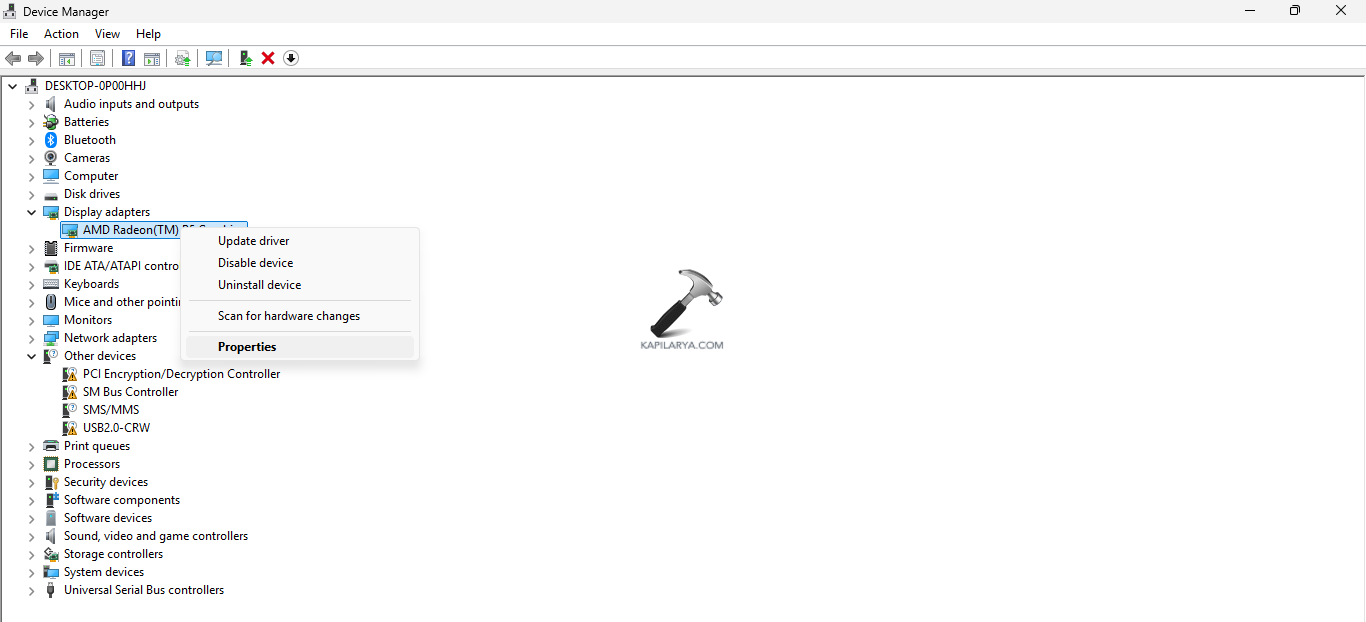
Step 3- Now, visit Driver and select Update Driver.
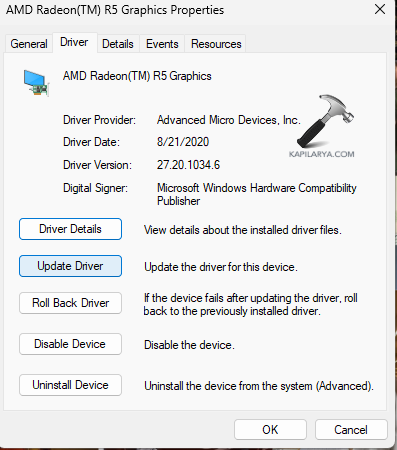
Step 4- Further, select Search Automatically for Drivers. Thereafter, look for any graphic driver that needs update and install it
Step 5- However, if any downloadable driver doesn’t appear, then download any pending updates. Go to Settings > Windows Update and install any pending update. Lastly, restart the PC and see that the issue is resolved.
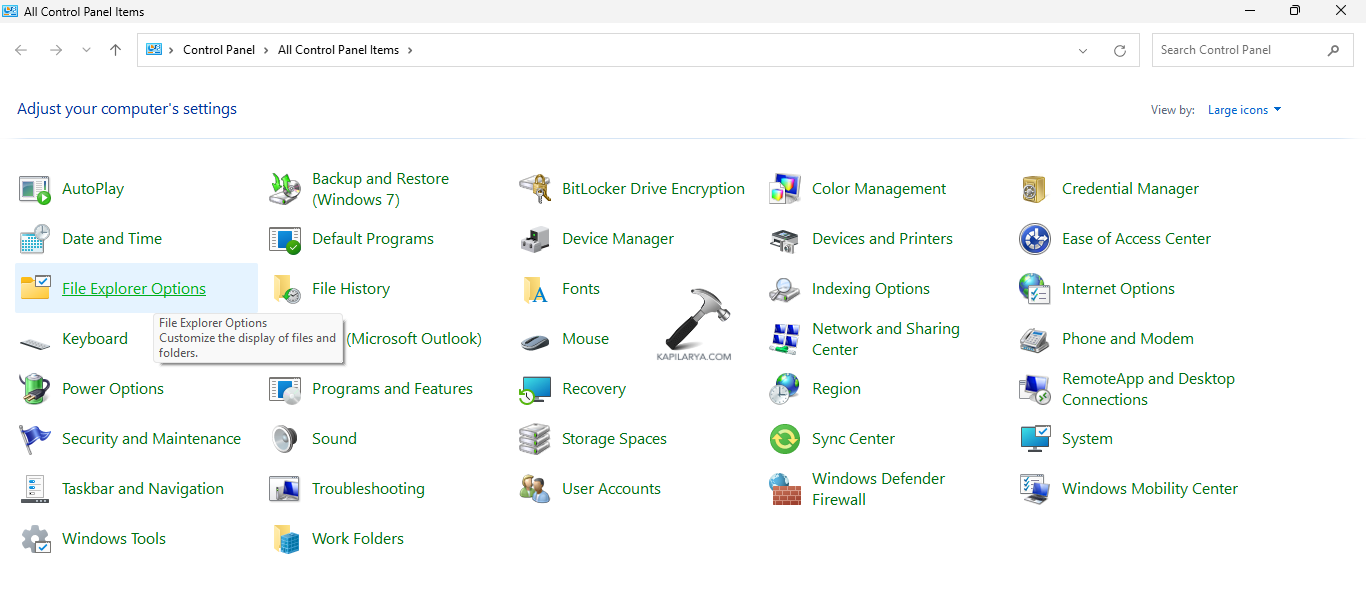
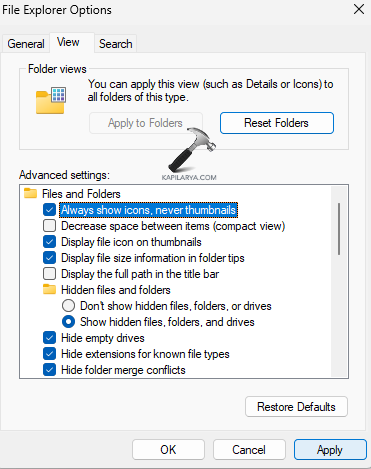
Fix 3: Disabling Thumbnails in Folder Option Settings
If this problem occurs while accessing File Properties, then change the folder option settings and disable the thumbnails using the steps below.
Step 1- Open Control Panel > File Explorer Options.
Step 2- Now, in the File Explorer Options window, go to View tab. The, select Always show icons, never thumbnails > Apply > OK.
Step 3- Lastly, reboot the PC and check if the File Properties is working.
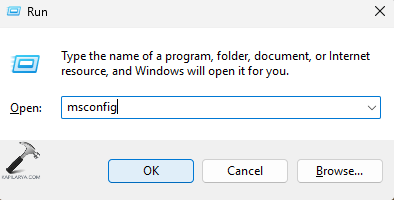
Fix 4: Performing Clean Boot
Performing a clean boot is another fix which the users can try when the above fixes are not working. To perform a clean boot, follow the steps given below-
Step 1- At first, press Windows + R and open the run dialog box. Now, copy and paste the command given below and open System Configuration.
msconfig
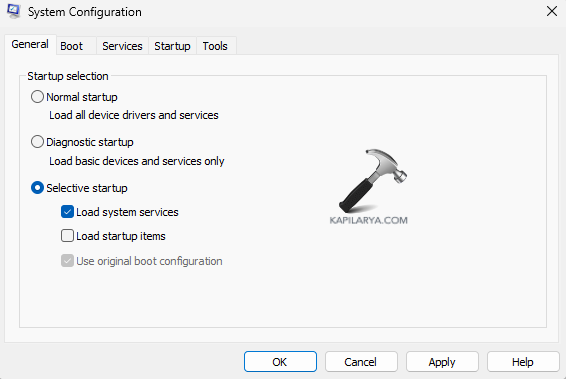
Step 2- Now, go to General tab of the System Configuration windows and deselect Load startup items under Selective startup. Additionally, select Load system services and Use original boot configuration.
Step 3- Further, visit the Services tab and select Hide all Microsoft Services.

Step 4- Next, select Disable all and disable all Microsoft services.
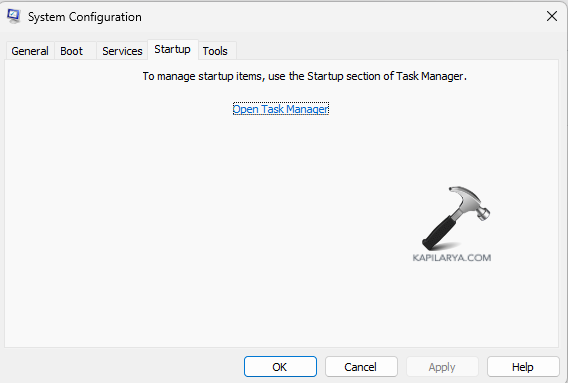
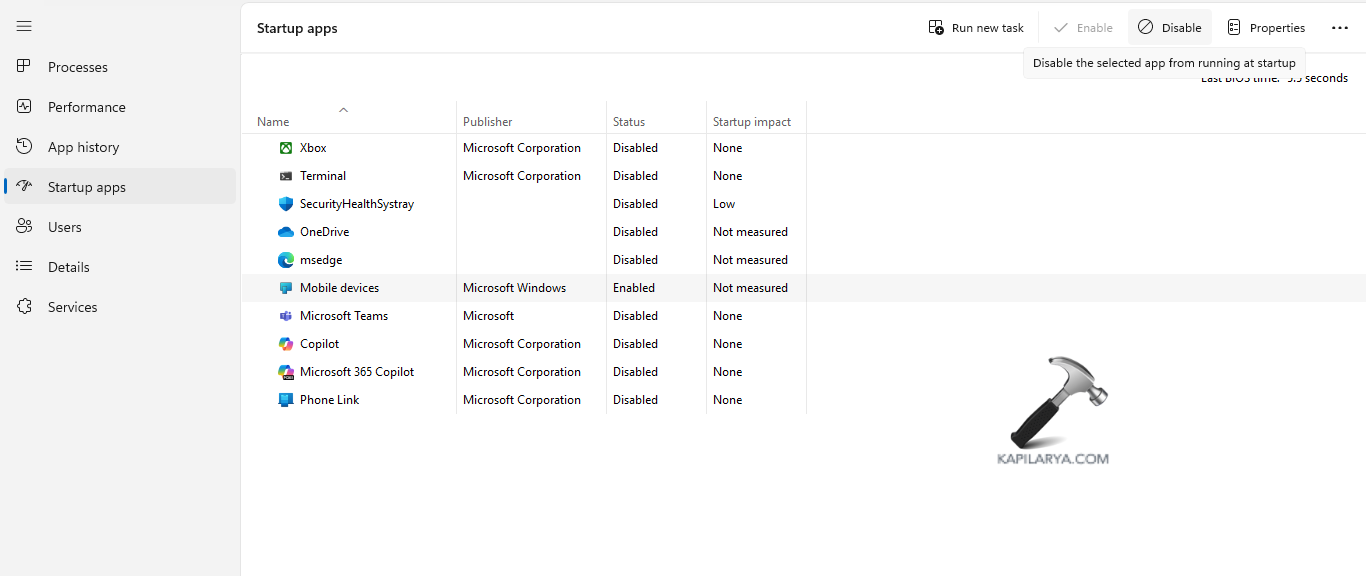
Step 5- Again, navigate to Startup > Task Manager > Startup apps. Thereafter, disable all the startup items.
Step 6- Lastly, select Apply > OK and save all the changes. Also, reboot the PC if necessary.
Fix 5: Turning off Data Execution Prevention (DEP)
When the Data Execution Prevention (DEP) is running in the background, it prevents applications from running if it finds any problem with the program. Thus, turn off the DEP with the given steps.
Step 1- Firstly, run Command Prompt as an administrator.
Step 2- Next, copy and paste the command below.
bcdedit.exe /set {current} nx AlwaysOff

Step 3- Restart the PC and if the problem is solved, turn the DEP on with the command below-
bcdedit.exe /set {current} nx AlwaysOn

Fix 6: Rolling back the Drivers
If updating the drivers doesn’t solve the issue, then try roll backing the drivers to the previous versions and see if it helps. Follow the steps below.
Step 1- Open Device Manager.
Step 2- Expand Display Adapters.

Step 3- Right-click the Driver, select Properties > Roll Back Driver.
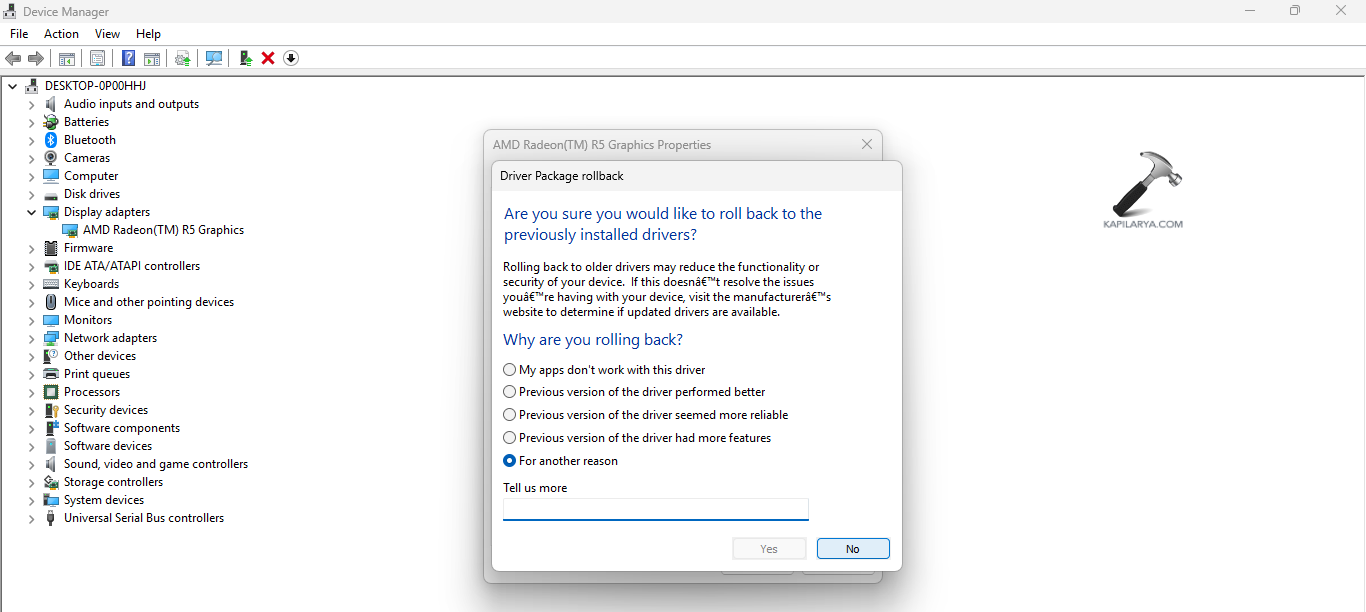
Step 4- Confirm to any prompt seeking permission and select Yes to proceed. Reboot the PC and check if the problem is resolved.
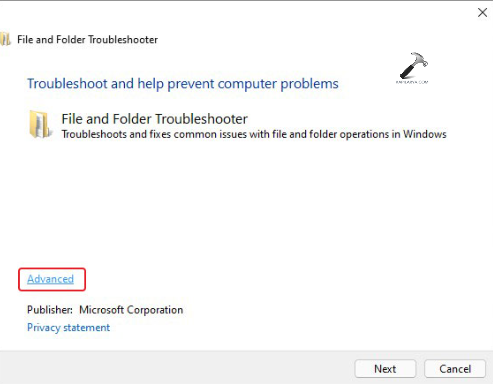
Fix 7: Running File and Folder Troubleshooter
If the error is not solved yet and there is issue with accessing the files and folders, try running the file and folder troubleshooter with the instructions provided below.
Step 1- Firstly, download File and Folder Troubleshooter (https://support.microsoft.com/en-us/windows/automatically-diagnose-and-repair-windows-file-and-folder-problems-8ca2261a-eb4b-bda1-232c-d88b972438cd) from Microsoft’s website.
Step 2- Now, open the file and select Advanced > Apply repairs automatically > Next.
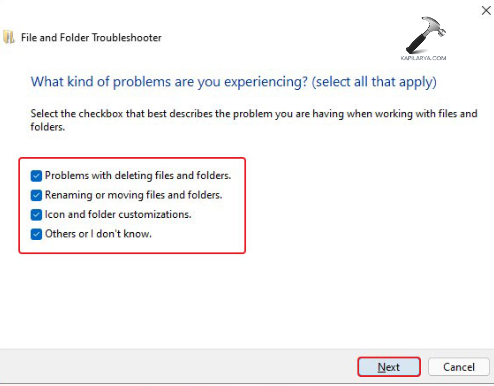
Step 3- Next, select the desired option/options and press Next.
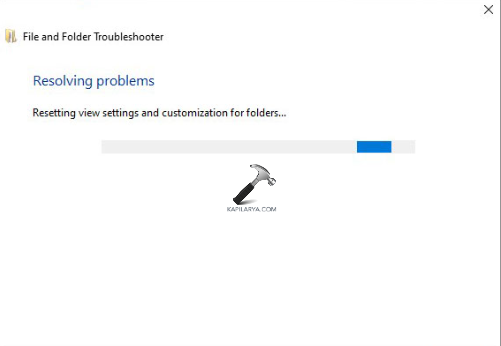
Step 4- Further, follow any on-screen prompt that may appear for completing the process. Lastly, restart the PC and check if the problem is solved.
Fix 8: Running System File Checker (SFC) scan
If the above fixes do not work, then running a system file scan and can help the users in solving the aforementioned issue easily. Therefore, follow the steps given below to run the System File Checker (SFC) solve the issue.
Step 1- At first, open Command Prompt and run it as an administrator.
Step 2- Next, copy and paste the prompt given below for running a SFC scan and select Enter.
sfc /scannow

Step 3- Finally, restart the PC and check if the issue is fixed.
Hoping this helps the users!


![[FIX] Windows Shell Common DLL Has Stopped Working](https://www.kapilarya.com/assets/Admin-3-768x496.jpg)
![[FIX] The Program Can’t Start Because mfc100u.dll Is Missing From Your Computer](https://www.kapilarya.com/assets/Admin-2-768x581.jpg)