
Feature Update or upgrades for Windows 11 is a large service pack that adds advanced features, functionality and fixes to the operating system. In comparison with Quality Updates, which fix security, reliability, and performance issues, Windows Feature Updates are less critical. In this article, we will show you how to defer or delay Windows 11 2022 Update, released few days back.
Earlier, Windows used to have an built-in option to defer or delay Windows Upgrades for upto 365 days. Later on, the option was removed because users can install updates as per their requirement. However, you can risk experiencing software or driver issues after installing a fresh update. To prevent this from happening, you might want to choose to Pause an update or delay it until you see how other users are responding to the new update.
Page Contents
How to defer or delay Windows 11 2022 Update
Following are the two methods to defer or delay Windows 11 update:
Method 1: Defer or Delay Windows using Group Policy Editor
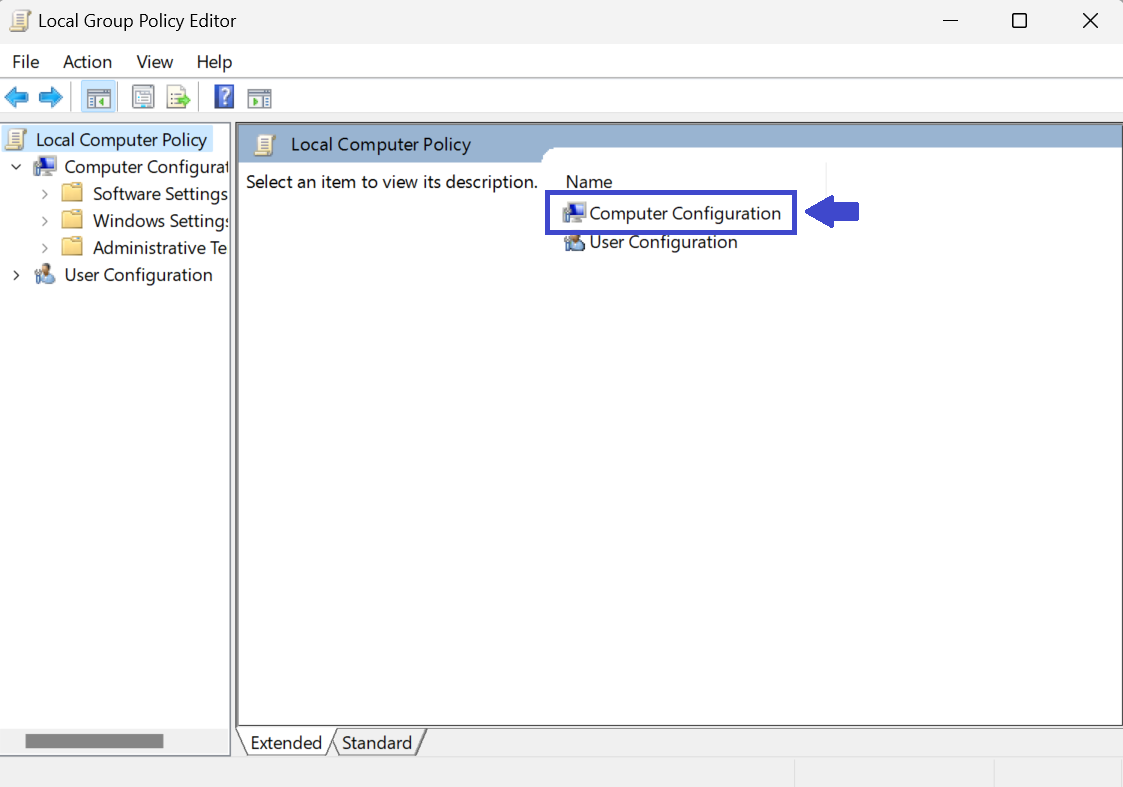
1: Press Windows key + R. Type gpedit.msc and click OK.

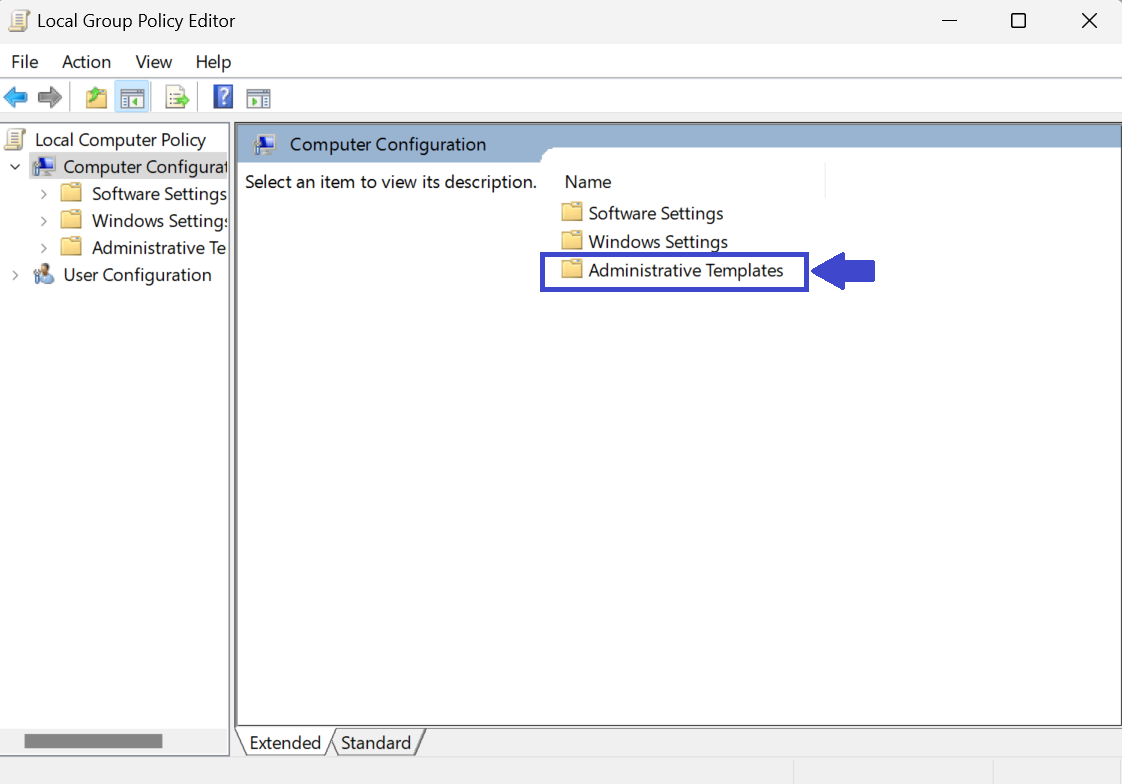
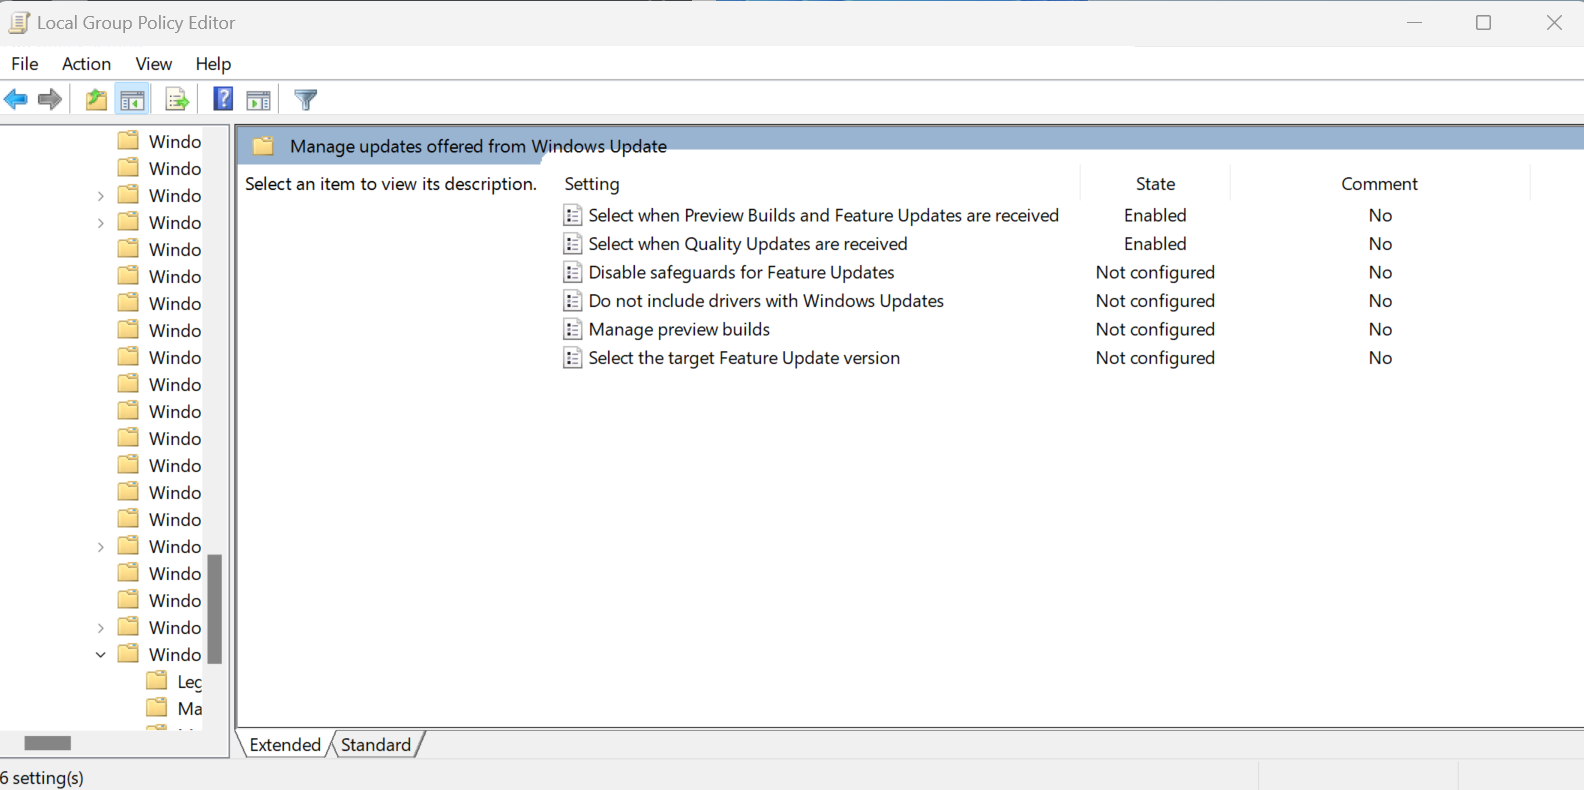
2: Navigate the following path:
Computer Configuration\Administrative Templates\Windows Components\Windows Update\Manage updates offered from Windows Updates
See the below images to navigate the path properly:


3: Double-click on “Select When Preview Builds and Features Updates are received”.
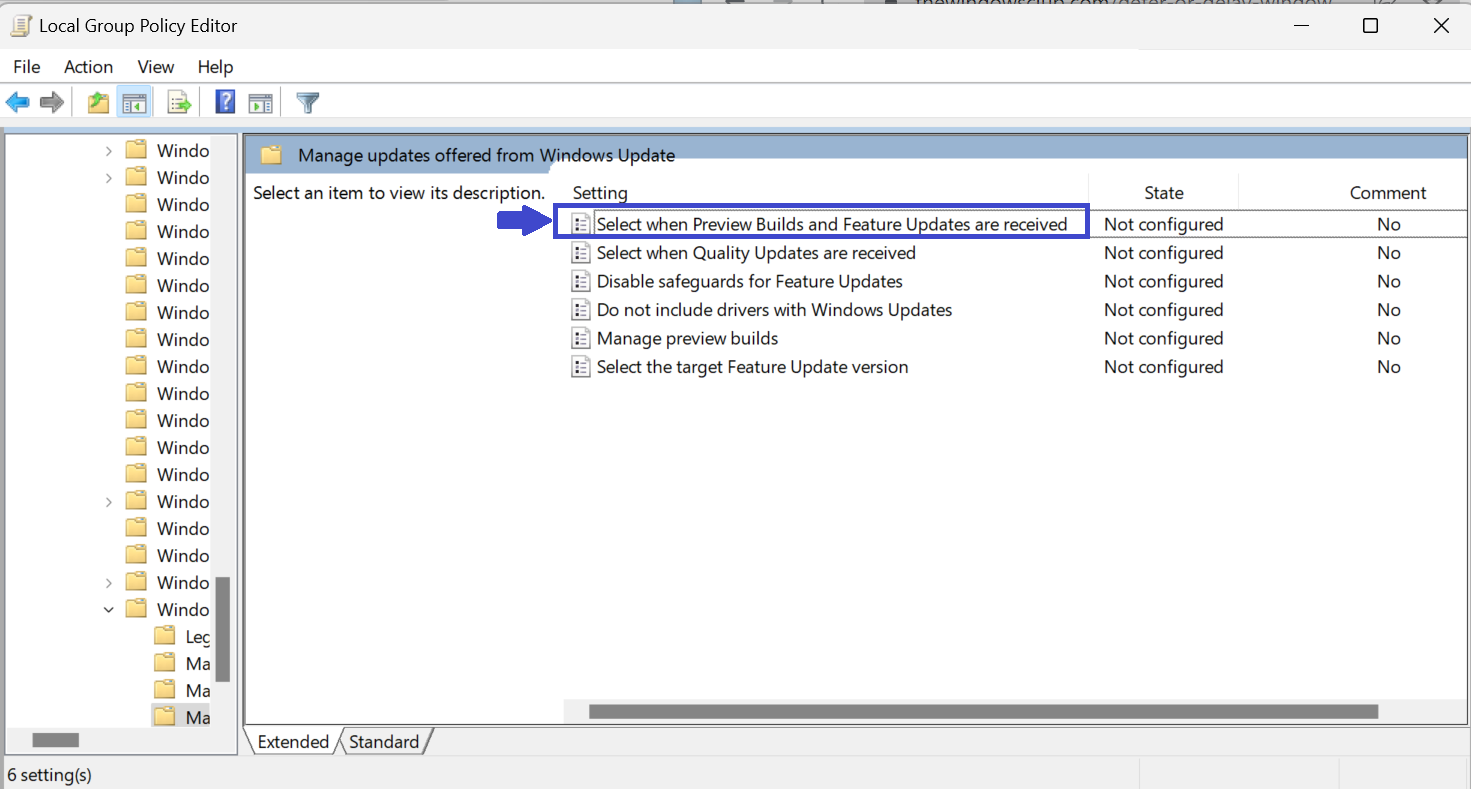
4: Prompt box will appear. Select “Enabled”.
Specify the number of days for which you would defer the feature update once it is released. You can delay it for upto 365 days.

5: Click OK.
6: Now, click on Next settings.
7. Again prompt box will appear and Select “Enabled”.
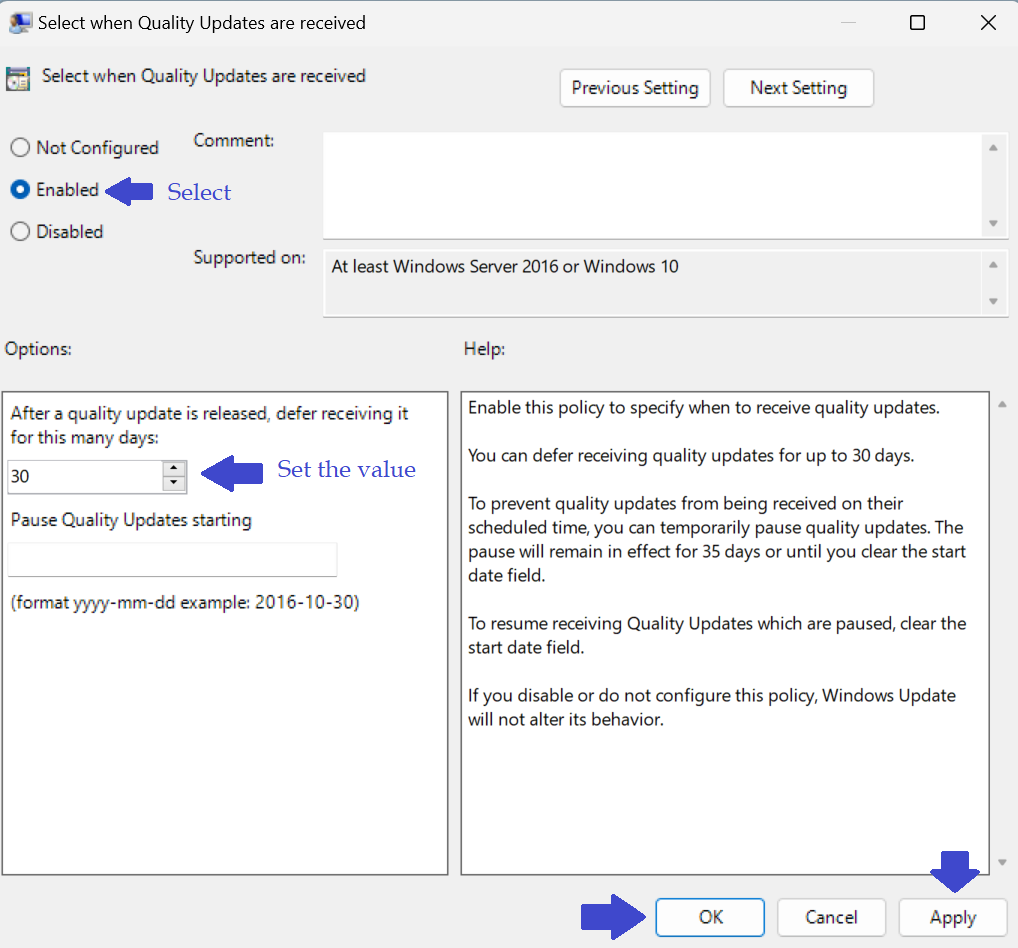
Specify the number of days for which delay the quality update after it is released. You can delay it for upto 30 days. You can also choose to pause the updates for upto 35 days.
9. Click Ok and then click on Apply button.
10. Now Defer and Delay Windows 11 upgrade is Enabled (See the below image).
Method 2: Defer or Delay Windows using Registry Editor
1. Press Windows key + R . Type regedit.exe and click OK.
2. Navigate the following path:
Computer\HKEY_LOCAL_MACHINE\SOFTWARE\Policies\Microsoft\Windows\WindowsUpdate
3. If you don’t have WindowsUpdate key, you can create a new one.
Right-click on Windows => New => Key. Type WindowsUpdate and then click OK (See the below image).

4. After creating the WindowsUpdate Key, now create new DWORD (32-bit) value naming DeferUpgrade.
5. Right-click on WindowsUpdate key, select New => DWORD (32-bit) value. Type “DeferUpgrade” and click OK.

Now, click on DeferUpgrade and Select the base as Decimal. Set the value to 1 and Click OK.

6. Repeat the 5th step and create another key “DeferUpgradePeriodInDays”.
Click on DeferUpgradePeriodInDays and select the base as Decimal. Set the value from 0 to 365 and click OK.
You can set the value from 0 to 365. This value represents the number of days for which you wish to delay the upgrade.

7. Repeat the 5th step and create another key “DeferUpdatePeriodInDays”.
Click on DeferUpdatePeriodInDays and select the base as Decimal. Set the value from 0 to 30 and click OK.
You can set the value from 0 to 30. This represents the number of days for which you want to delay updates.

You can remove the defer update settings by deleting all DWORD (32-bit) value which you have created in the above steps.
That’s It!


