
In Windows 11, the Windows Update error code 0x80245006 typically appears when the system is unable to connect to Windows Update servers or when certain update components are corrupted. This issue may occur due to problems with Windows Update services, Windows store conflicts, network connection error, or missing system files.

Page Contents
Fix Windows Update error code 0x80245006
Fix 1: Run the System File Checker (SFC) scan
SFC is a Windows tool to check file integrity.
Step1: Click on the Windows search bar and type “CMD” and right click on “Command Prompt” and run as administrator from context menu.

Step 2: In Command Prompt Window, type sfc/scannow. Press Enter.
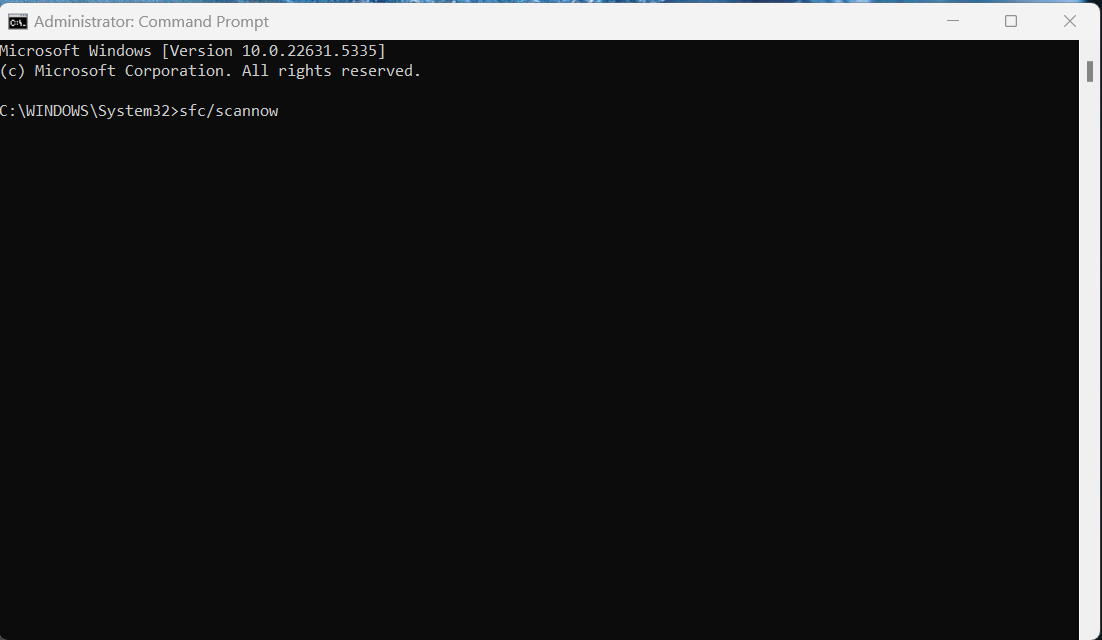
Step 3: The SFC scan will start, and it may take some time to finish, depending on your system’s performance and the size of your files.
Now try to update the Windows.
Fix 2: Temporarily disable your antivirus
Here’s how disable Microsoft Defender antivirus temporarily in Windows. Re-enable Defender once issue is resolved.
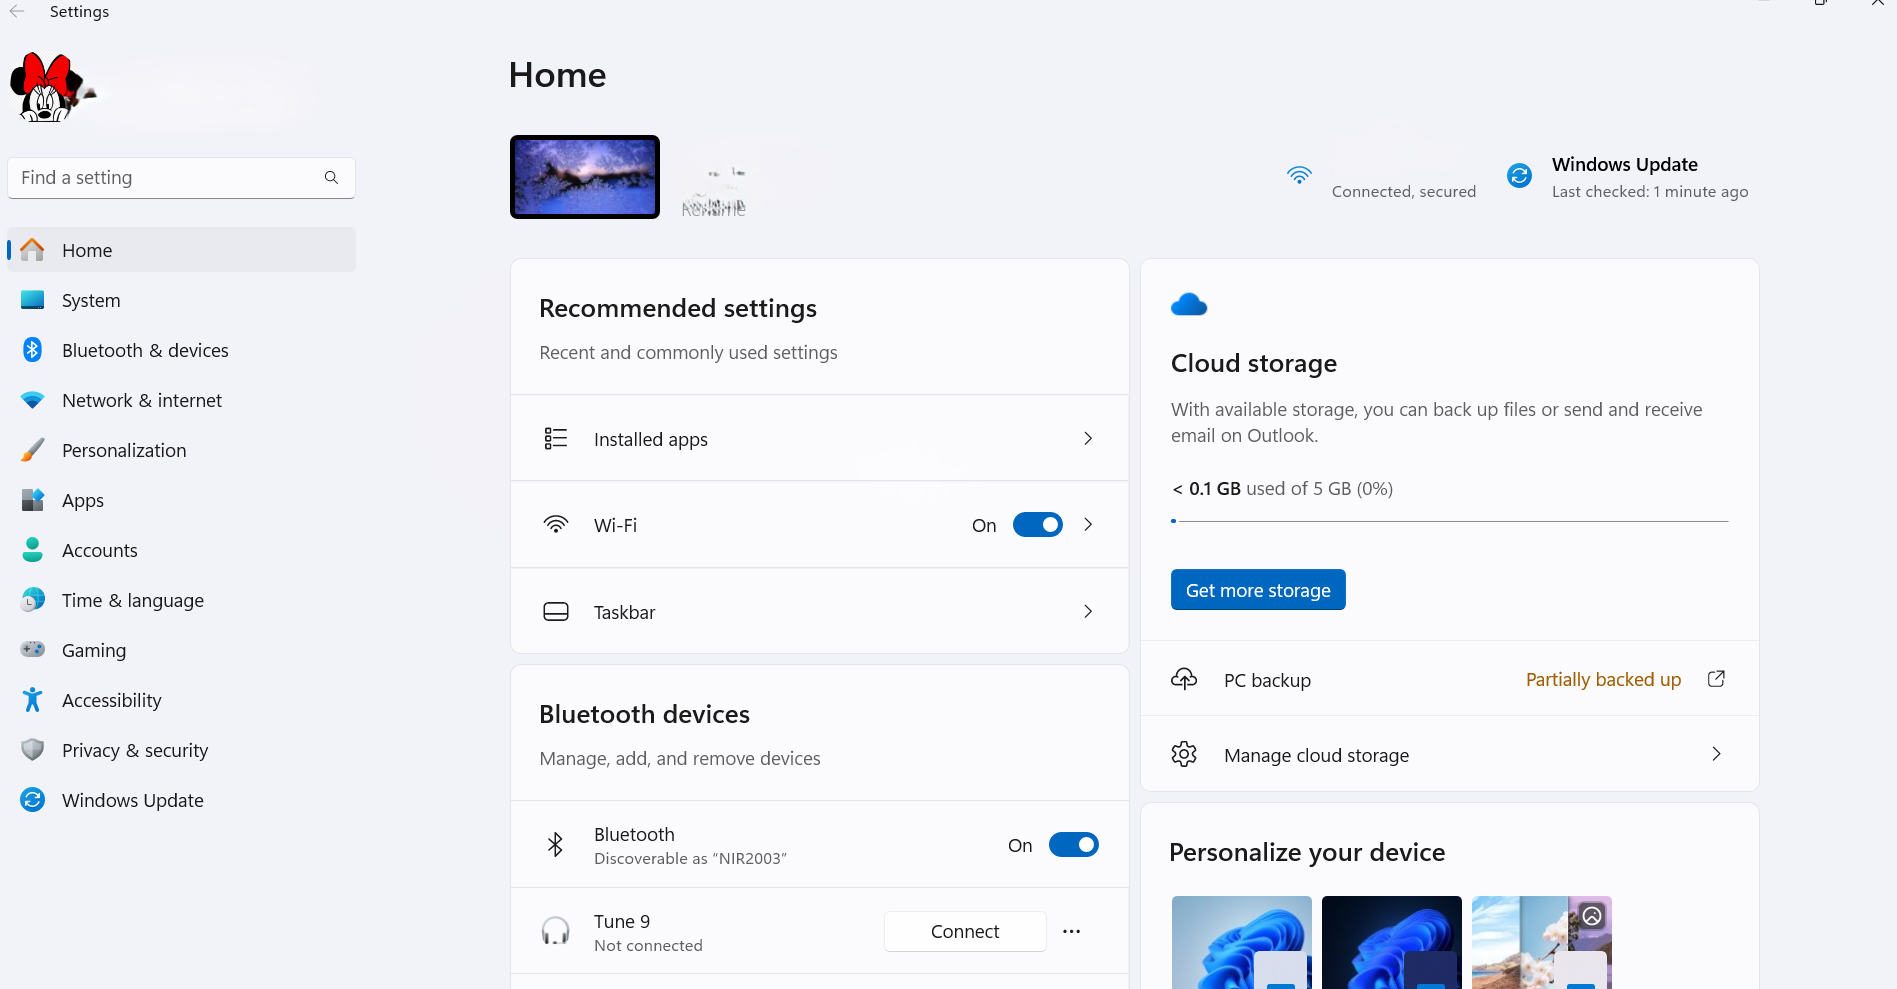
Step 1: Open the Windows Setting or use shortcut (Win+l).
Step 2: Click Update and Security or search in the Windows Security.
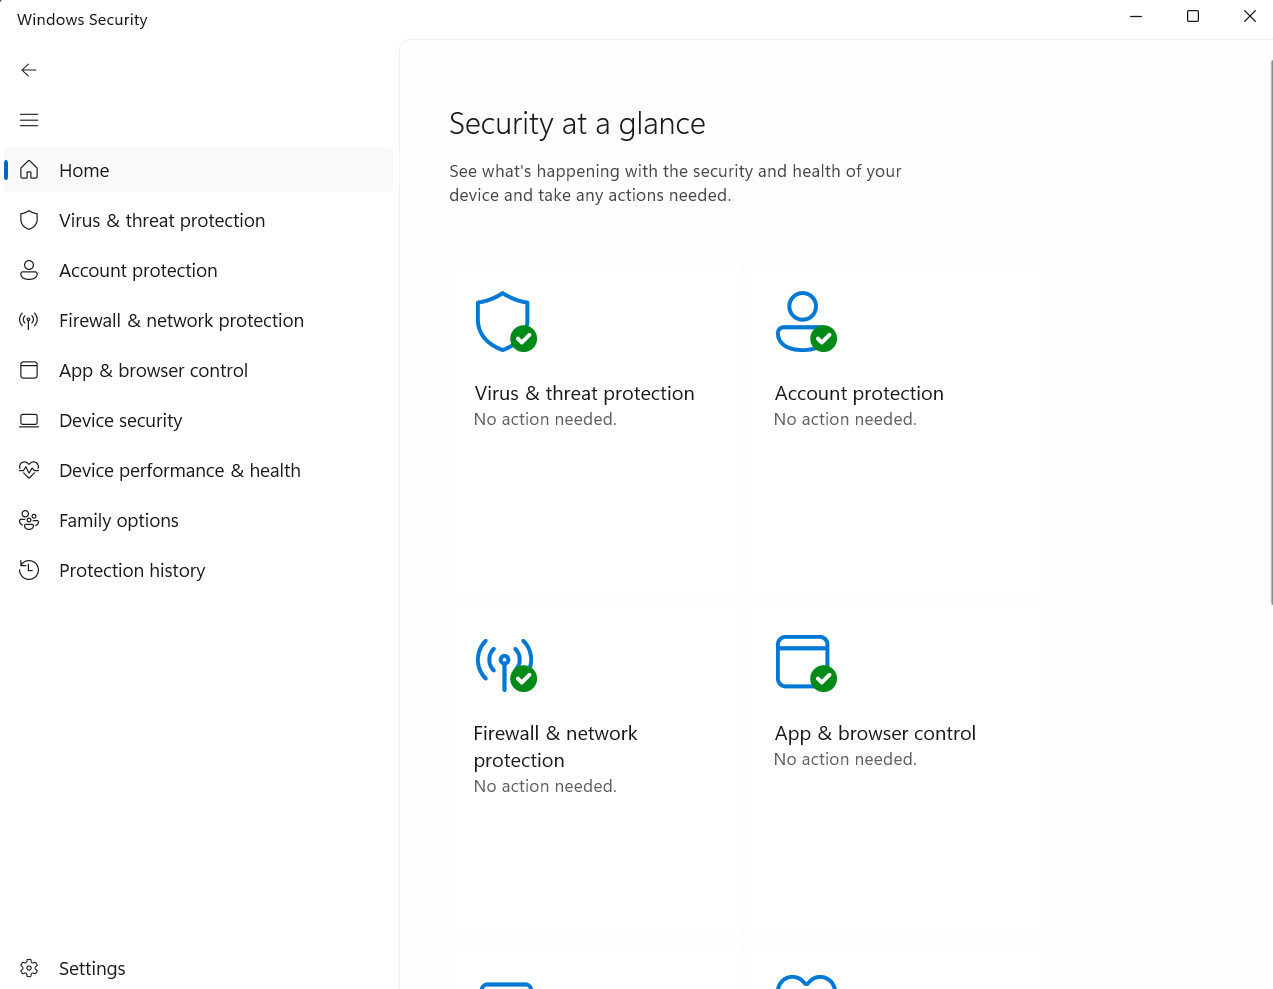
Step 3: In the Windows Security, click on Virus & threat protection.
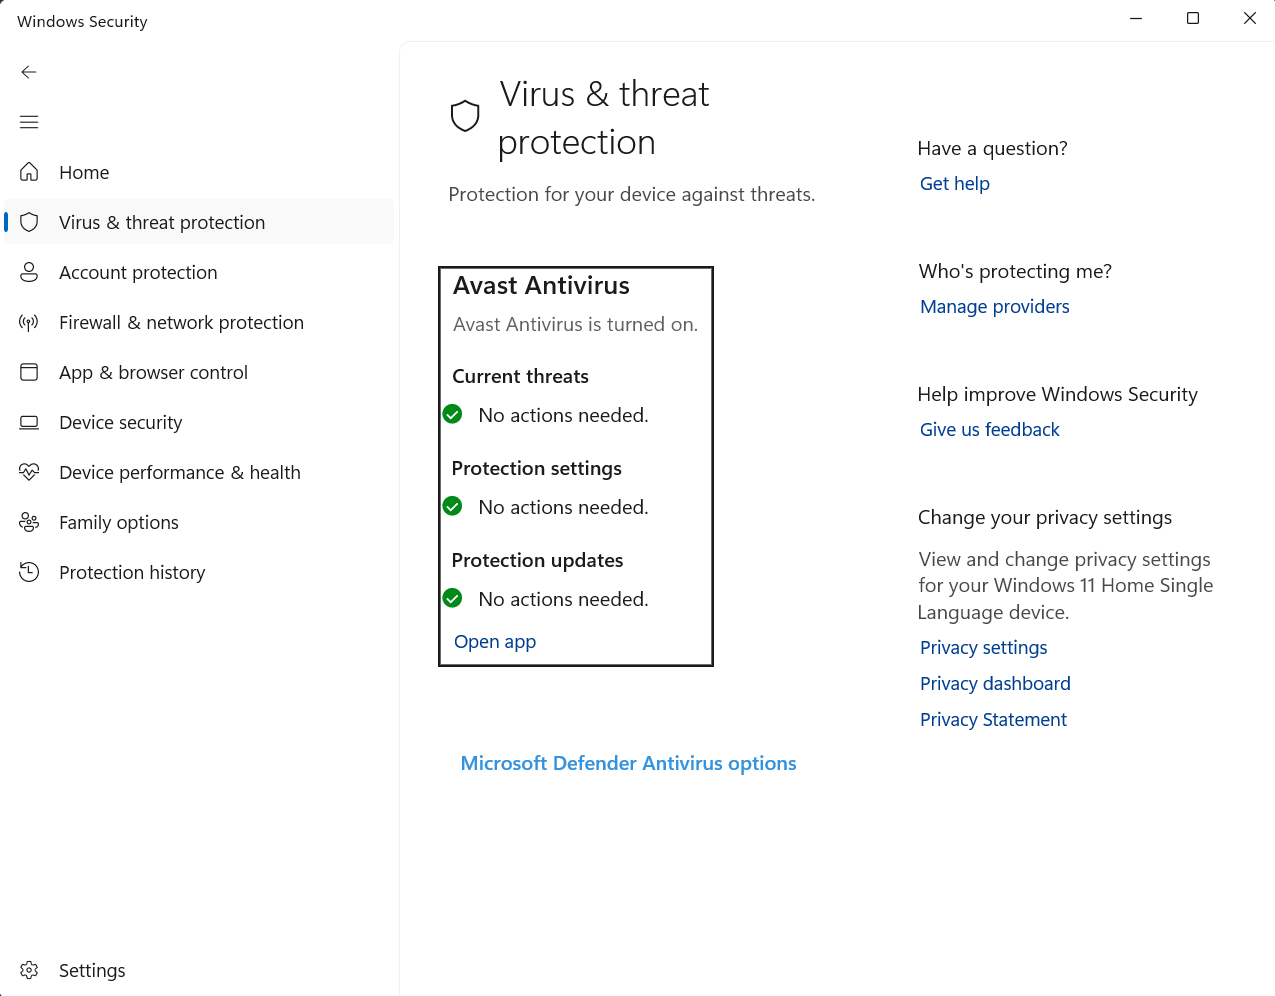
Step 4: Under Virus & threat protection settings, click on Manage settings, Toggle off the “Real-time protection” switch.
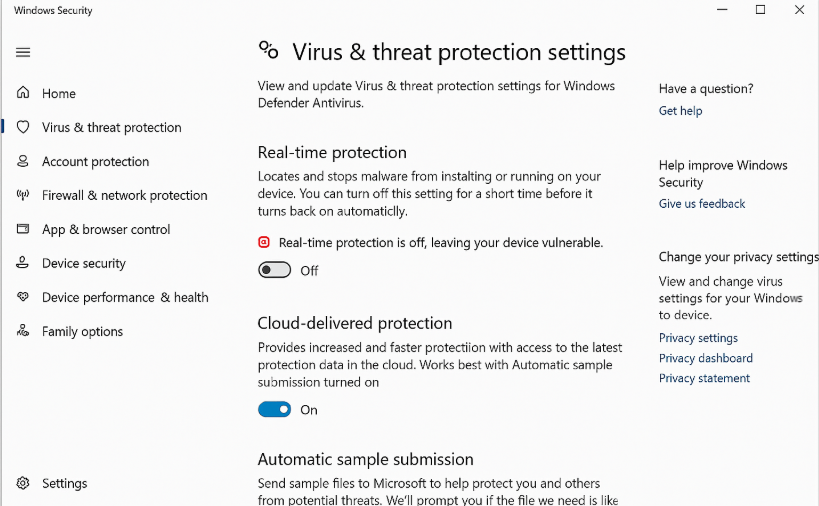
Step 5: Microsoft defender antivirus will now temporarily disabled.
Fix 3: Run the Windows Update Troubleshooter
Running the Windows Update Troubleshooter in Windows 11 can help resolve issues related to Windows updates.
Step 1: Press Windows key + l to open the Settings app.
Step 2: Search Troubleshoot and click other troubleshooters.

Step 3: Find Windows Update.
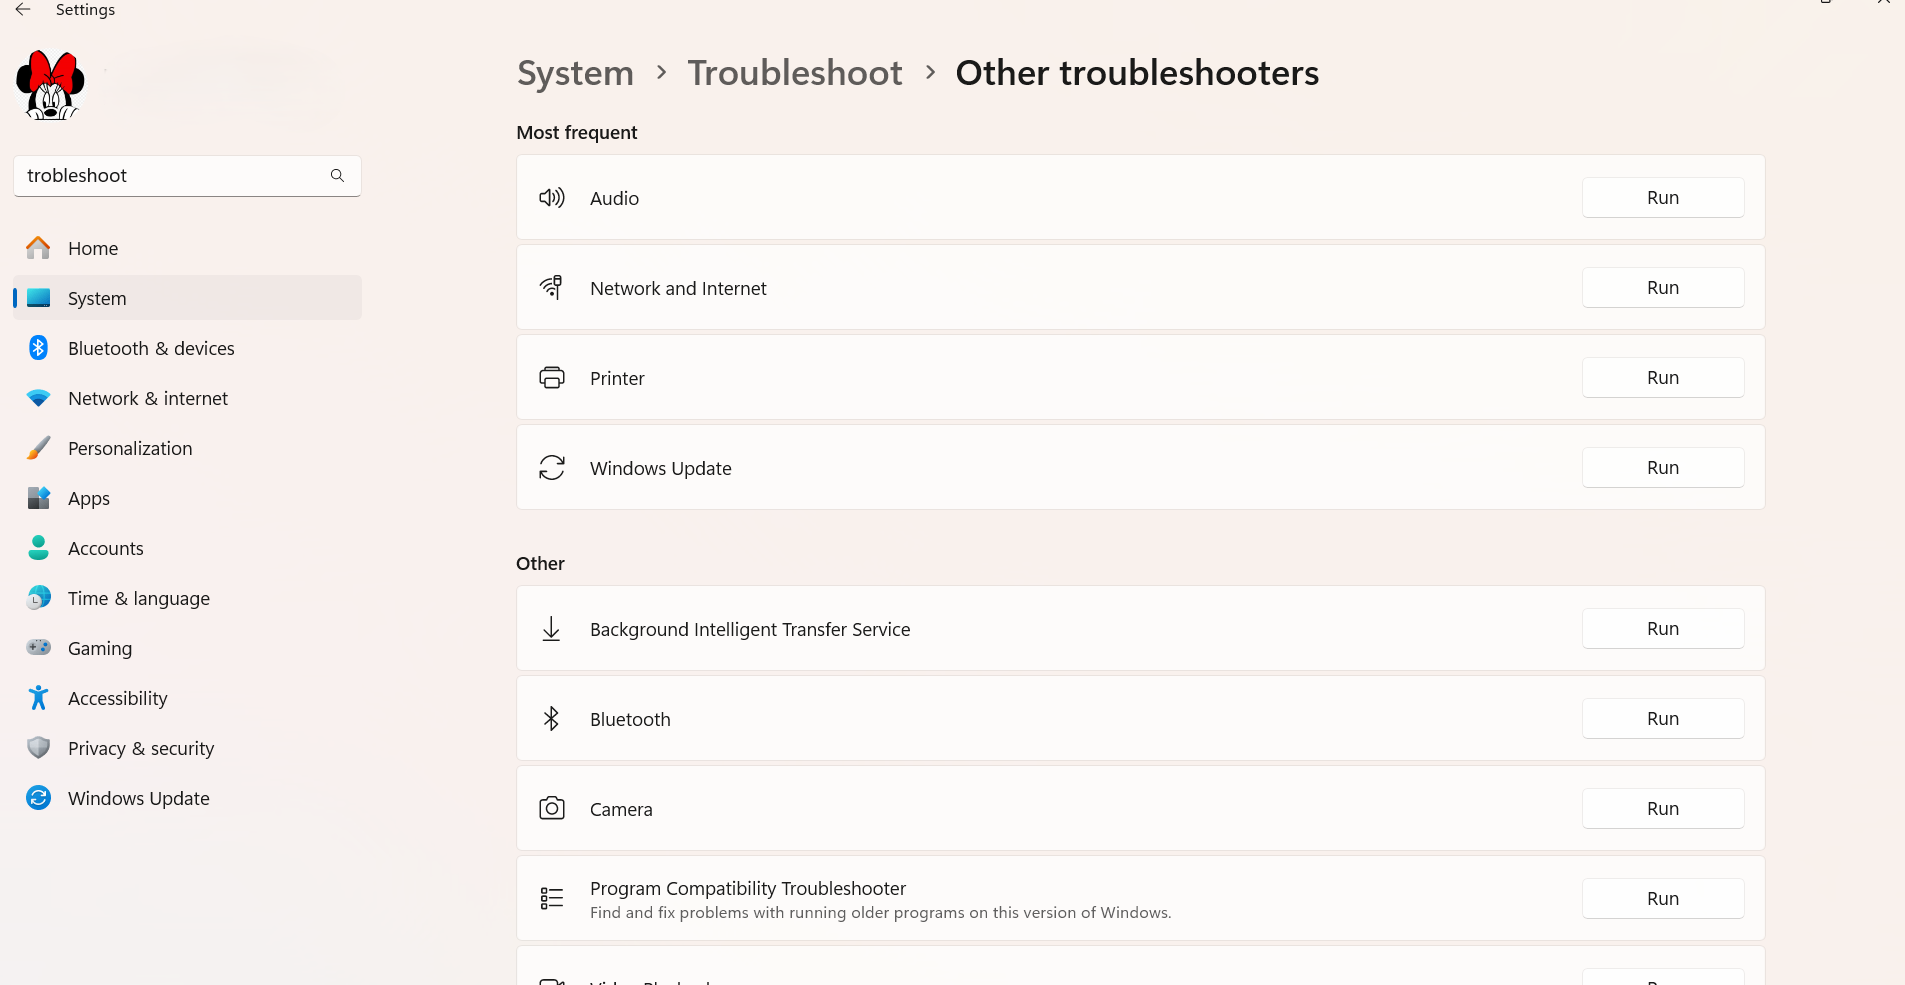
Step 4: Click the Run the Troubleshooter button. Follow on-screen instructions. The Windows Update Troubleshooter will now scan for and attempt to fix issues related to Windows updates. Follow any on-screen instructions that the troubleshooter provides to resolve detected issues.
Fix 4: Restart the Windows Update Service
We can use the Services application, which allows you to manage and control various system services.
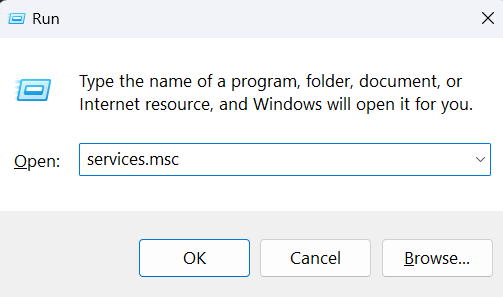
Step 1: Type services.msc and press enter.
Step 2: Locate Windows Update in the list and right click on Windows Update and select restart from the context menu and wait for the service to restart.
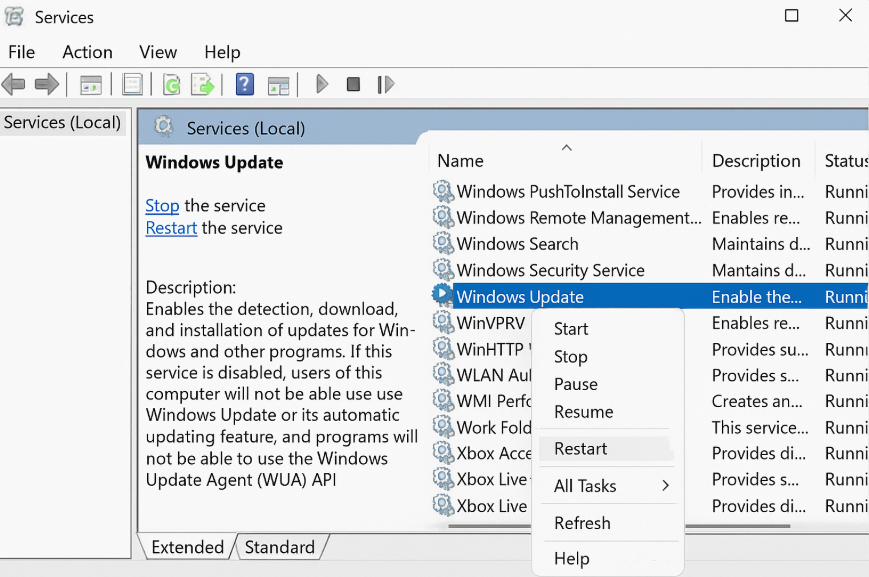
Step 3: After the service has restarted, you can go to Windows Update in the Settings app to check if updates have been installed.
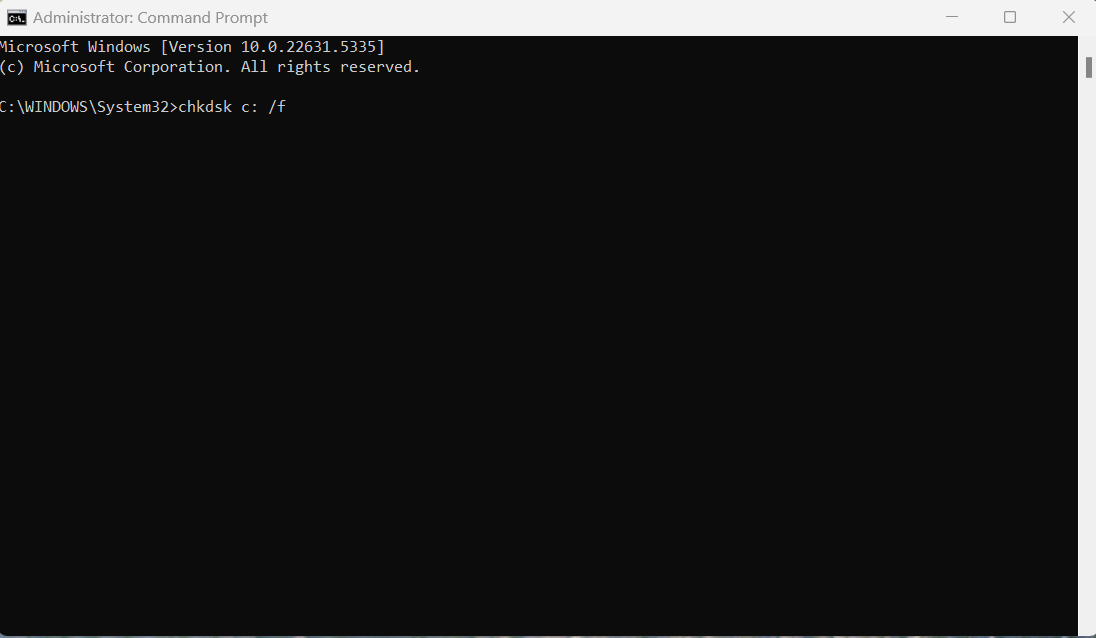
Fix 5: Check disk errors
Ensure that your disk is not damaged. You can perform checks using Administrative Command Prompt as follows.
Step 1: Click on the Windows search bar and type “CMD” and right click on “Command Prompt” and run as administrator from context menu.
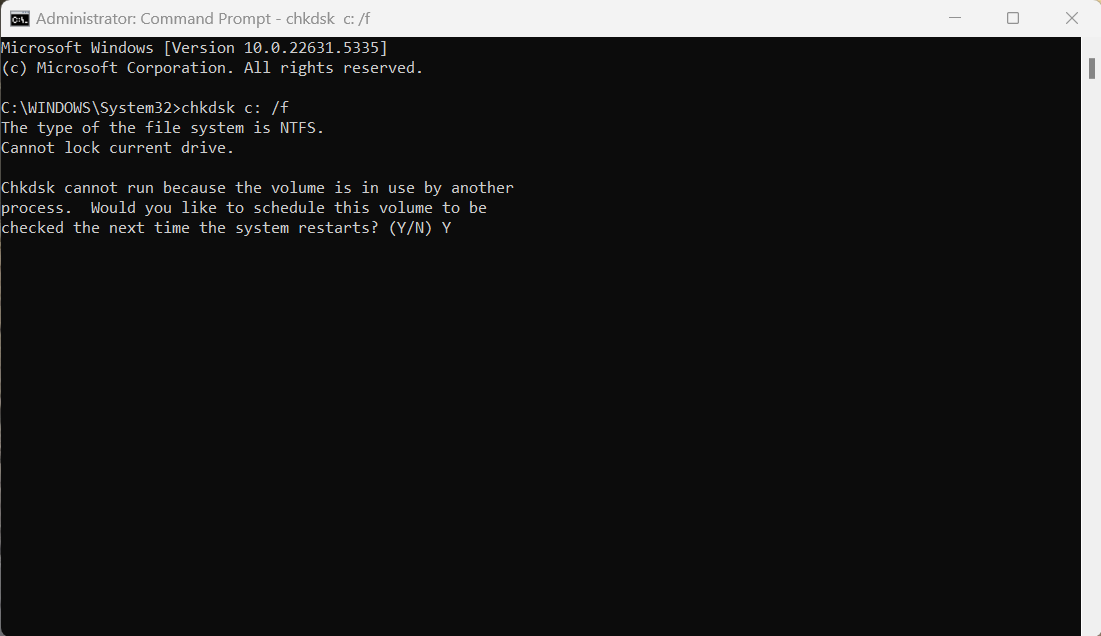
Step 2: If you are using an HDD as your main drive, use the following command and press Enter: chkdsk c: /f or If you are using SSD, use this command: chkdsk c: /f /r /x.
Step 3: If you receive an error, type in Y and hit enter.
Step 4: Restart your device to perform the check.
Fix 6: Update Drivers
Scan your PC for missing and out-of-date device drivers. Or you can update them manually.
Step 1: Open the Windows Setting or use shortcut (Win+l).
Step 2: Click on Update and Security.
Step 3: Click on Windows Update.

Step 4: Click the Check for updates button.
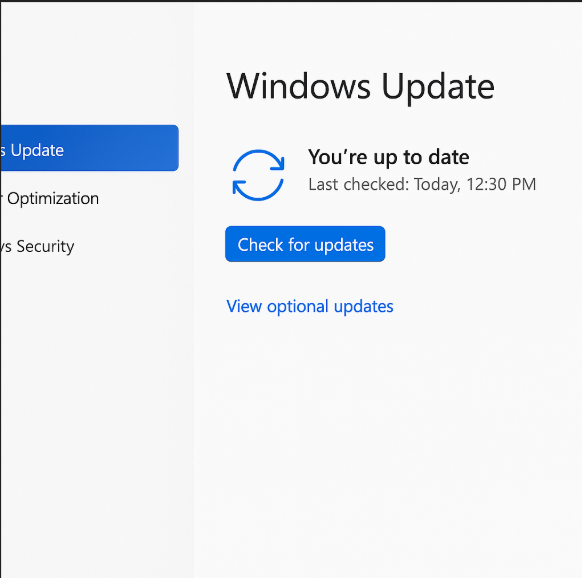
Step 5: Click the View optional updates option, If the View optional updates link is not available after checking for updates, then Windows Update does not have any new drivers or any updates for other products at that particular time.

Step 6: Click the Driver Updates tab and select the driver you want to update.
Step 7: Click the Download and install button.
Fix 7: Try Clean Boot
Try clean boot, if no other fixes are not working.
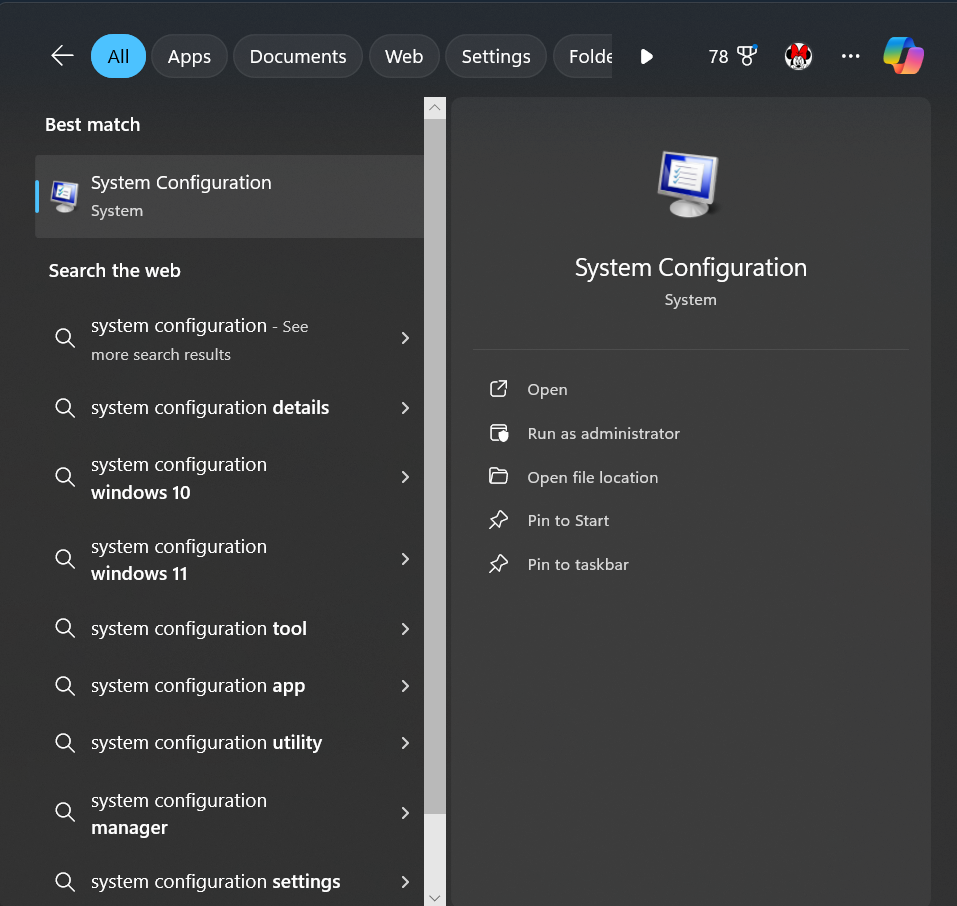
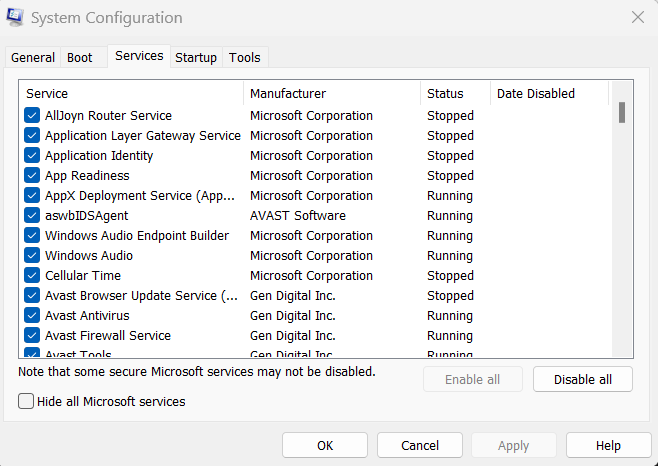
Step 1: Open the Search menu, type in System configuration, and press enter.
Step 2: Under the Services tab, tick the Hide all Microsoft services box and click on Disable all button.
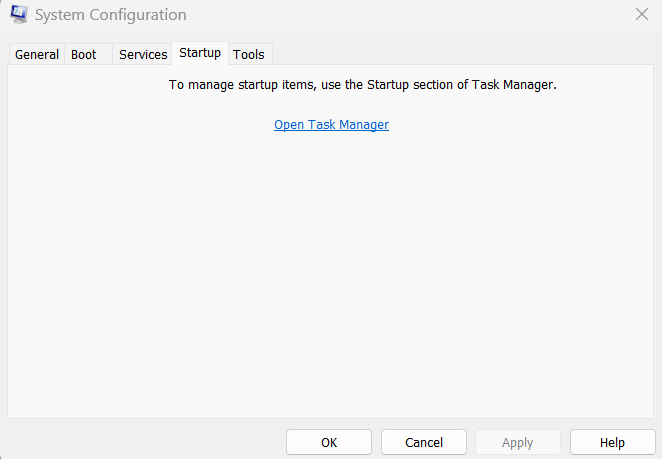
Step 3: Head over to the Startup tab and click on Open Task Manager.
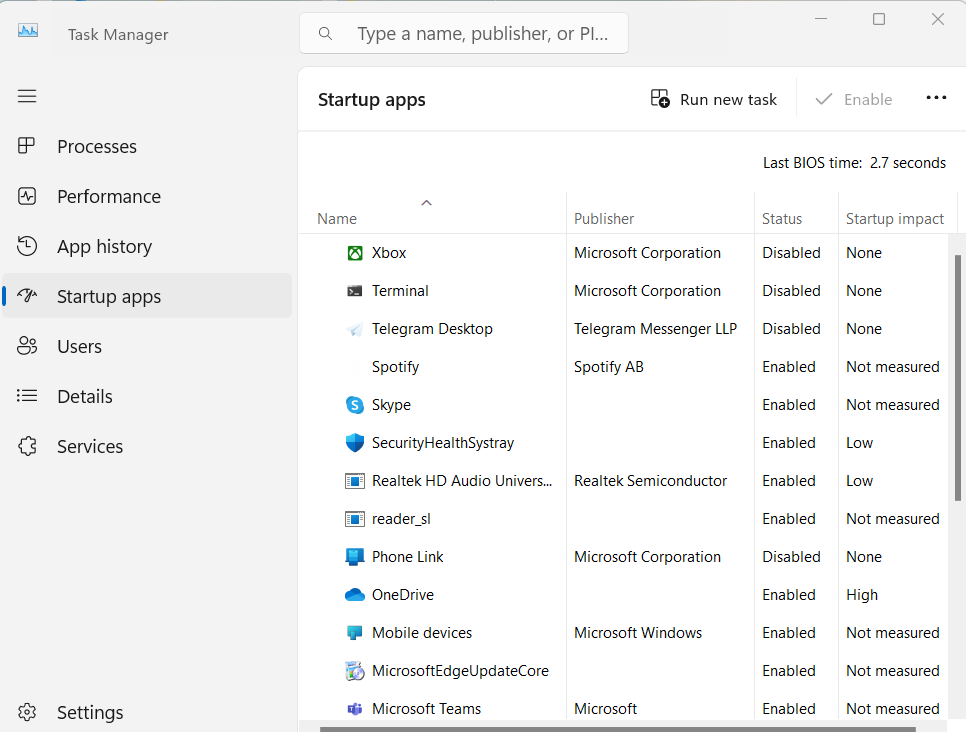
Step 4: Select a third-party program and click on Disable at the top.
Step 5: Restart your PC to enter the clean boot state and see if the issue persists. If the issue disappeared in the clean boot state, then you can be certain that a third-party app is causing it.
Fix 8: Install the Update Manually
Windows updates fail to install automatically, you can always try doing it manually. First, you need to find out which KB number is relevant to you.
Step 1: Right-click Start button and pick Settings. Go to Windows Update.
Step 2: On the right, click View Update history.
Step 3: From the list, note the KB number that fails to install with the error code.

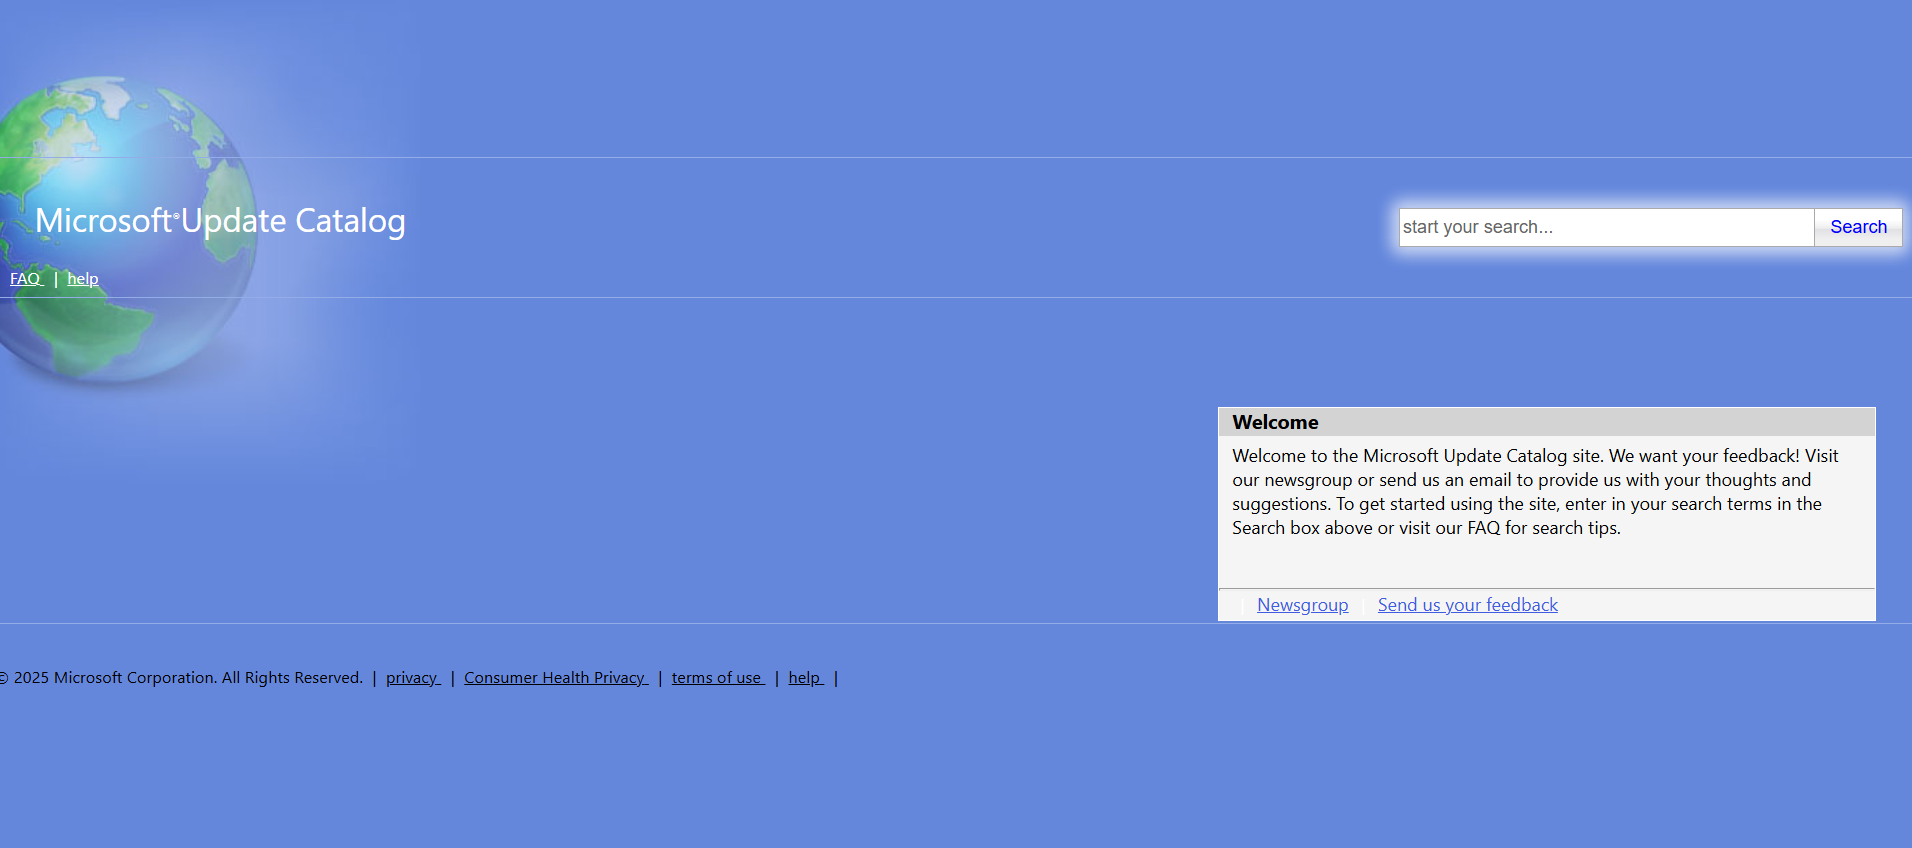
Step 4: Go to Microsoft Update Catalog (https://www.catalog.update.microsoft.com/home.aspx) page, type in the KB number, and press Search.
Step 5: Download the update and install it manually.
Hope this helps!


![[Latest Windows 11 Update] What’s new in KB5089549?](https://www.kapilarya.com/assets/Windows11-Update.png)