The users of Windows 11 can sometimes face the issue of being stuck at ‘Preparing security options’. This might result in the freezing of the system. In such situations, the PC stops working and the users are forbidden from even logging into the PC for fixing the issue. Hence, this article consists of some solutions which will help the users in solving the problem of Windows 11 stuck at ‘Preparing security options’.

Page Contents
Fix Windows 11 stuck at ‘Preparing security options’
The users must first disconnect all the USB devices which are connected to the PC and uninstall any third-party fingerprint reader software. If these doesn’t work, then the users should try the fixes mentioned below.
Fix 1: Disabling Credential Manager service
Disabling the Credential Manager service is the first fix which the users should try for solving the issue of Windows 11 stuck at ‘Preparing security options’. For disabling it, follow the steps below.
Step 1- At first, select Win + S and open the Windows Search Bar. Now, write Services in the search box and click Enter.

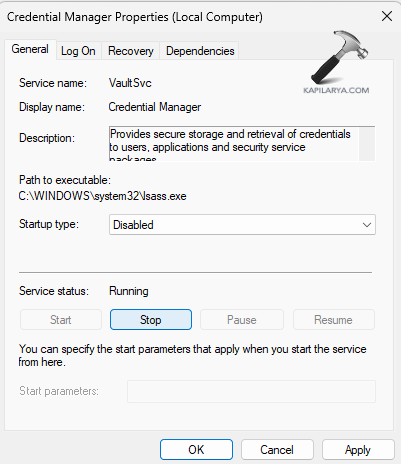
Step 2- Next, go to Credential Manager and right-click it. Then, select Properties.
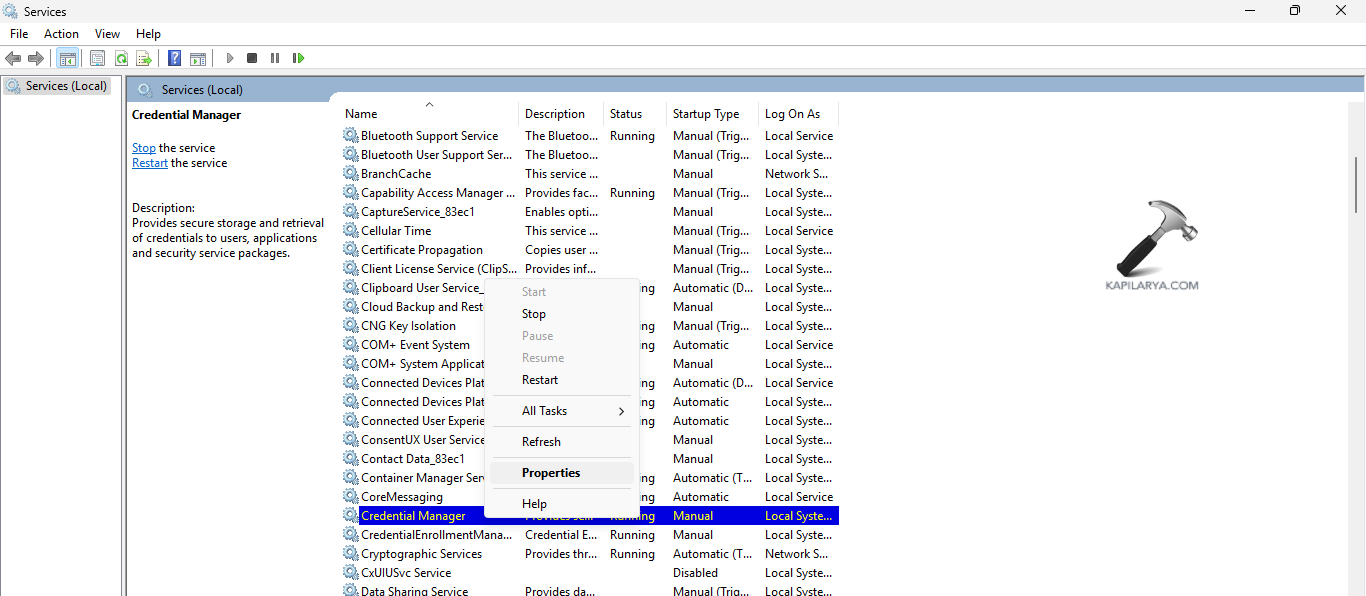
Step 3- Thirdly, change the Startup type to Disabled and select Stop > OK to save the changes.
Fix 2: Running SFC Scan
If the above fixe do not work, then running a system file scan and can help the users in solving the issue of Windows stuck at ‘Preparing security options’ easily. Therefore, follow the steps given below to run the SFC solve the issue.
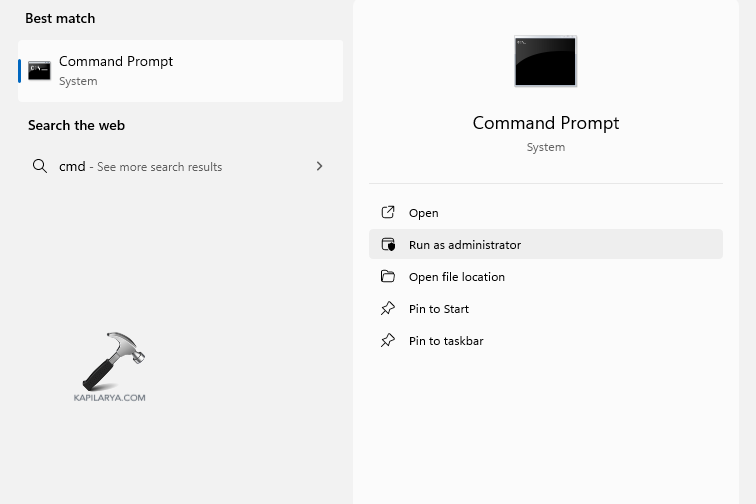
Step 1- At first, open Command Prompt and run it as an administrator.
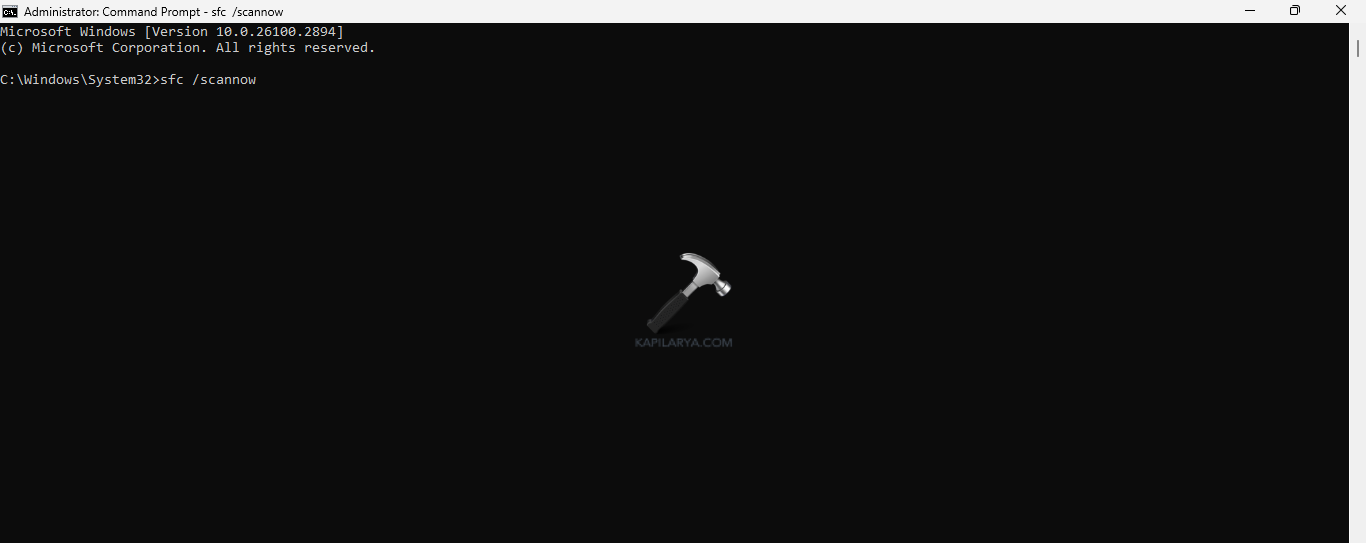
Step 2- Next, copy and paste the prompt given below for running a SFC scan and select Enter.
sfc /scannow
Step 3- Reboot the PC and see if the error is solved.
Fix 3: Updating Drivers
Outdated or missing drivers in the system may also add to the mentioned issue. Hence, updating the drivers of the system is another fix that can be adopted by users to fix the issue. Now, let us see the steps to update the drivers-
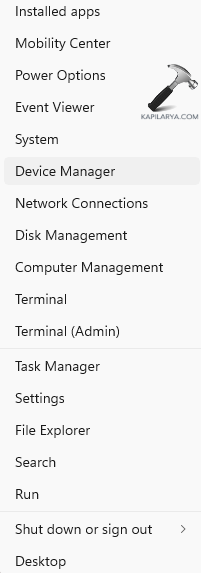
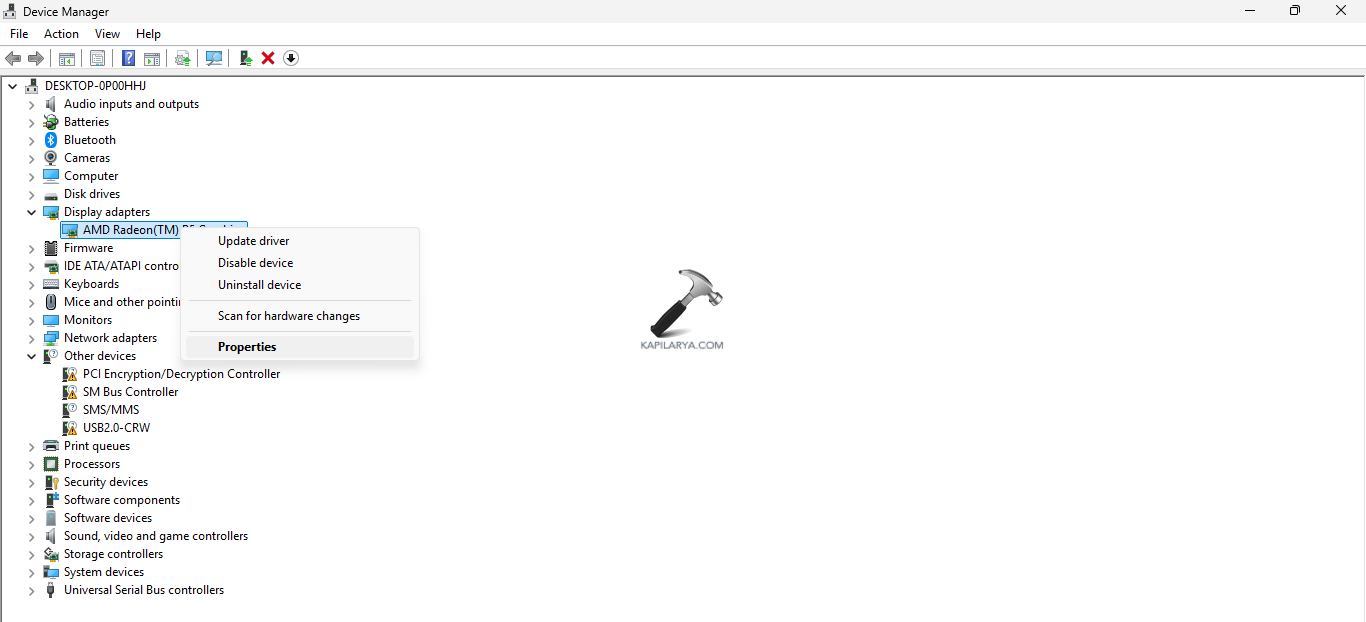
Step 1- Firstly, open Device Manager.
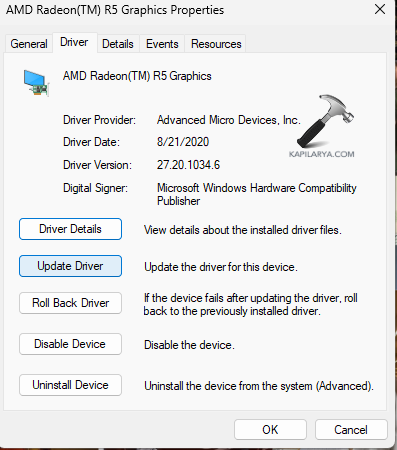
Step 2- Next, locate the driver and right click on it. Now, select Properties > Update Driver.
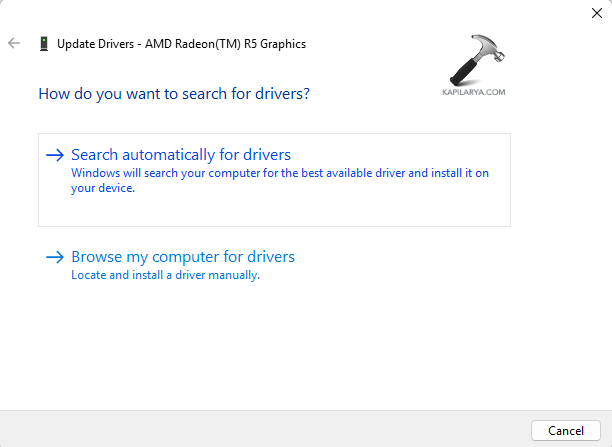
Step 3- Further, in the Update Drivers window, press Search automatically for drivers.
Step 4- Lastly, follow the prompts that appears in the screen to install the updated drivers.
Repeat above steps and update all the drivers. If this does not work, then try uninstalling the drivers and restarting the PC.
Fix 4: Checking certain services are running
There are certain services which must be active and running for the proper functioning of the PC. Now, let us check how to ensure these services are running.
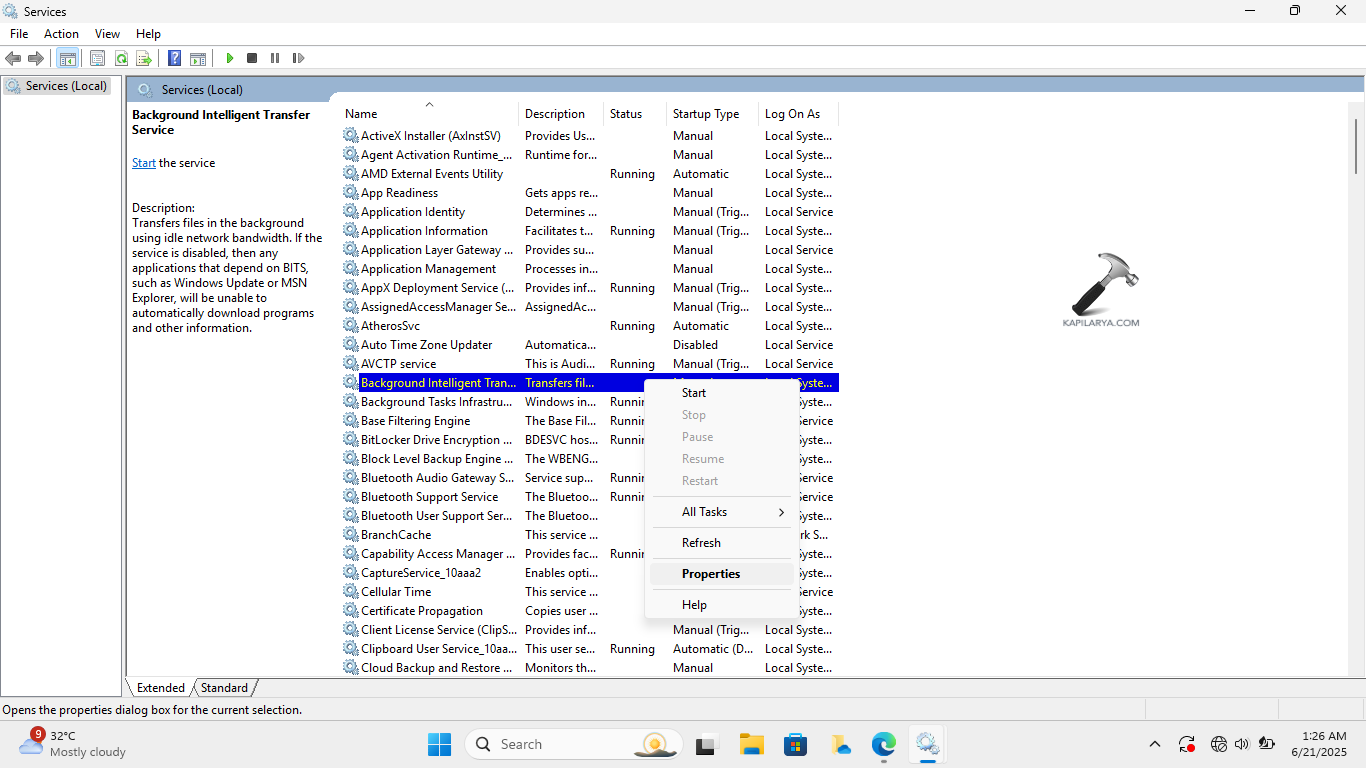
Step 1- Open Services window.
Step 2- Now check that the services listed below are active and running-
- Background Intelligent Transfer Service (BITS)
- Cryptographic Service
- Windows Update
- MSI Installer
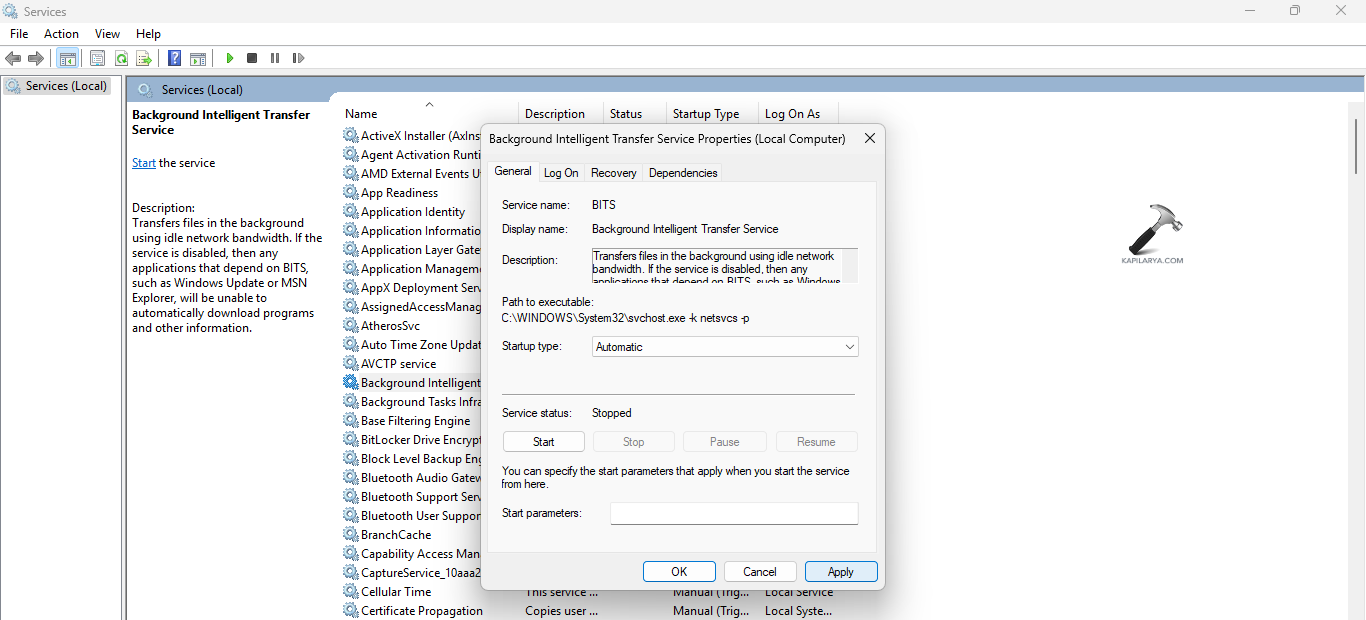
Step 3- If these services are not running, then right-click them and select Properties.
Step 4- Now, change the Startup type to Automatic and press Start > Apply > OK.
Fix 5: Resetting the System
Another fix which the users can try to fix this problem is through resetting the PC. But, before resetting the PC, ensure to back up all the files of the PC and transfer them to an external device. This will help in keeping all the data safe. Now, follow these steps to reset the PC-
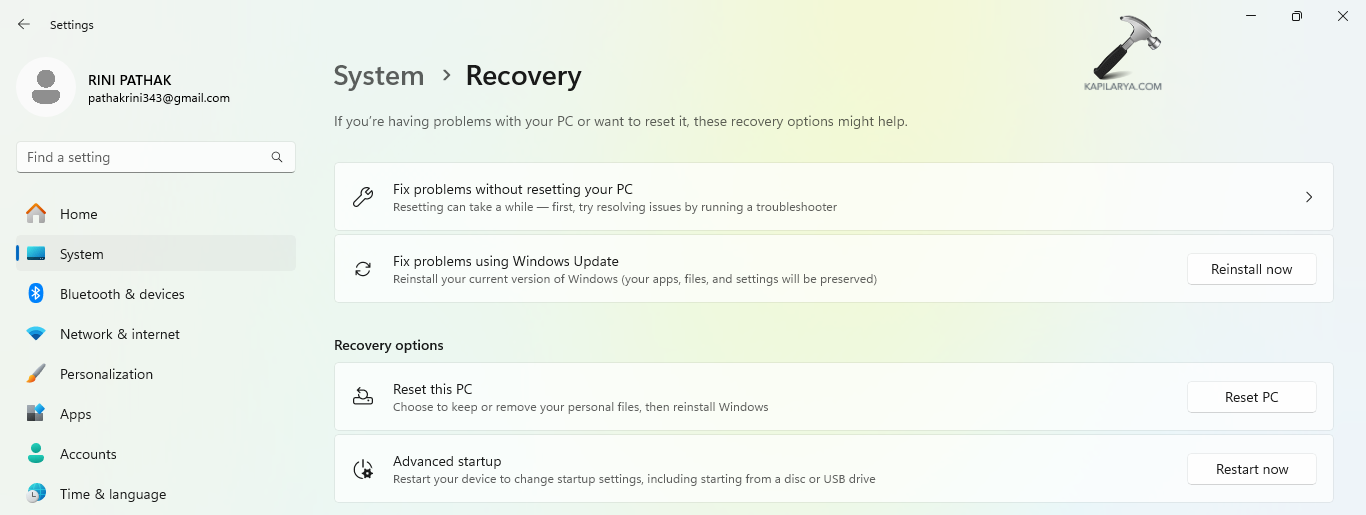
Step 1- Firstly, go to Settings > System > Recovery.
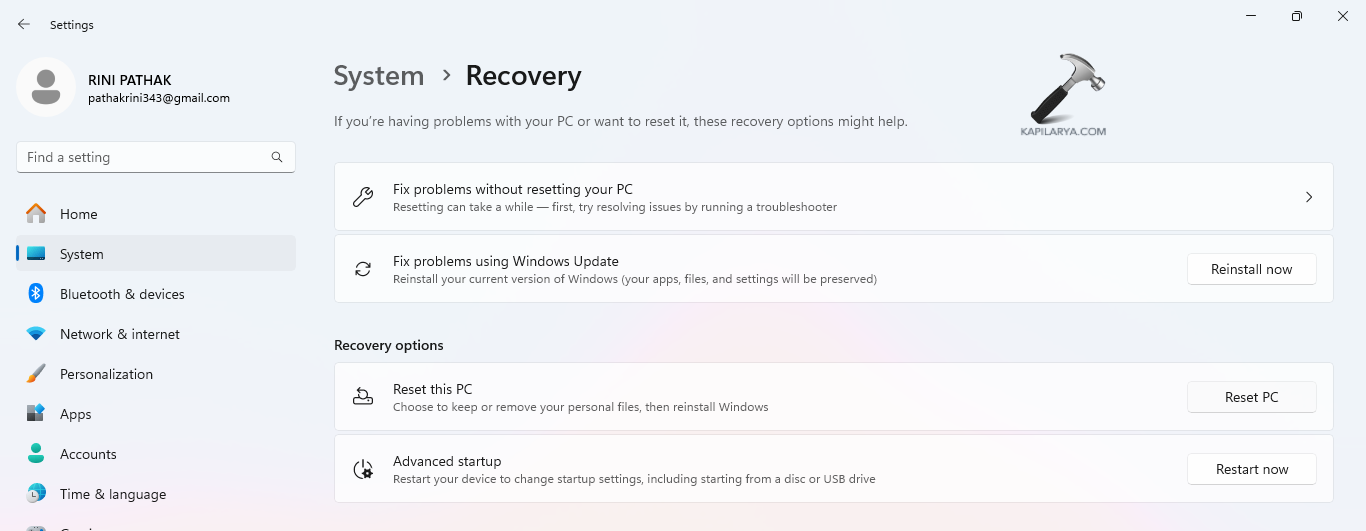
Step 2- Thereupon, below the Recovery option, select the Reset PC button close to Reset this PC.
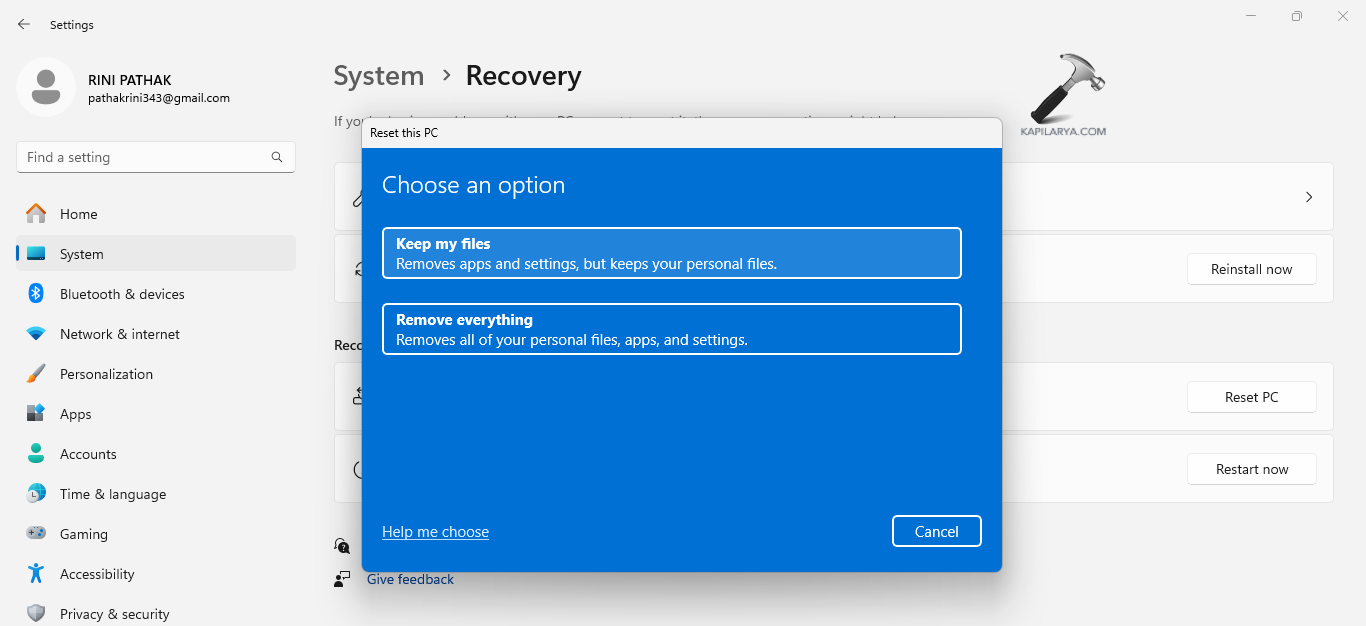
Step 3- Now, a blue pop-up window will open. As per requirement, choose either “Keep my files” or “Remove everything”.
Step 4- Lastly, follow the prompts that appears on the Window screen and reset the PC.
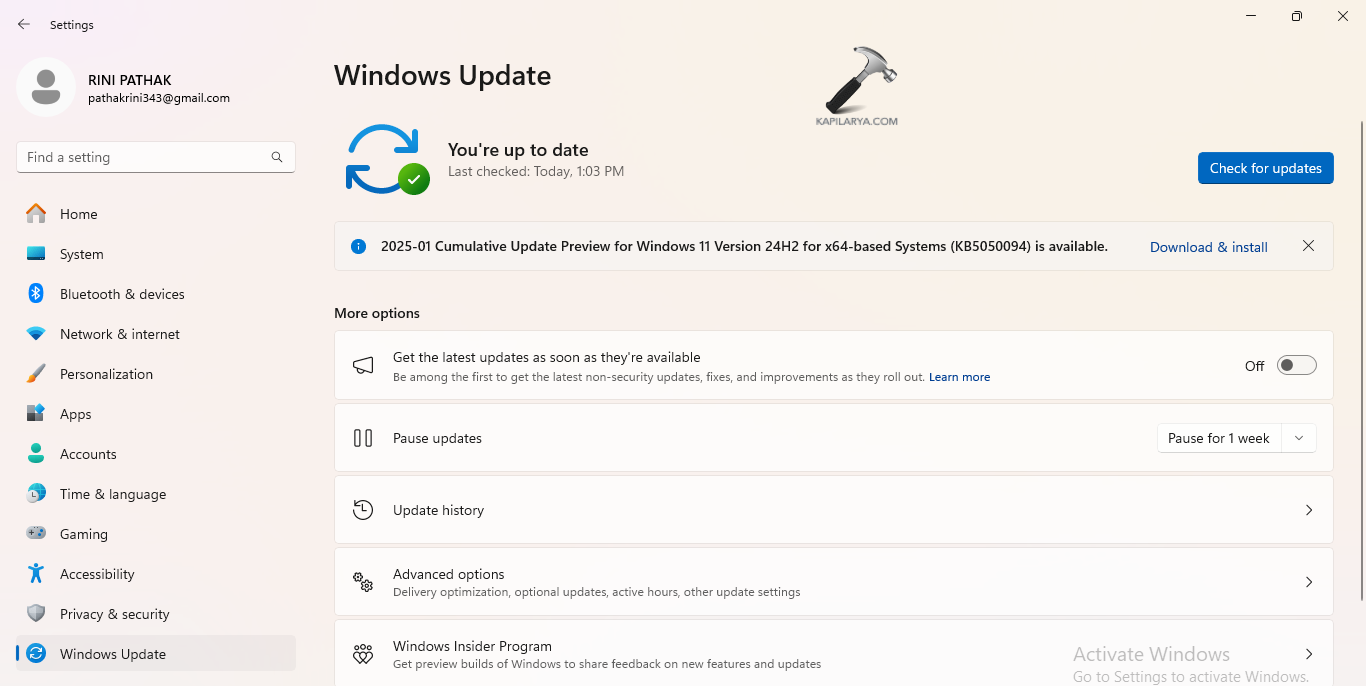
Fix 6: Updating Windows
The users can try updating the Windows and see if that solves the problem. To do that, follow the steps below-
Step 1- At first, open Settings.

Step 2- Next, select Windows Updates. Click on Check for updates. Hereafter, install any available Optional or Driver updates.
Fix 7: Uninstalling Windows Update
Sometime, the latest Windows Update may be incompatible with the system of the PC. Hence, try uninstalling any latest updates for fixing the issue.
Step 1- Open Control Panel.
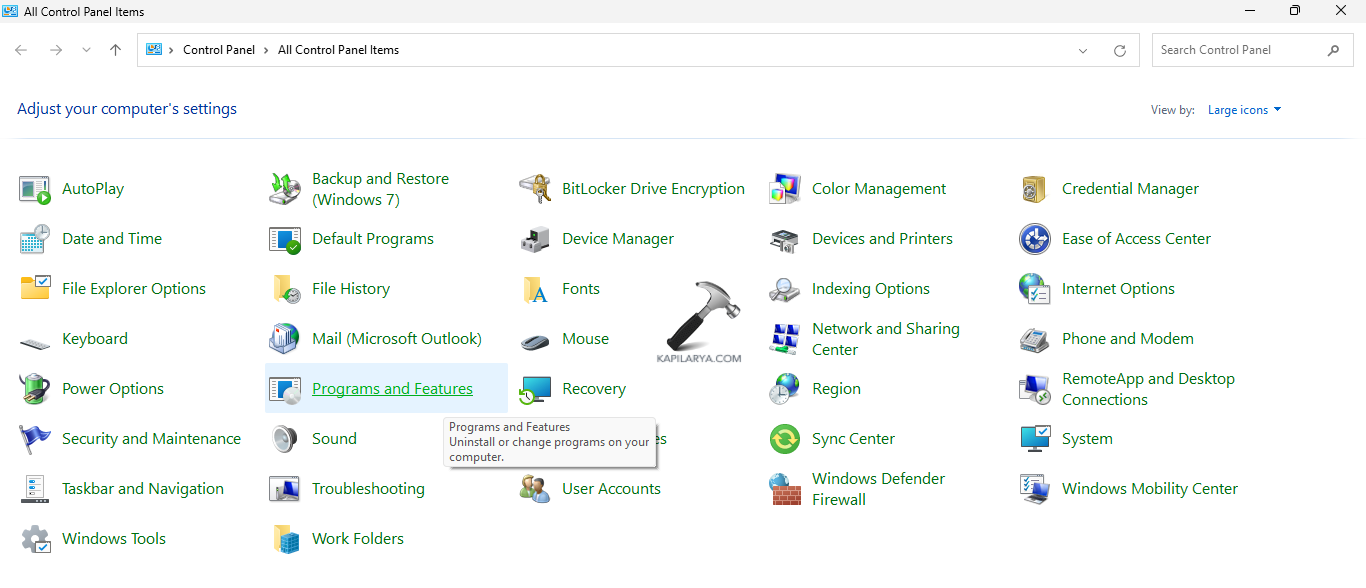 Step 2- Select Programs and Features and click View installed updates.
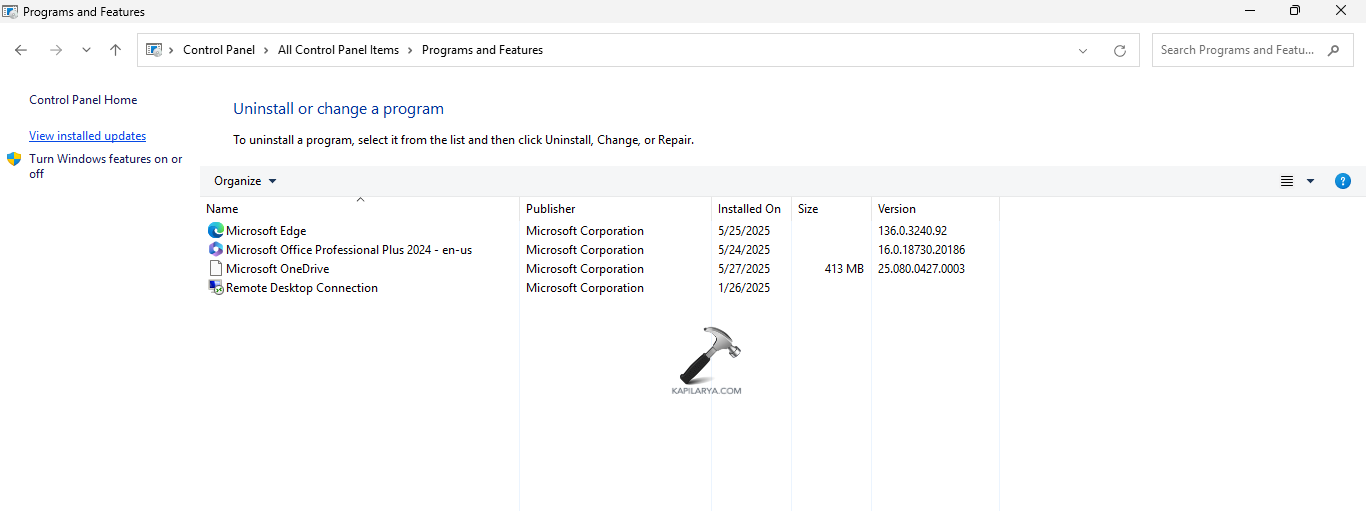
Step 3- Lastly, right-click the latest downloaded updates which might be the cause of the issue and select Uninstall.

Fix 8: Disabling Fast Startup
The fast startup when turned on too cause interruptions leading to various issues in the PC. Therefore, the instructions to turn off the fast startup are provided below.
Step 1- At first, press Windows + R and open Run dialog box. Next, write the command below and press enter to open Power Options.
powercfg.cpl
Step 2- Next, from the left side pane, select Choose what the power buttons do.

Step 3- Now, click Change settings that are currently unavailable and deselect the option of Turn on fast startup.

Step 4- Lastly, select Save changes to save all the changes and reboot the PC. The issue should be solved with this.

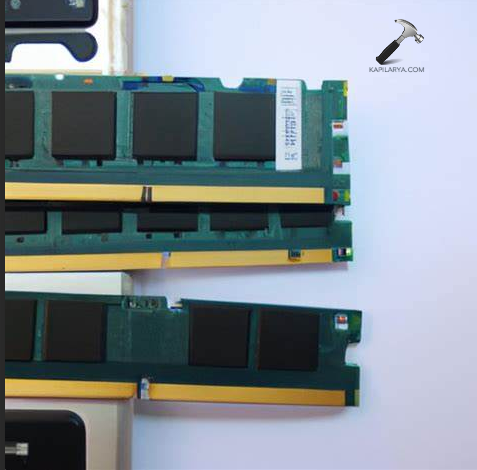
Fix 9: Increasing RAM
Another fix which the users can try for fixing the issue is increasing the RAM of the PC as the present RAM may be unable to handle the load of programs present in the PC. Thus, increasing it may help in fixing the issue.
Fix 10: Renaming SoftwareDistribution Folder
SoftwareDistribution folder is a folder which consists of files required for Windows Updates. Thus, renaming the folder can fix any issue related to Windows 11 system. Now, follow the steps for doing the same.
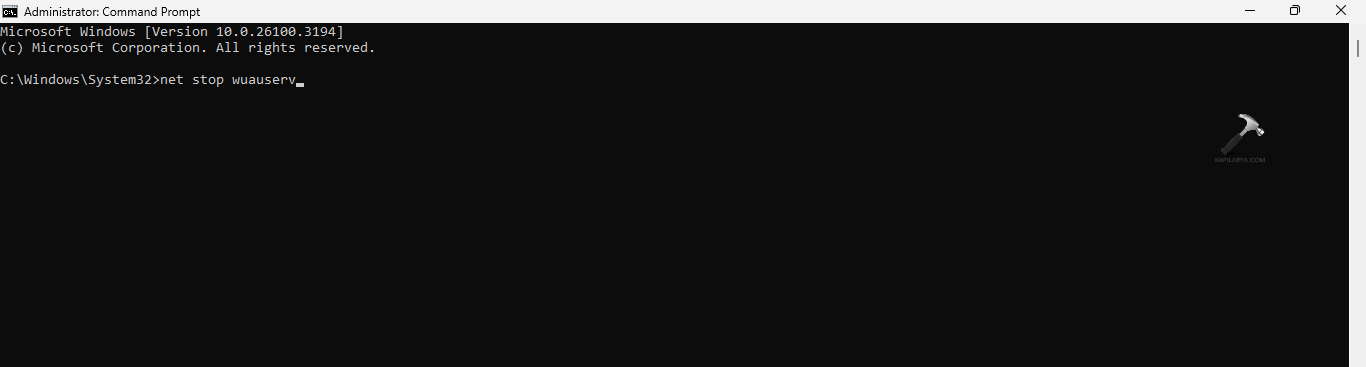
Step 1- Run Command Prompt as an administrator.
Step 2- Next, run the commands given below one-by-one and press Enter.
net stop wuauserv
net stop bits
rename c:\windows\SoftwareDistribution SoftwareDistribution.old
net start wuauserv
net start bits
Fix 11: Rebuilding BCD
The users can lastly try the solution of rebuilding BCD using the steps below for fixing the issue.
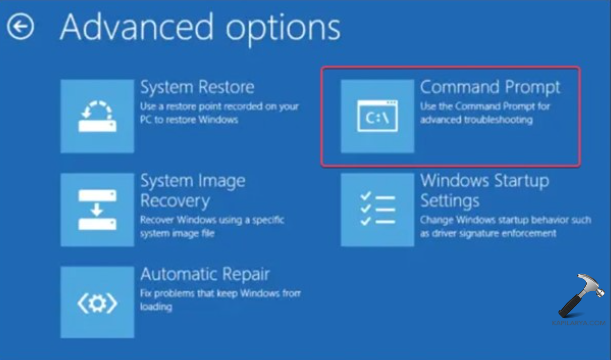
Step 1- At first, search change Advanced startup options.
Step 2- Next select Restart now, located near Advanced startup.
Step 3- Further, select Troubleshoot > Advanced Options > Command Prompt.
Step 4- Now, enter the commands given below one at a time and press Enter.
bootrec.exe /FixMbr
bootrec.exe /FixBoot
bootrec.exe /RebuildBcd
Step 5- Lastly, type Exit and click Enter for exiting the CMD window.
Hoping that all of these fixes help the users!