How to make a disk write protected in Windows 11? This could be a question of yours in case you want to protect the USB drive, SD card or internal/external storage in case it is accidentally changed, or is accessed by an unauthorized person. One of the best ways to avoid deleting the data or even blocking transfers, or just to protect sensitive files, is to establish write protection. This guide will teach you several ways in which you can use Windows 11 to allow write protection of any storage device.
Page Contents
Why Make Disk Write-Protected?
You should use write protection to:-
- Avoid deleting files accidentally.
- Prevent illegal users from altering files.
- Maintain the integrity of sensitive data during transfers.
- Lock USBs in the common areas.
- Do not use malware that rewrites the programs of removable devices and attempts to infect those devices.
Ways to Make a Disk Write Protected in Windows 11
At this point, we will consider the most effective ways of turning on disk write protection in Windows 11.
Way 1: Enable Write Protection Using Diskpart Command
You may well want the quickest and highest authority method to get your disk secured and Diskpart reigns. This is an inbuilt Windows utility that allows one to lock out the entire drive without much input of commands.
1. Click Windows + X > then select Terminal (Admin).

2. Type this.
diskpart
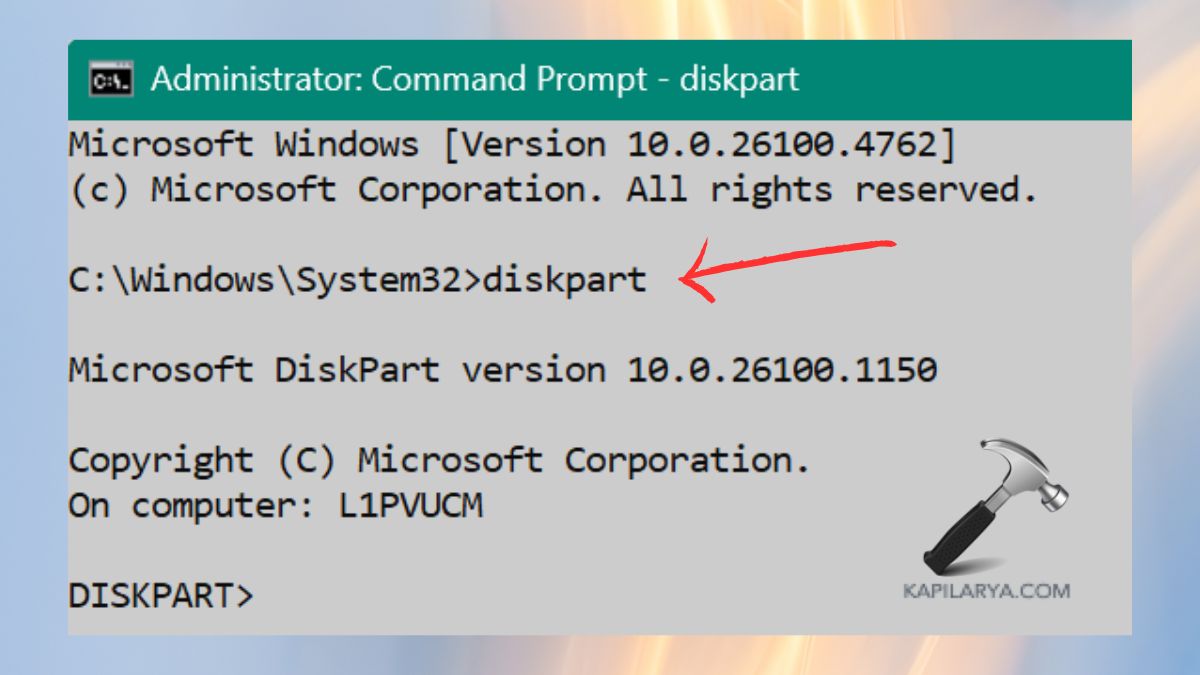
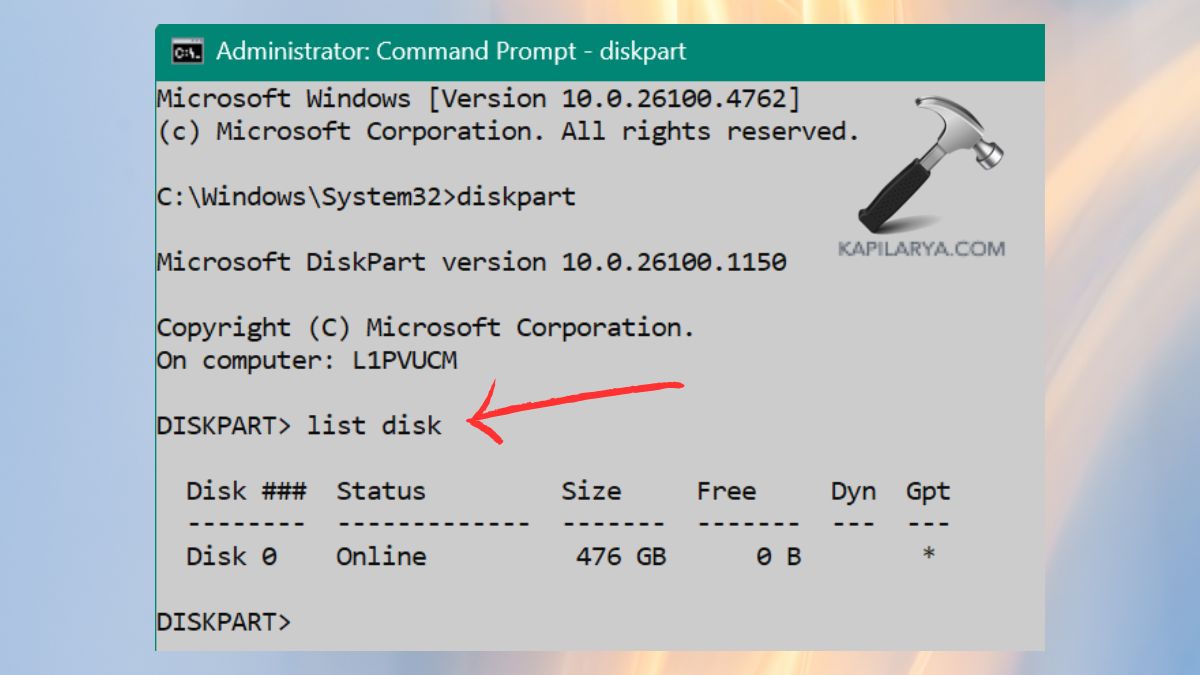
3. List available disks.
list disk
Find your USB/disk number.
4. Select it.
select disk X
5. Apply write protection.
attributes disk set readonly
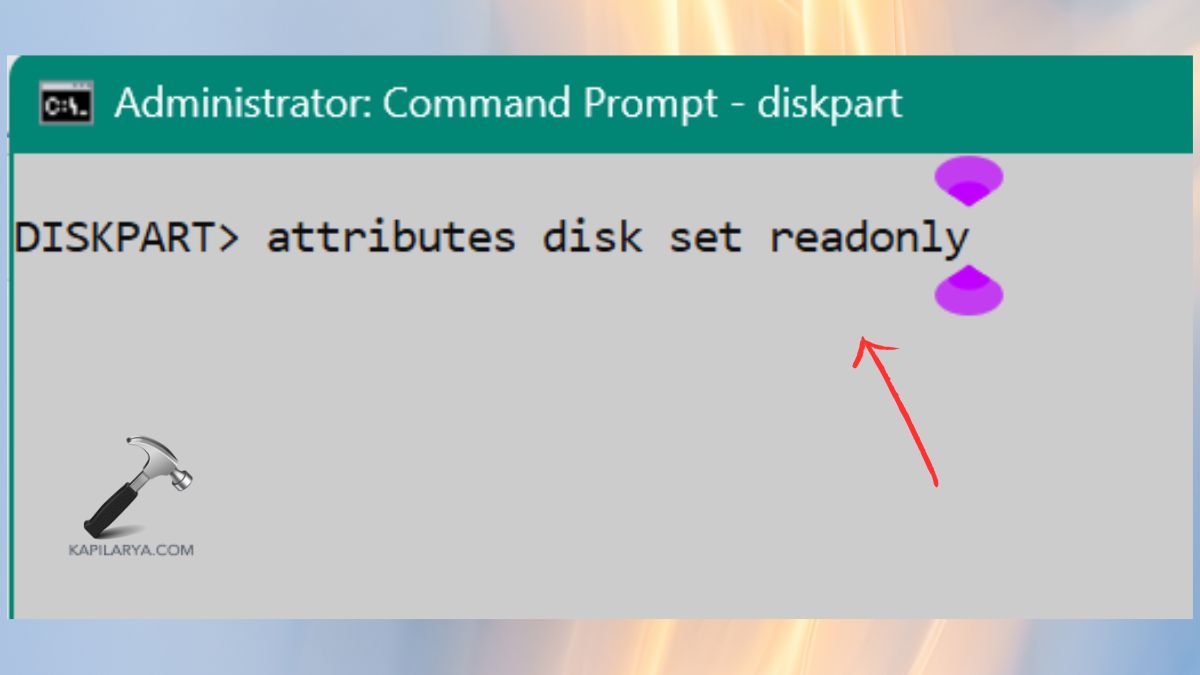
Done! Your disk now has complete write protection.
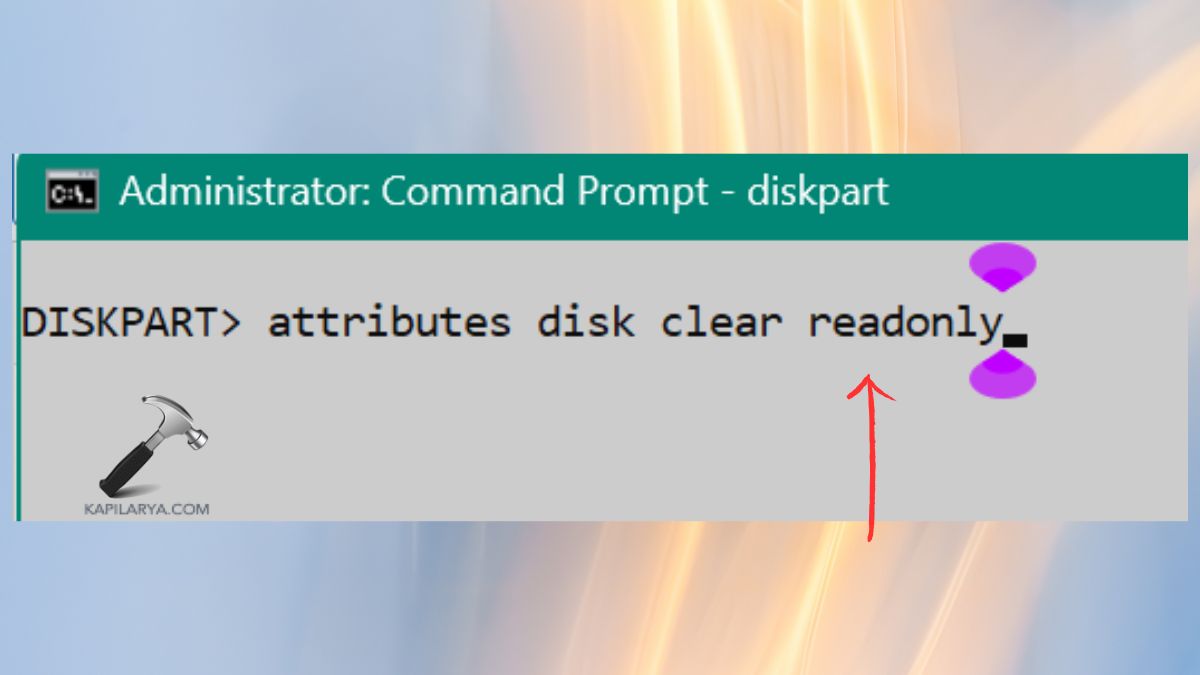
6. This command would then reverse it back later.
attributes disk clear readonly
Way 2: Protect Your USB or SD Card with Its Physical Lock Switch
It is the easiest way and, by the way, it is malware-free as it is hardware.
1. Remove the SD card or USB.
2. Find a small slide power switch ( Sometimes has LOCK printed on it).
3. Flick the bottom and enable write protection.
4. Re-insert the device into your computer.
This is what is meant by the lock; no software can be used to bypass this lock.
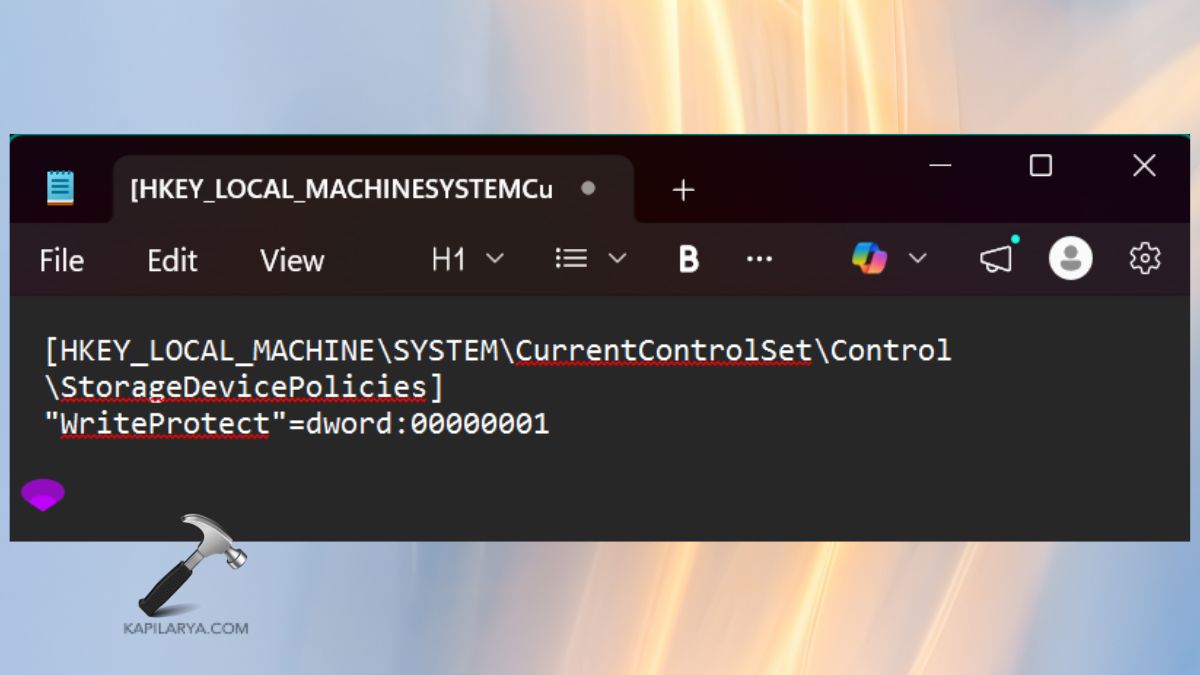
Way 3: Enable USB Write Protection Using a REG File
The technique is ideal through a REG file.
1. Open Notepad.

2. Paste this code.
[HKEY_LOCAL_MACHINE\SYSTEM\CurrentControlSet\Control\StorageDevicePolicies]
"WriteProtect"=dword:00000001
3. Save it as this file name “Enable_Write_Protection.reg”.
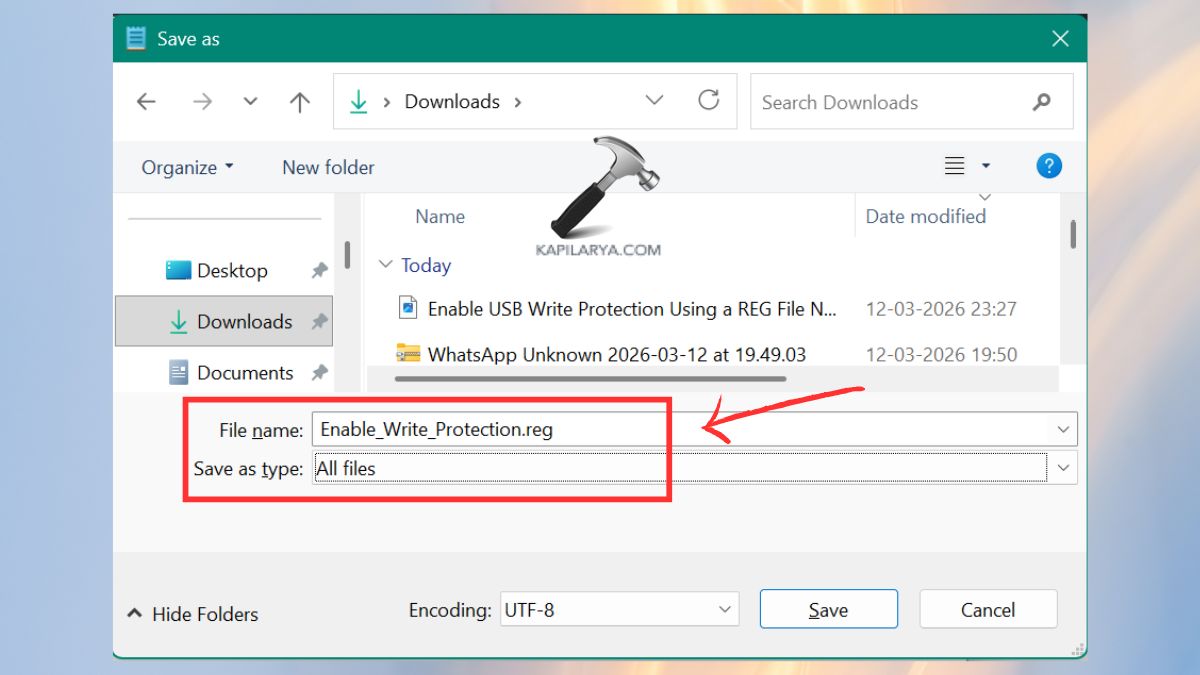
4. Click the file and go into the option of opening it as an administrator. Then, restart the PC.

Way 4: Deny Write Access to All Removable Disks Using Group Policy
Group Policy is potent as it allows imposing rules on the users, which is suitable for an office, shared system or parenting.
1. Click on Windows + R, write this in, and press Enter.
gpedit.msc

2. Navigate.
Computer Configuration → Administrative Templates → System → Removable Storage Access
Locate this entry “Removable Disks: Deny Write Access” and place it in Enabled.
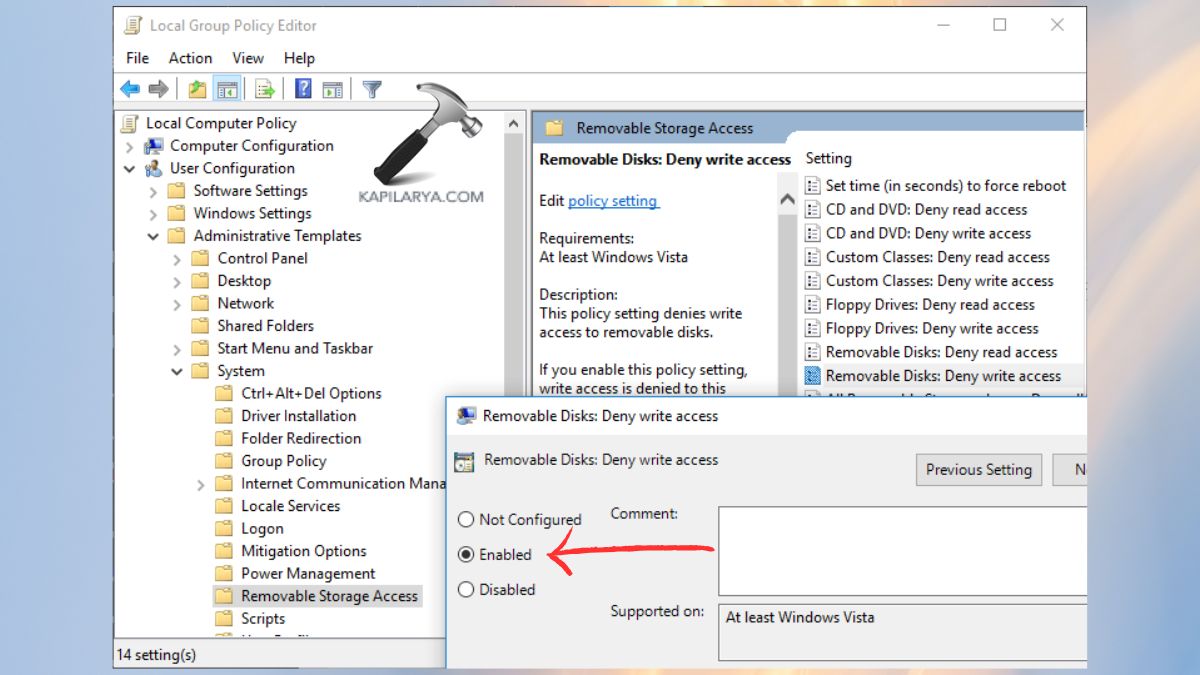
No one now could write to removable drives.
Way 5: Deny Write Access to Removable Drives Not Protected by BitLocker
In case some of your drives are BitLocker-encrypted and not others, then using this technique enables you to have control of which drives can be written on.
1. Launch the Group Policy Editor once again.
2. Navigate to this path.
Computer Configuration > Administrative Templates > Windows Components > BitLocker Drive Encryption > Removable Data Drives
3. Open it “Deny write access to removable drives not protected by BitLocker” and put it on Enabled.
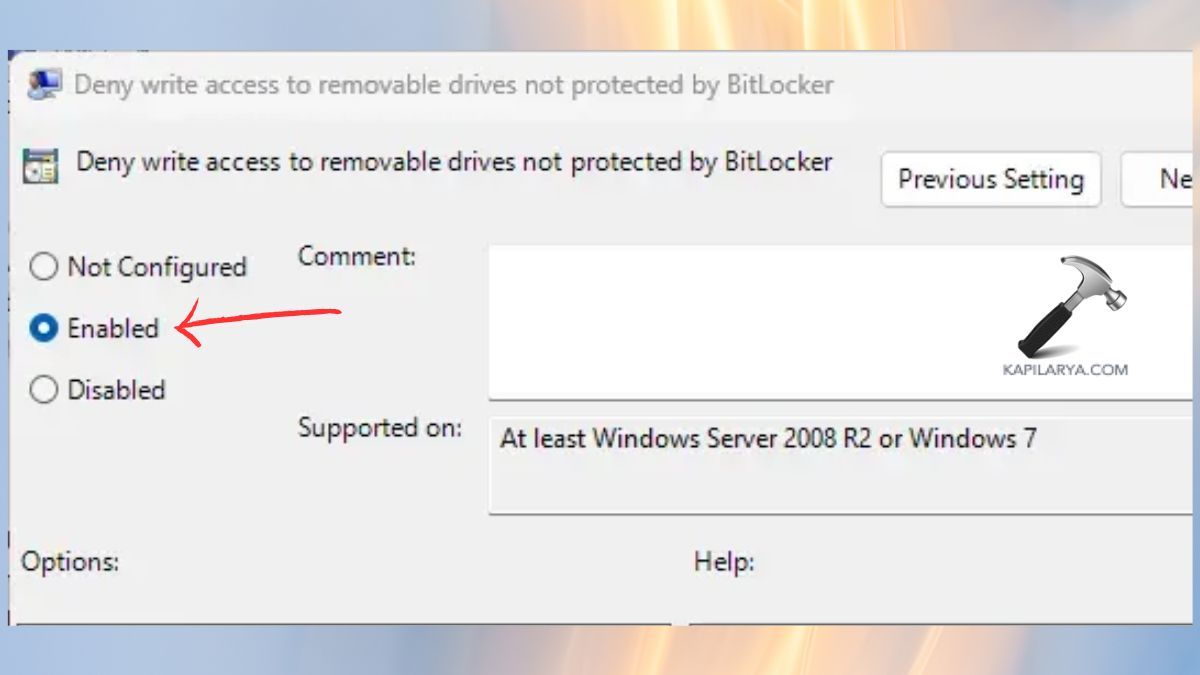
Only to gain access to the devices can now be written encrypted (secure) devices.
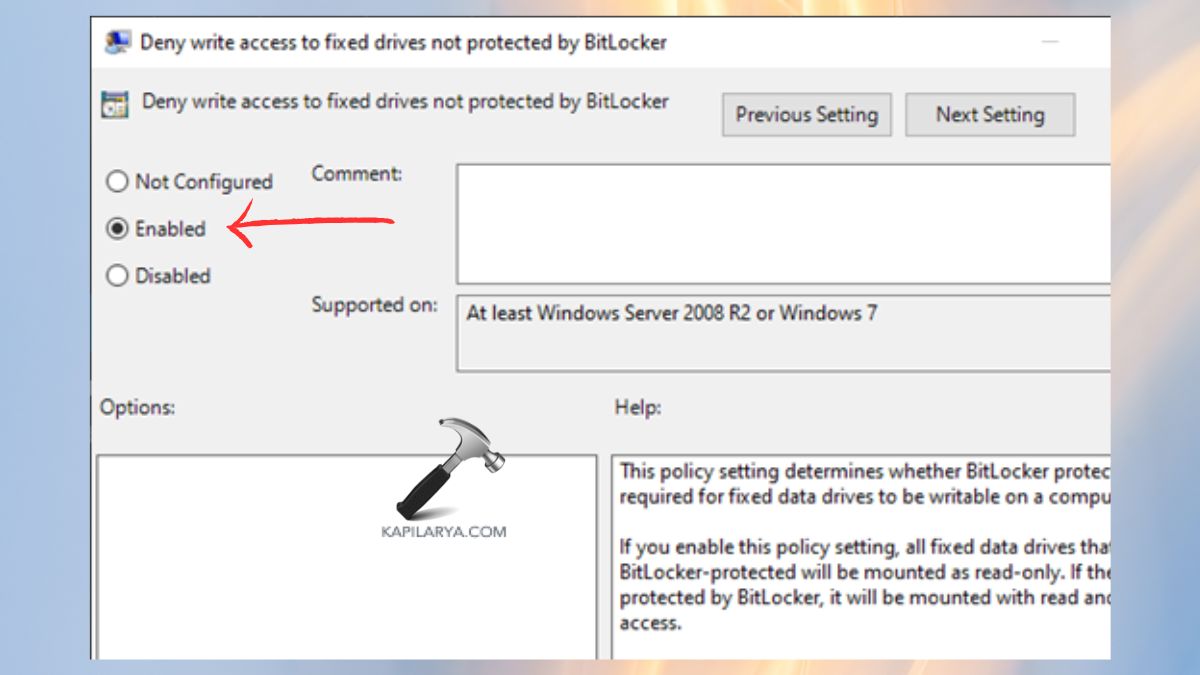
Way 6: Deny Write Access to Fixed Data Drives Not Protected by BitLocker
This process is likened to the previous one except that it applies to internal drives.
1. Again, start the Group Policy Editor. Follow the path.
Computer Configuration > Administrative Templates > Windows Components > BitLocker Drive Encryption > Fixed Data Drives
2. Select this “Deny write access to fixed drives not protected by BitLocker” and Enable it. Internal drives, without protection, are no longer alterable now.
Way 7: Enable Write Access to Removable Disks Using a REG File
The technique is ideal where you do not wish to get your hands to editing the Registry or Group Policy settings.
1. Open Notepad again.
2. Paste this write-access enabling Registry script. This is enough to change WriteProtect to 0, thereby fully unlocking the write option to all removable disks.
[HKEY_LOCAL_MACHINE\SYSTEM\CurrentControlSet\Control\StorageDevicePolicies]
"WriteProtect"=dword:00000000
Click Save As (file) and make a name by choosing All files in the drop-down.
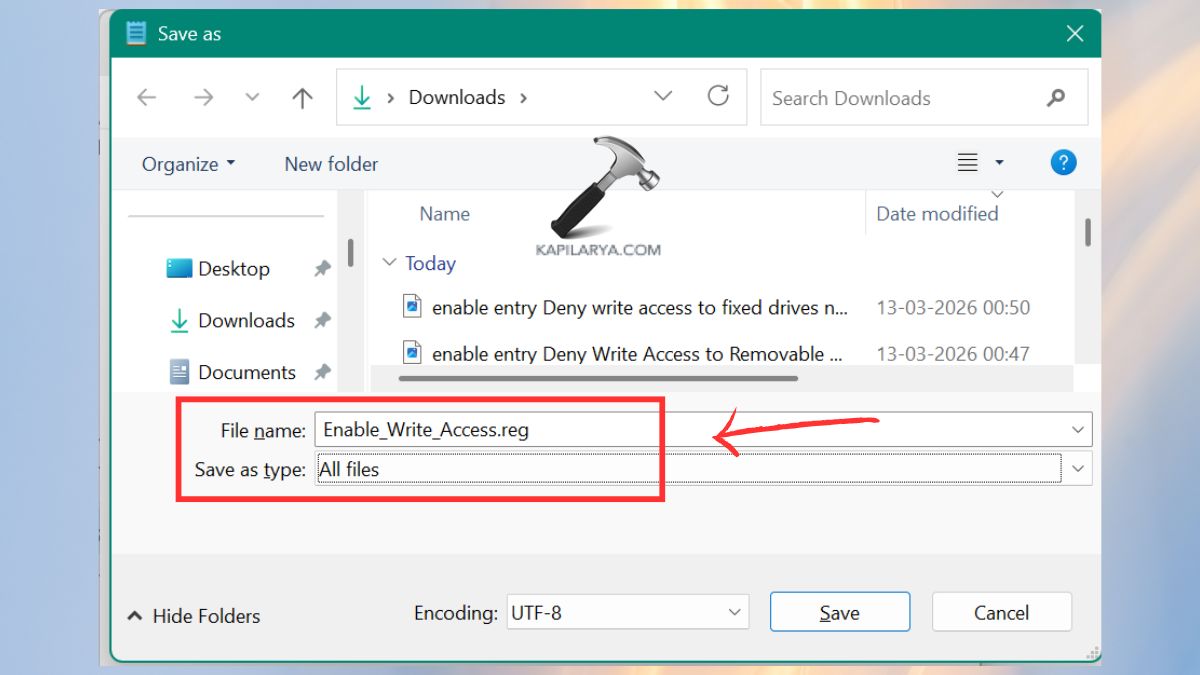
3. Open the REG file through a double click. When a change is required to be made on the Registry, choose “Yes” with a tap. There is a confirmation message that shows that the keys have been added.
Pro Tips to Boost Data Security in Windows 11
- Encrypt the drive with BitLocker against full disk drives. It safeguards your data in case of theft of your drive.
- Before writing protection is applied, make a backup. In case you ever have to make alterations to the files.
- Use maximum protection Policy + Diskpart. This develops a multi-layer security boundary.
- Apply the use of an antivirus to prevent infection by the USB. Primarily on the common systems or office facilities.
Frequently Asked Questions (FAQs)
Can write protection stop viruses from modifying my USB?
Yes! Write protection eliminates any file addition, removal, or modification, including malware.
Why can’t I remove write protection?
There are those devices that cannot be reset by the manufacturer or are broken.
Does write protection affect reading files?
No, it is still possible to open, view and copy files, only it does not allow writing.
Is Diskpart write protection permanent?
No, with the appropriate command, one can clear it at any time.
That’s it!