The VMSP (Virtual Machine Service Process) error usually appears when starting a virtual machine in Hyper-V on Windows 11. When the service fails to start, your virtual machines may refuse to launch or display errors related to virtualization services.
Page Contents
Fix: The VMSP Service Failed to Start in Windows 11
This problem can occur due to corrupted Hyper-V components, disabled virtualization features, driver conflicts, or corruption of system files. Fortunately, several fixes can help restore the VMSP service and get Hyper-V working again.
Fix 1: Reinstall Hyper-V
A misconfigured Hyper-V installation is one of the most common causes of this error.
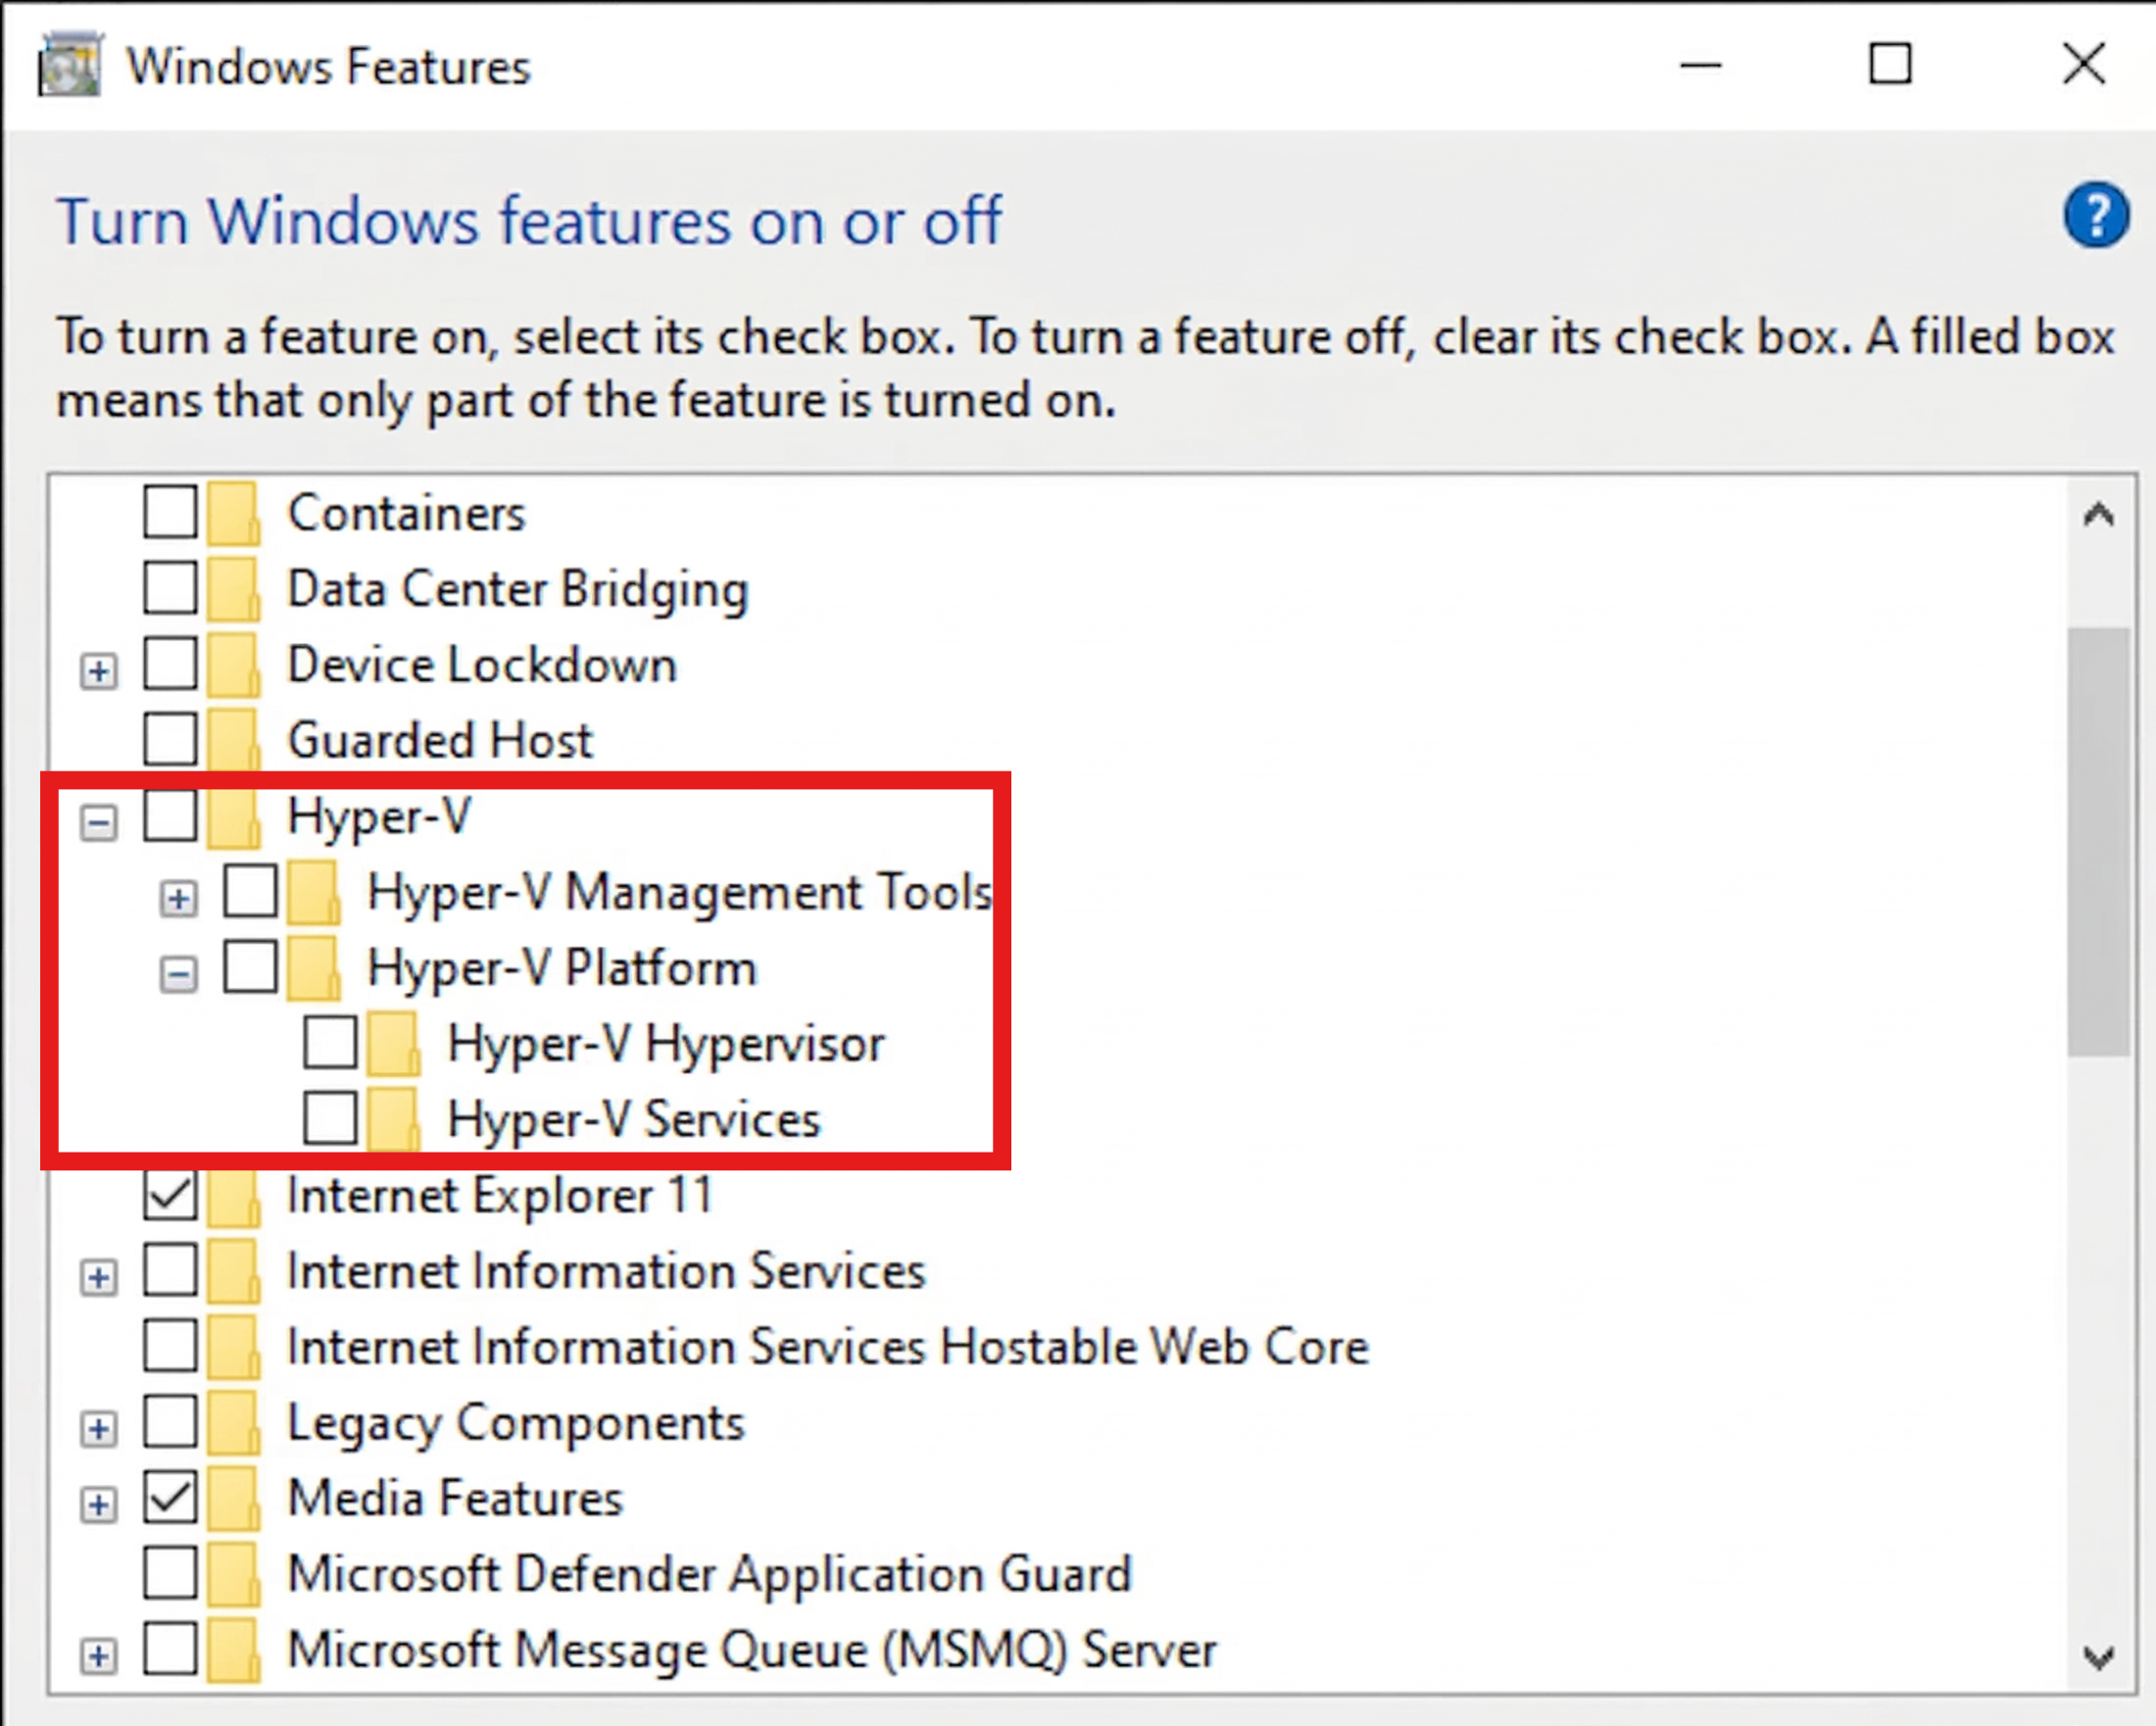
1. Press Win + R, type optionalfeatures, and press Enter.
2. Uncheck Hyper-V and click OK.
3. Restart your PC.
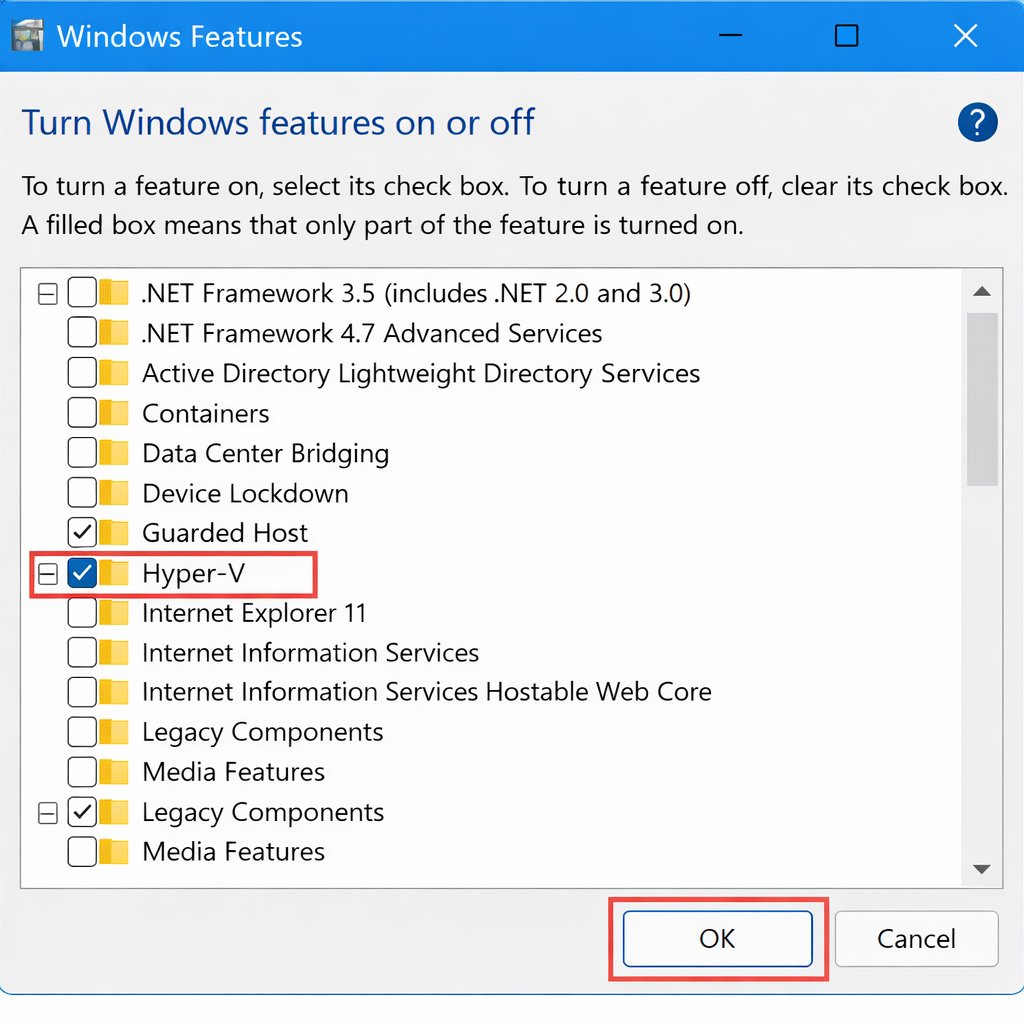
4. Open the Windows Features window again.
5. Re-enable Hyper-V and restart the computer.
Reinstalling Hyper-V refreshes its services and can fix configuration issues that prevent the VMSP service from starting.
Fix 2: Ensure Virtualization Is Enabled in BIOS
Hyper-V requires hardware virtualization support.
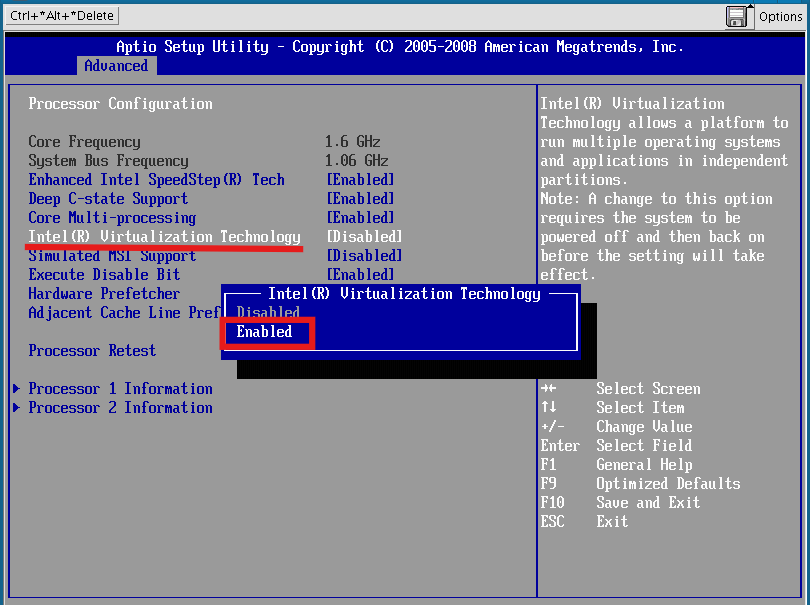
1. Restart your PC and enter the BIOS/UEFI settings (usually by pressing F2, Del, or Esc during startup).

2. Look for Intel VT-x, AMD-V, or Virtualization Technology.
3. Enable it if it is disabled.
4. Save changes and reboot.
If virtualization is turned off, Hyper-V services such as VMSP may fail to start.
Fix 3: Update System Drivers and Firmware
Outdated chipset or system drivers can interfere with virtualization services.
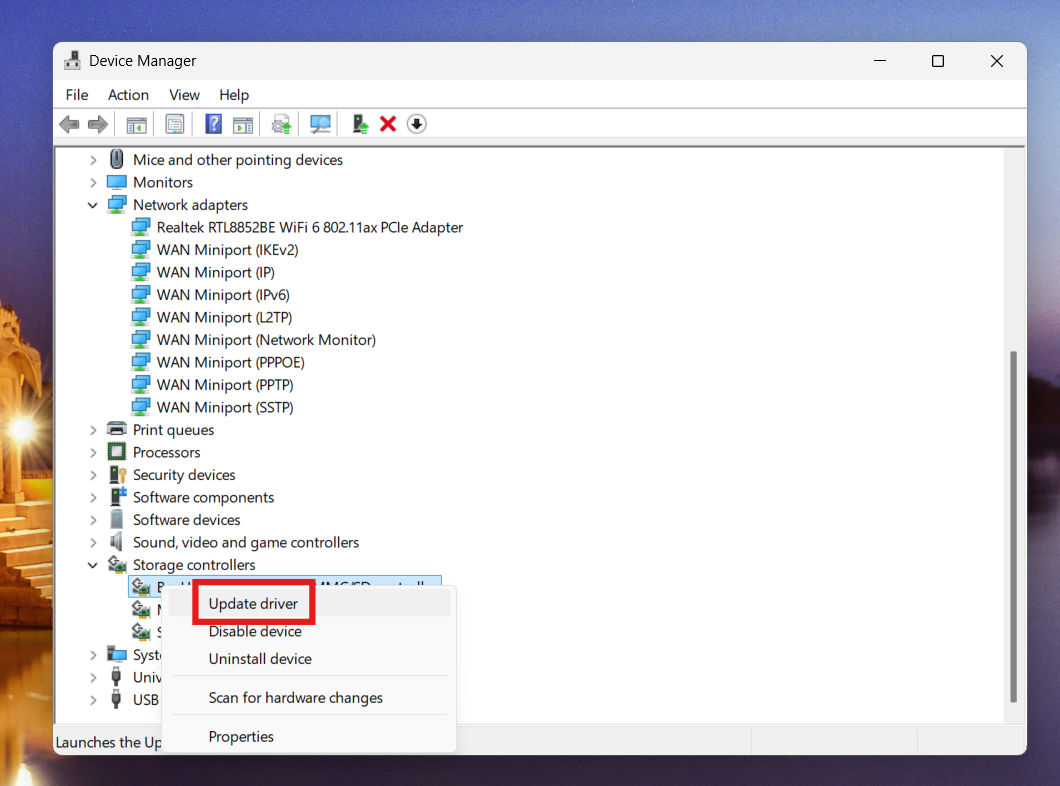
1. Open Device Manager.
2. Update drivers for chipset, network, and storage controllers.
3. Install the latest BIOS or firmware updates from your PC manufacturer if available.
Updated drivers ensure compatibility with Hyper-V and virtualization components.
Fix 4: Check Hyper-V Services to fix the VMSP Service Failed to Start error
Certain services must be running for Hyper-V to work properly.
1. Press Win + R, type services.msc, and press Enter.
2. Locate these services:
- Hyper-V Virtual Machine Management
- Hyper-V Host Compute Service
3. Ensure they are Running and set to Automatic.
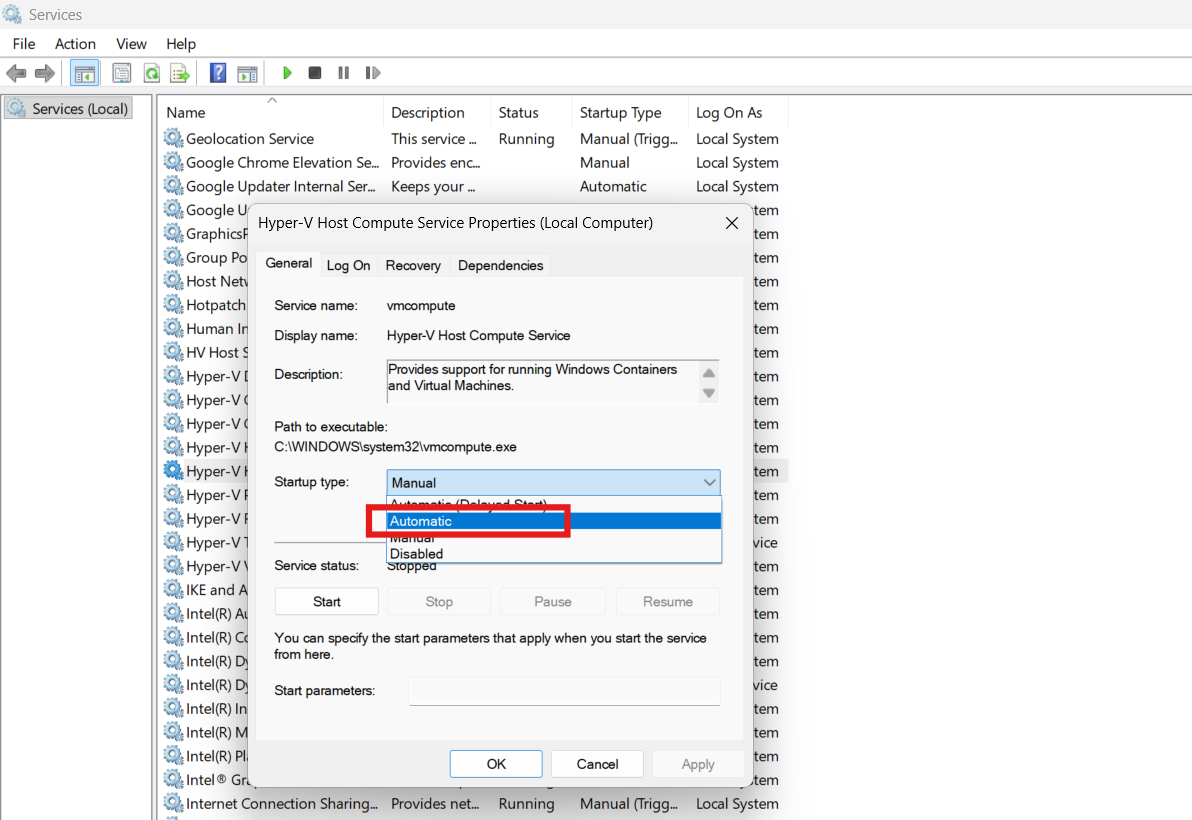
If these services are stopped, the VMSP process may fail to launch.
Fix 5: Run SFC and DISM Scans to fix the VMSP Service Failed to Start error
Corrupted system files may prevent virtualization services from starting.
1. Open Command Prompt (Admin).
2. Run:
sfc /scannow
3. After it finishes, run:
DISM /Online /Cleanup-Image /RestoreHealth
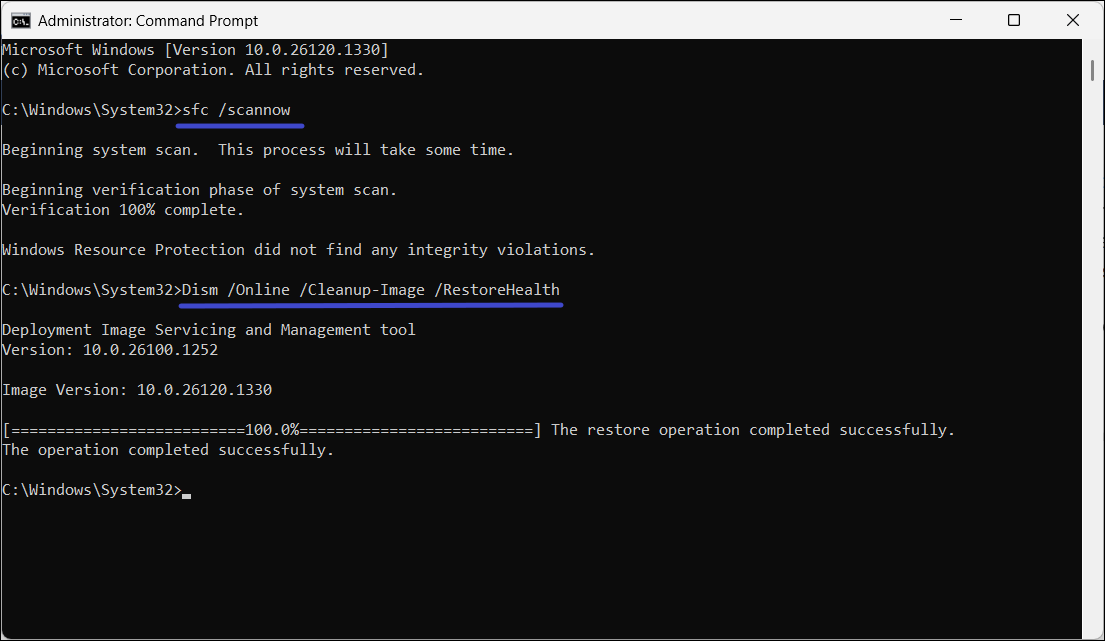
These tools repair damaged Windows system files that may affect Hyper-V services.
Fix 6: Restart the PC and Check Event Logs
Sometimes the error occurs due to temporary system resource issues.
1. Restart your computer.
2. Open Event Viewer and check Hyper-V-related logs for detailed errors.
3. System logs often reveal the exact reason the VMSP service failed to start.

The VMSP service failed to start error in Windows 11 is usually caused by Hyper-V misconfiguration, disabled virtualization features, outdated drivers, or corrupted system files.
Reinstalling Hyper-V, enabling virtualization in BIOS, ensuring required services are running, updating drivers, and repairing system files typically resolve the issue and allow your virtual machines to run normally.
Do let us know via your comments, if issue still persists and we’ll be happy to help you.