
Web Proxy Auto-Discovery (WPAD) is a protocol designed to automatically configure web proxy settings for devices on a network. While it can be a convenient tool for configuring web proxies in large environments, it has also been identified as a potential security risk due to the possibility of WPAD spoofing attacks. As a result, it may be necessary to disable WPAD in Windows 11 to prevent these types of attacks from occurring. In this article, we will discuss the methods you can take to disable WPAD in Windows 11, providing you with the information you need to keep your system secure.
Page Contents
Disable Web Proxy Auto-Discovery (WPAD) in Windows 11
Method 1: Stop WPAD using a host file entry
- Open Windows Explorer by pressing the Win + E keys together.
- Go to %systemdrive%\Windows\System32\Drivers\etc\hosts.
- Create the following entry for WPAD in the host file: 255.255.255.255 wpad.
Method 2: Registry method to disable Web Proxy Auto-Discovery (WPAD) in Windows 11
- Press Win + R to open the Run prompt and type regedit.
- Then press Shift + Enter keys.
- Registry editor will open and navigate to the following path:
Computer\HKEY_LOCAL_MACHINE\SYSTEM\CurrentControlSet\Services\WinHttpAutoProxySvc
- Click on Start and set the value to 4 in the Edit DWORD window. Click OK.
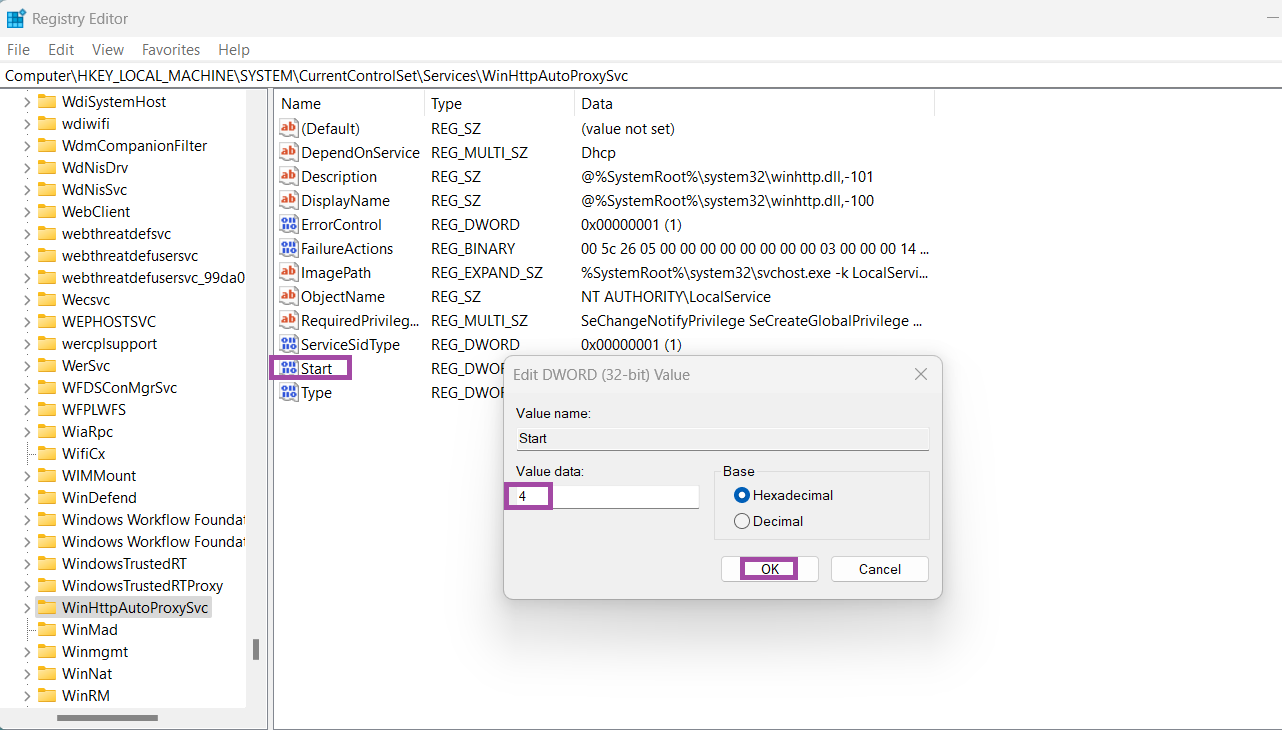
- Next, close the Registry Editor window and reboot your system.
Method 3: Disable WINS/NetBT name resolution
- Open Settings and click on Network & Internet.
- Click on Advanced network settings > More network adapter options.

- Control panel window will open. Double-click on the network adapter that is used to connect to the Internet.
- Select Properties and double-click on Internet Protocol (TCP/IP).

- Click on Advanced > WINS tab > click on the radio button of Disable NetBIOS over TCP/IP and click OK.

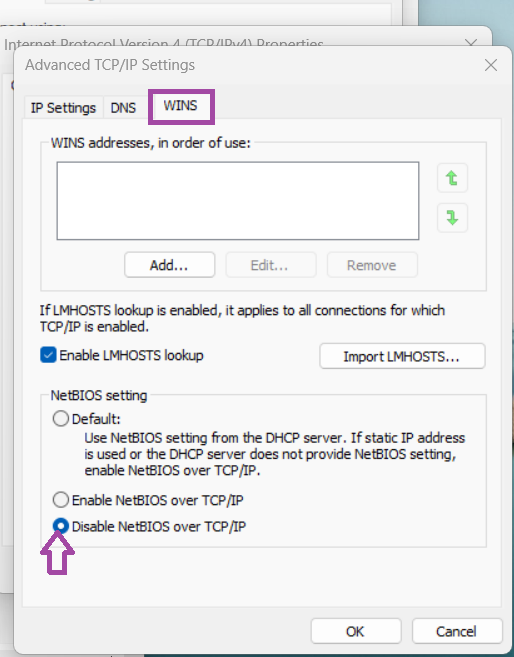
- Restart your system to apply changes.
Method 4: Group Policy Editor
- Press Win + R to open the Run prompt. Type gpedit.msc and press Enter.
- Go to the following path in GPO:
User Configuration > Administrative Templates > Windows Components > Internet Explorer
- Double click on policy Disable caching of Auto-Proxy scripts.

- Click Enable > OK.
Hope this was helpful!


![The mapped network drive could not be created [Detailed fix]](https://www.kapilarya.com/assets/Network-Drive-768x511.jpg)

![Stop sharing a folder in Windows 11 [Guide]](https://www.kapilarya.com/assets/Network-768x522.png)
No more wpad spam in Pi-Hole. Thanks for the guide.