
The “The request is not supported” error on Windows 11/10 typically indicates that the operating system encountered an issue when trying to execute a particular command or perform a specific action. This error message can arise due to various reasons, including incompatible drivers, network connectivity issues, or corruption in system files. In this guide, we will explore the common causes of the error and provide solutions to fix the request is not supported error on Windows 11/10 error.

Page Contents
Fix: ‘The request is not supported’ error on Windows 11/10
The error can be triggered by various factors. Some common causes include:
- Incompatible or Outdated Drivers: Outdated or incompatible drivers, especially for hardware components like network adapter, can lead to this error.
- Network Issues: Connectivity problems, both with local networks and the internet, may result in an error message.
- System File Corruption: Corruption in critical system files can disrupt the execution of certain commands, causing the error to occur.
- Registry Errors: Issues within the Windows registry, such as incorrect or missing entries, might contribute to the error.
- Software Conflicts: Interactions between different software applications or security programs can sometimes lead to conflicts, triggering this error.
In the following section, we will explore step-by-step solutions to resolve the error:
Method 1: Start Windows in Safe Mode
Here’s an easy way to solve the problem: Start your Windows in Safe Mode. Only the most important parts of your computer will run when you do this. This helps you figure out if a driver causes the issue or if it’s a problem with Windows itself.
Method 2: Run Windows Store Apps Troubleshooter
Windows Store Apps Troubleshooter is a built-in Windows tool that diagnoses and repairs problems with apps downloaded from the Microsoft Store. It identifies issues related to installation, updates, launching, functionality, permissions, and configuration, offering automated fixes or recommendations.
Follow the below steps to run the Windows Store Apps troubleshooter:
1. Open the command prompt and run as administrator.
2. Copy and paste the below command:
msdt.exe /id WindowsStoreDiagnostic

Press Enter.
The above command will analyze and address any issues related to Windows Store apps.
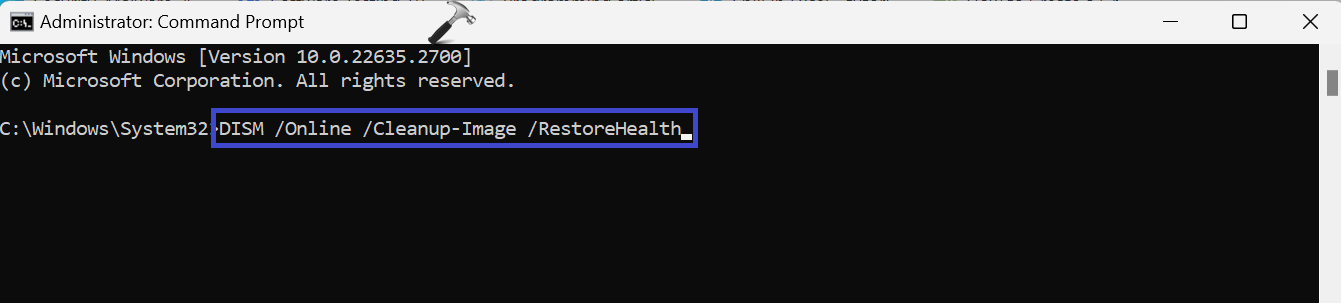
Method 3: Run DISM Scan
DISM (Deployment Image Servicing and Management) scan is a command-line tool that services and manages Windows images, including those used for deployments, recovery, and installations. It can check and repair corruption in the component store, where essential system files are located.
Here’s how you do a DISM scan:
1. Open the command prompt and run as administrator.
2. Copy and paste the below command:
DISM.exe /Online /Cleanup-Image /Restorehealth
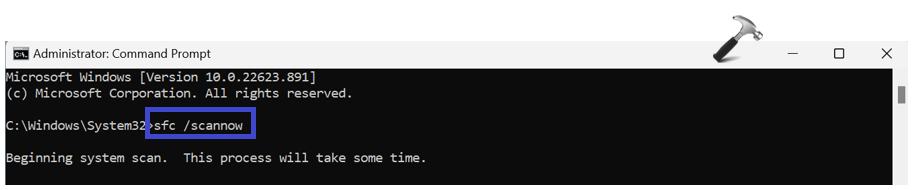
Method 4: Run SFC Scan
SFC (System File Checker) scans and repairs protected system files. It compares these files with cached copies and replaces any corrupted or missing ones with the healthy versions.
Here’s how to do an SFC scan:
1. Open the command prompt and run as administrator.
2. Copy and paste the below command:
sfc /scannow
Method 5: Run CHKDSK Command
CHKDSK (Check Disk) is a system tool built into the Windows operating system. Its primary function is to scan disks (hard drives, SSDs, external drives, etc.) for errors and, optionally, repair them. It helps maintain disk integrity, prevent data loss, and improve performance.
Here are the steps to run the CHKDSK command:
1. Open the command prompt and run as administrator.
2. Copy and paste the below command:
chkdsk /f X:

- /f is a switch that tells Chkdsk to fix any errors it finds.
- x: is the drive letter of the drive that you want to check. In the image, the drive letter is x:.
3. Restart the PC.
That’s It!


