Need to clear out disk space when you are getting limited storage space in the Windows 11 PC?
Over time, however, the downloads, photos, videos, apps, and unseen system files will just creep up, and soon enough, you will be left with a slow performance and that annoying notification of the Low Disk Space.
Nevertheless, there is no need to panic since it is simpler to release drive space in Windows 11, as it may appear. Regardless of whether you are a regular user or spend the whole day at your PC, these clever, easy-to-follow tips would assist you in recovering storage and increasing speed in your system within seconds.
So, it is time to brew a cup of coffee and refresh your PC!
Page Contents
Benefits to Free Up Drive Space in Windows 11
Frequently emptying drive space in Windows 11 is not only a way to avoid receiving storage notices but may, in fact, make your best computer run smoother, quicker, and better. Here’s why it’s worth your time-
- In case you have junk files in your drive, then your system will slow down. Windows is able to access data more quickly by releasing space, in turn, creating a faster boot-up, a shorter time between launching apps, and less challenging multitasking.
Go through this step-by-step guide to easily remove junk files in Windows 11.
- A lack of sufficient storage may result in the failure of updates or errors in the systems. Clarity enables a smooth updating process, the installation of apps, and the backing up of data.
- Deleting unnecessary files or apps can help you keep your digital workspace clean to get organized and work on what is indeed significant.
- Periodic maintenance ensures that your personal information remains undiscovered by a third party or accidentally.
In a nutshell, drive space liberation in Windows 11 enhances speed, performance and reliability. Also, it provides a new day to your PC and keeps it as fast and efficient as ever.
How to free up drive space in Windows 11
No advanced software installation or understanding is required to clear up the drive space in Windows 11. With Windows 11 in-built services such as Storage Sense, Cleanup Recommendations, and Disk Cleanup, you can maintain your system free of clutter and lightning fast.
Method 1: Use Storage Sense to Automatically Manage Space
The one feature that a Windows 11 user should enable is surely Storage Sense. Consider that it is your personal digital housekeeper; it automatically removes junk files, Temp files, and Recycle Bin messes to keep the house tidy without you even picking up a finger.
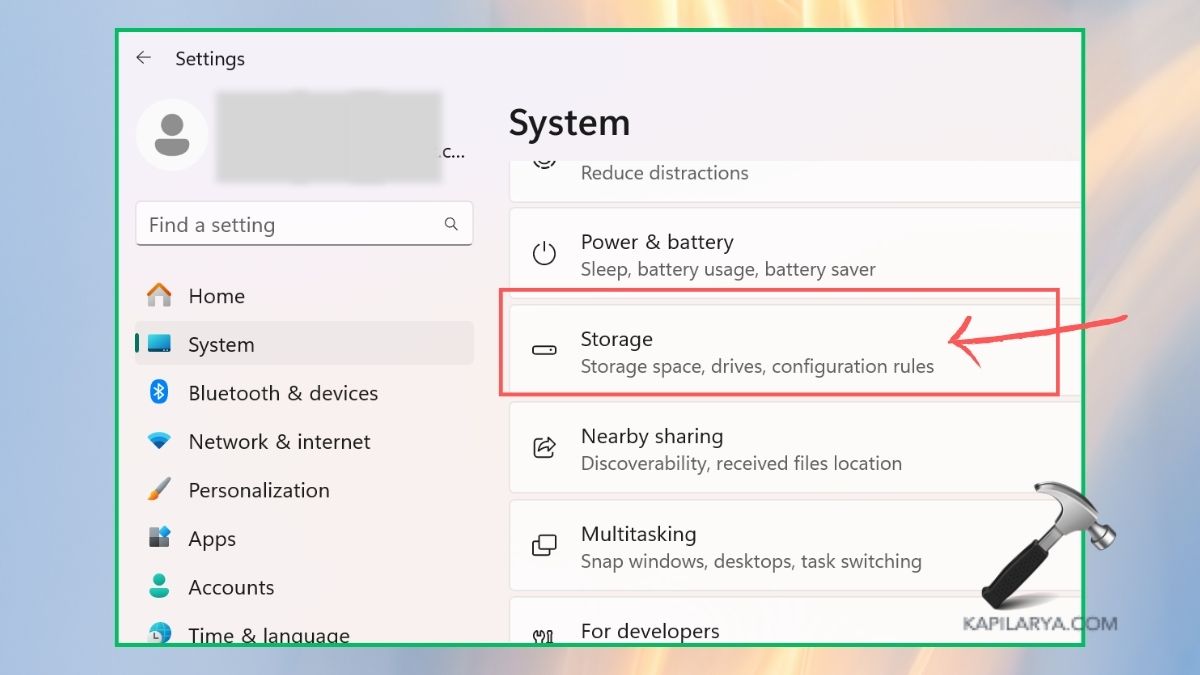
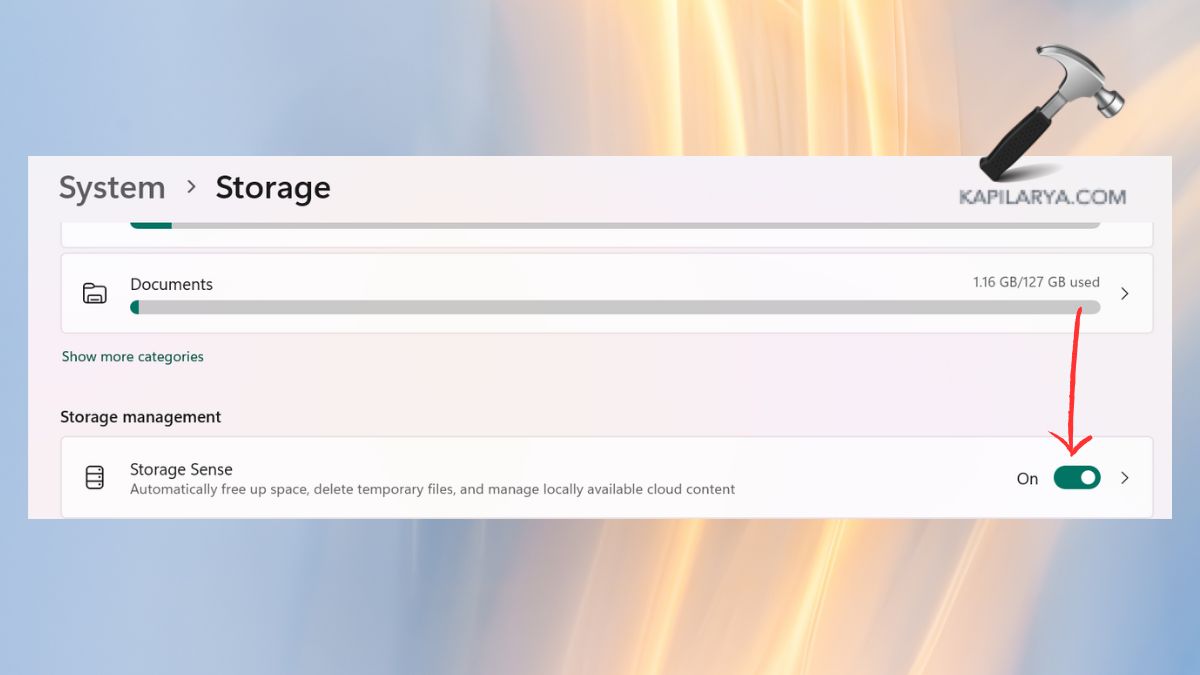
1. Open Settings app, then go to System > Storage.
2. Turn on Storage Sense. Click storage sense options to set it to clean daily, weekly, or monthly.
3. Select what to be automatically deleted: temporary files, old downloads, and so on.

After this one step is fulfilled, Storage Sense then operates quietly in the background to ensure the drive is always fresh and clean.
Method 2: Use Cleanup Recommendations to Free Up Drive Space
Cleanup Recommendations is one of the features that people tend to disregard in Windows 11. It is as if it were some intelligent helper identifying what files you may safely delete.
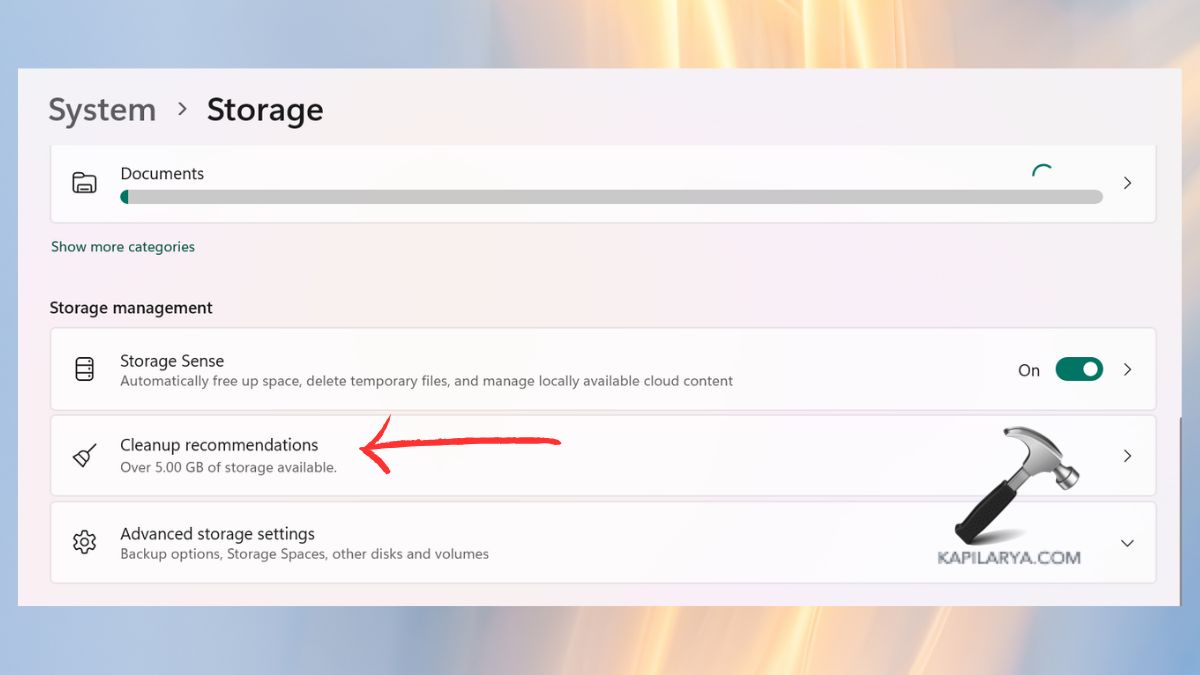
1. Once again, enter Settings > System > Storage.
2. Click Cleanup Recommendations.
3. Check out the list of recommended deletions (temporary files, big/unused files, etc.). Click Clean up.
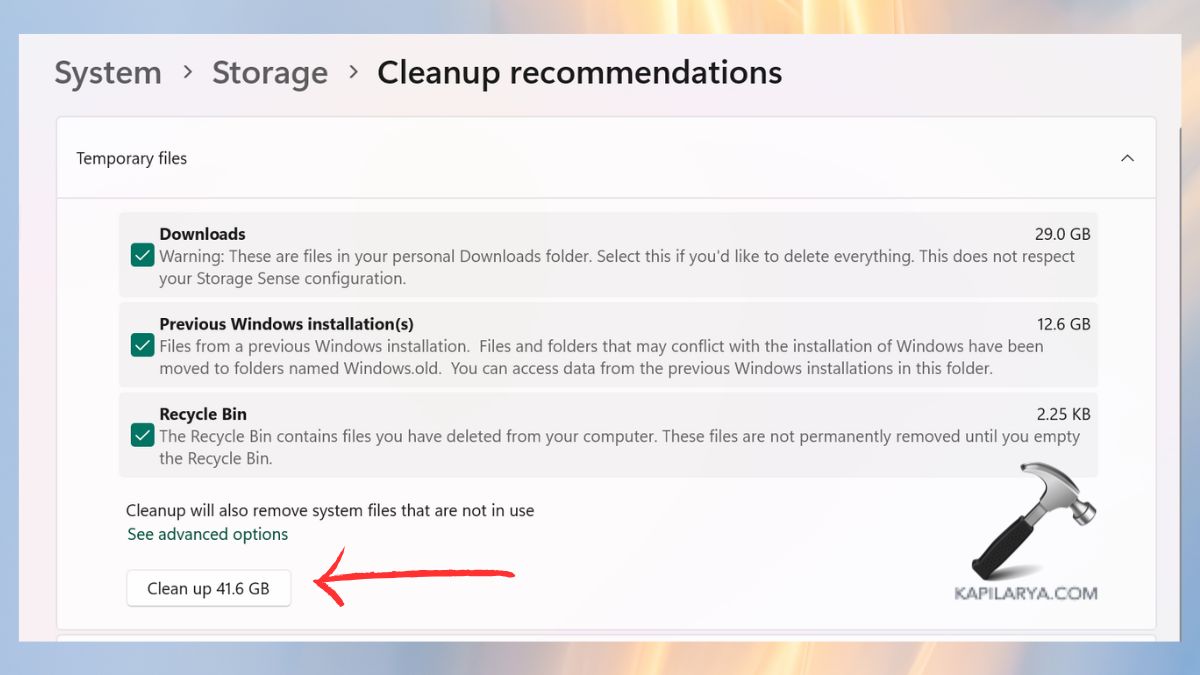
This is a great attribute, as you will be getting rid of unwanted files with no risks, no confusion.
Method 3: Uninstall Apps You Don’t Use Anymore
We download software, such as trial versions of programs, games, or photo editors that we used before. These are capable of consuming gigabytes of precious space silently.
1. Click on Settings > Apps > Installed apps.
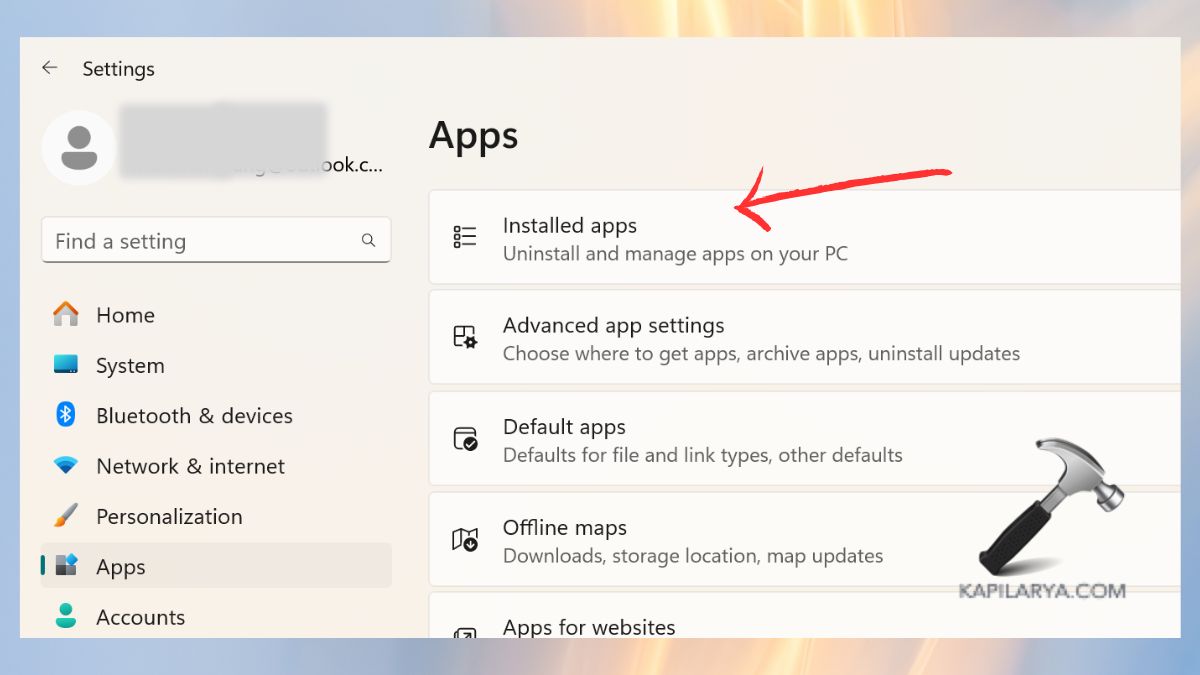
2. Sort available Storage by Size to locate the largest storage hogs. Click on three dots next to an app > Choose the option Uninstall.

Such an approach by itself can liberate tens of gigabytes from the majority of systems.
Method 4: Move Personal Files to External or Cloud Storage
Photos, videos, and downloads are known to be the largest behind low disk space. Rather than emptying them, transfer them to a separate drive or cloud storage so that they are secure and clear up your PC.
1. Your Best Storage Options-
a. External USBs or portable HDDs are ideal for huge files.
b. Many cloud options available on the Internet include OneDrive, Google Drive, and Dropbox to reduce their burden on a hard drive.
c. Network Drives are also ideal to use when one is at work or sharing a project.
2. To Move Files-
a. Open File Explorer. It is possible to pick big folders such as Videos or Downloads.
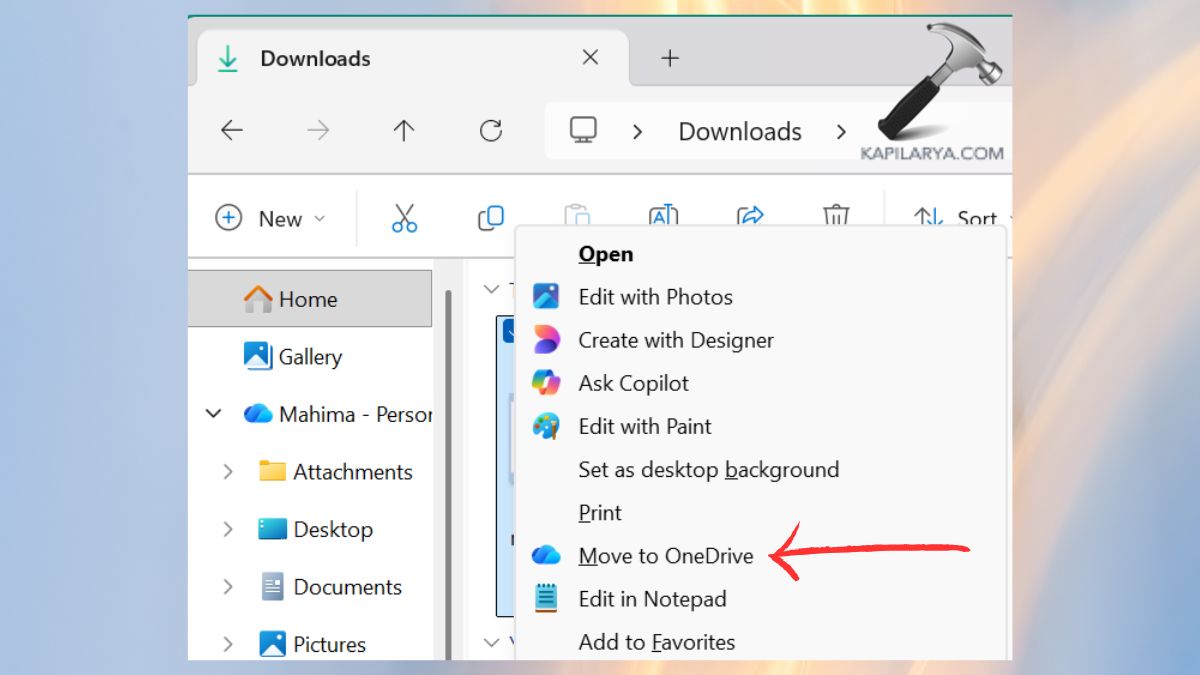
b. Duplicate them or cut them and paste them to your external drive or cloud drive.
You will immediately observe that there is now an additional free space in your Windows 11 drive without any loss of the important stuff.
Method 5: Change Where New Content Is Saved
When your C drive is constantly being filled up, one way of ending this cycle is to change where the new content is saved. This is an auto-complete approach that allows Windows to save new files on a different drive.
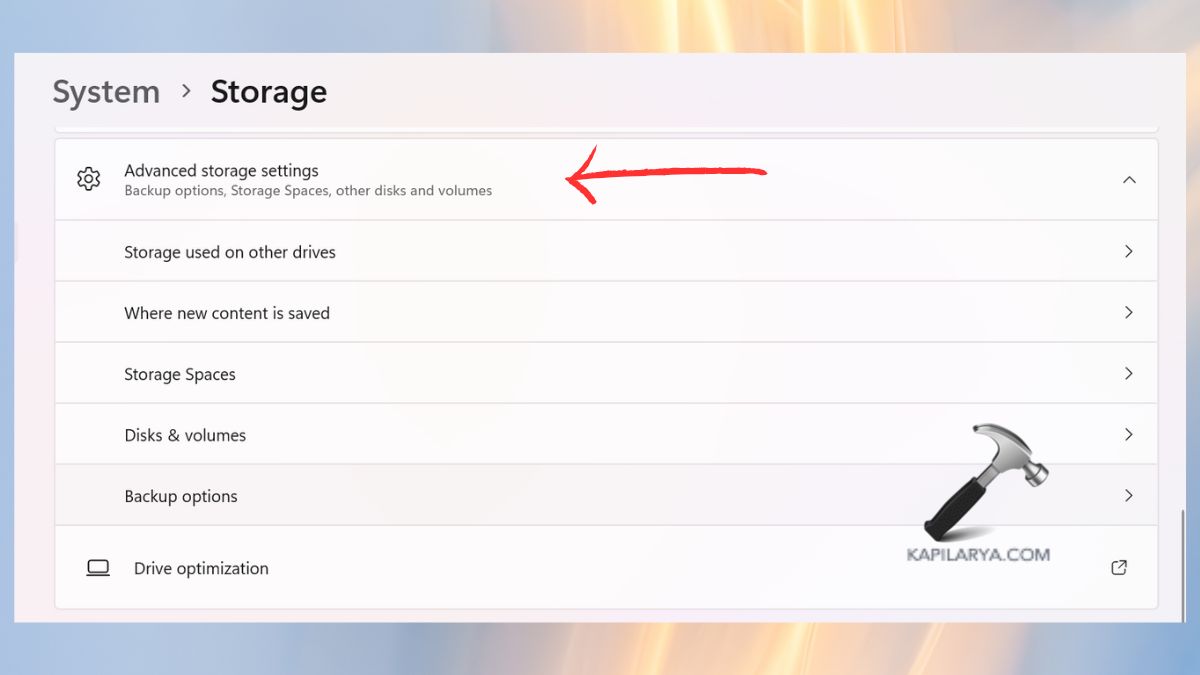
1. Click on Settings > System, then click on Storage.
2. Click where new content is saved – Advanced storage settings.
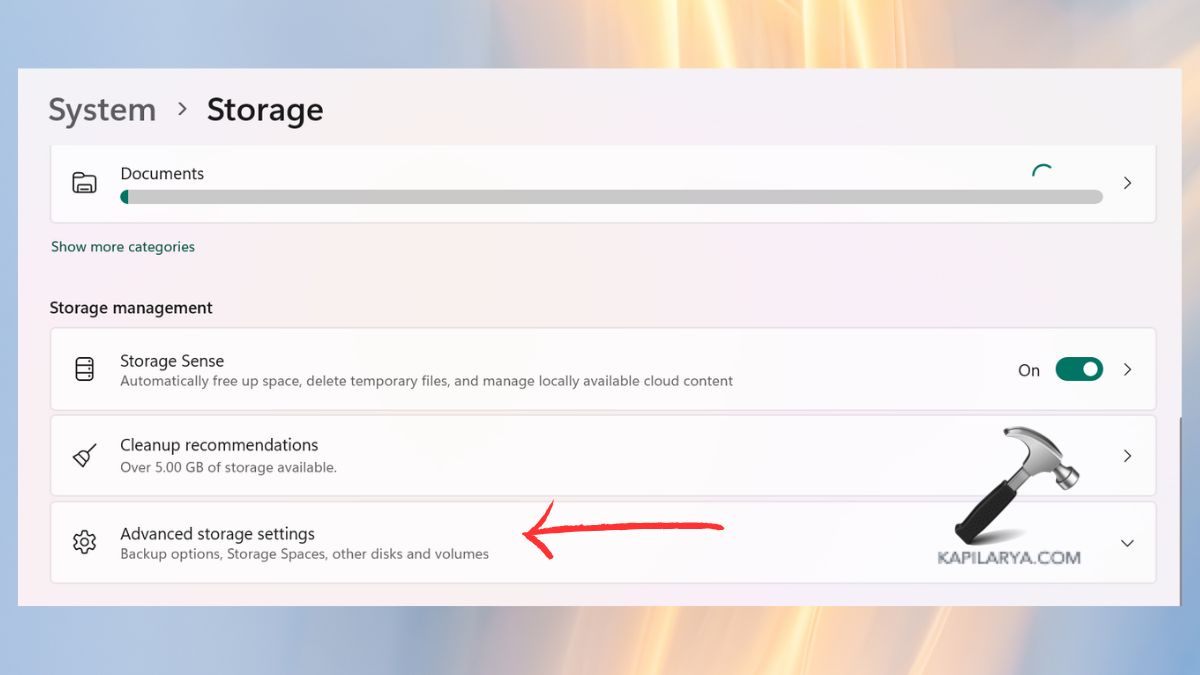
3. Select either storage space, backup options, disk and volumes.
It is a permanent alteration, and it will stop your principal motive from running to choke once more.
Method 6: Clean Up System Restore and Old Windows Files (Bonus Tip)
Such old update files and restore points frequently lurk in your system and take several gigabytes of space. By clearing them, you can provide a tangible increase in the PC performance.
1. In the search engine, type Disk Cleanup and open it.

2. Choose the drive (usually C:). Choose Cleanup Windows Update, Temporary system files, etc. Click Clean up system files.
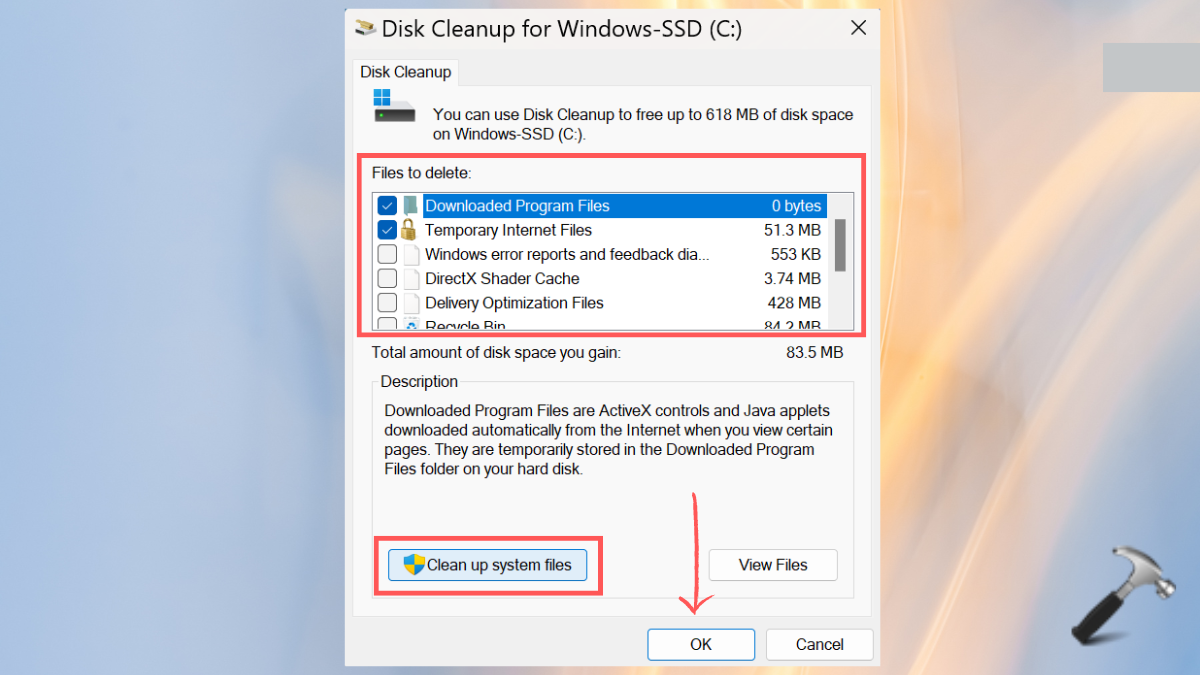
Click OK to delete. Even a simple cleanup can release 5 to 10 GB or even more, as per your update history.
Video guide
You can also refer this video guide for live demonstration of above shared methods:
Frequently Asked Questions (FAQs)
That’s it!