
The AWS CLI (Command Line Interface) lets you interact with AWS services directly from your terminal. Installing and configuring it on Windows 11 is straightforward, but many users face issues with setup, PATH errors, or authentication.
Page Contents
Install and Configure AWS CLI on Windows 11
Installing and configuring it on Windows 11 is straightforward, but many users face issues with setup, PATH errors, or authentication. Below are the 5 most important steps (and fixes) to install and configure AWS CLI correctly.
Fix 1: Install AWS CLI Using Official MSI Installer (Best Method)
The easiest and most reliable way is to use the official installer.
1. Download the installer from: https://awscli.amazonaws.com/AWSCLIV2.msi
2. Double-click the file and follow the setup wizard.
3. Click Next, then Install, and then Finish.
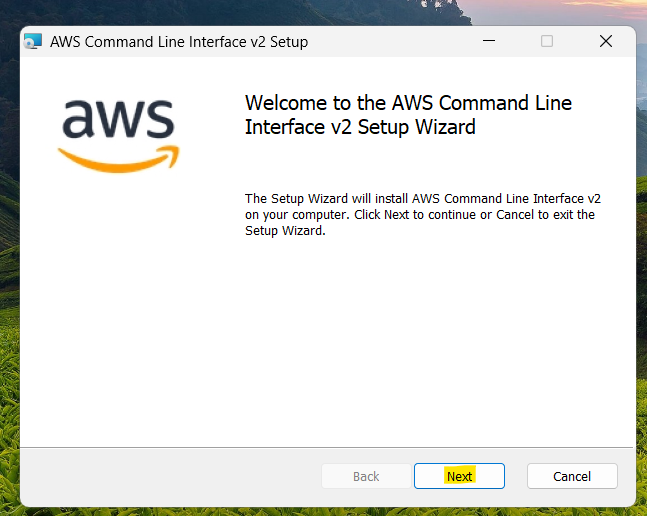
The MSI installer installs AWS CLI globally and handles dependencies automatically.
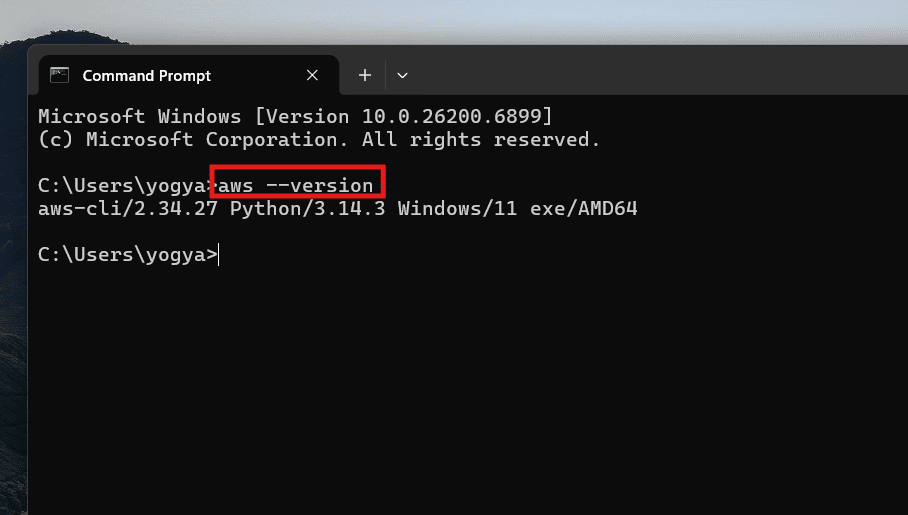
Fix 2: Verify Installation (Important Check)
After installation, confirm AWS CLI is working:
1. Open Command Prompt.
2. Run:
aws --version
If installed correctly, you’ll see version details like aws-cli/2.x. If not, restart your terminal or PC.
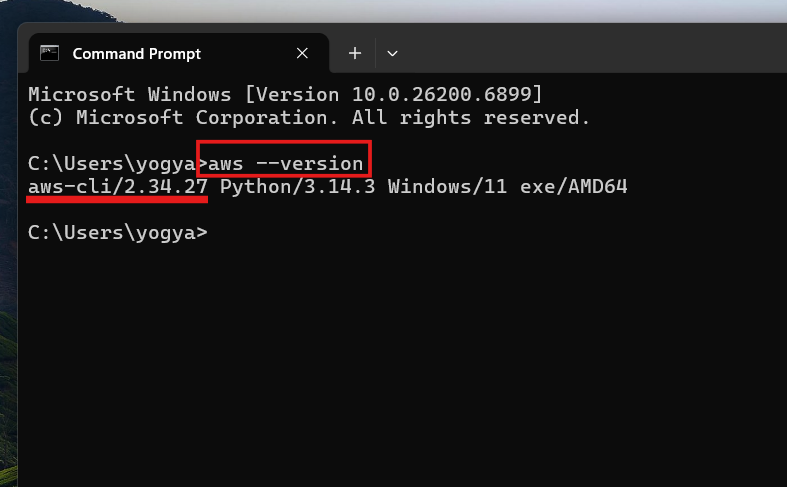
Verification ensures the CLI is properly installed and accessible.
Fix 3: Configure AWS CLI (Authentication Setup)
You must configure credentials before using AWS CLI.
1. Open Command Prompt / PowerShell.
2. Run:
aws configure
3. Enter:
- AWS Access Key ID
- Secret Access Key
- Default region (e.g.,
us-east-1) - Output format (
json)
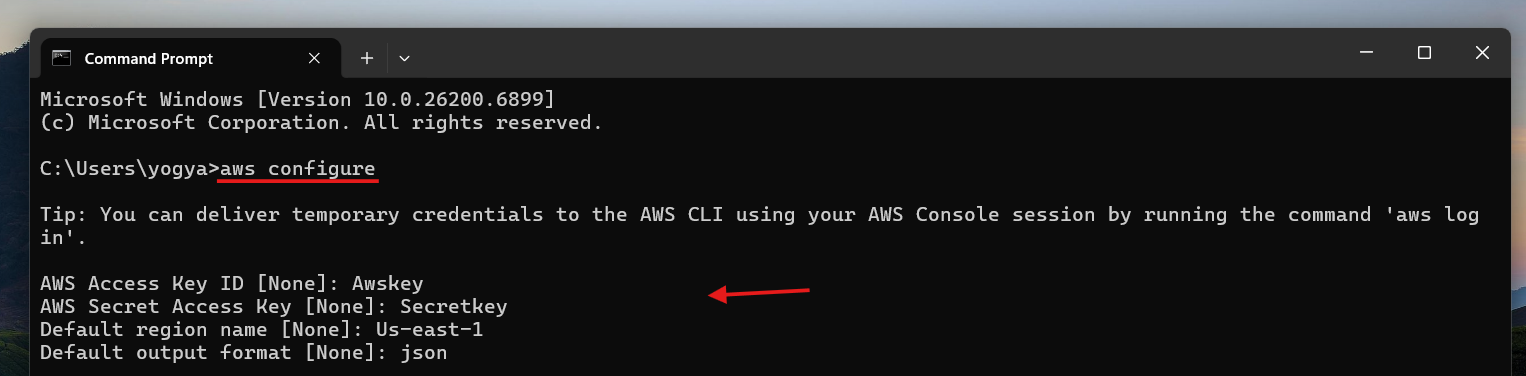
These credentials allow CLI access to your AWS account securely.
Fix 4: Add AWS CLI to PATH (If Command Not Found)
If aws is not recognized:
1. Go to System Properties and click on Advanced. Choose Environment Variables.
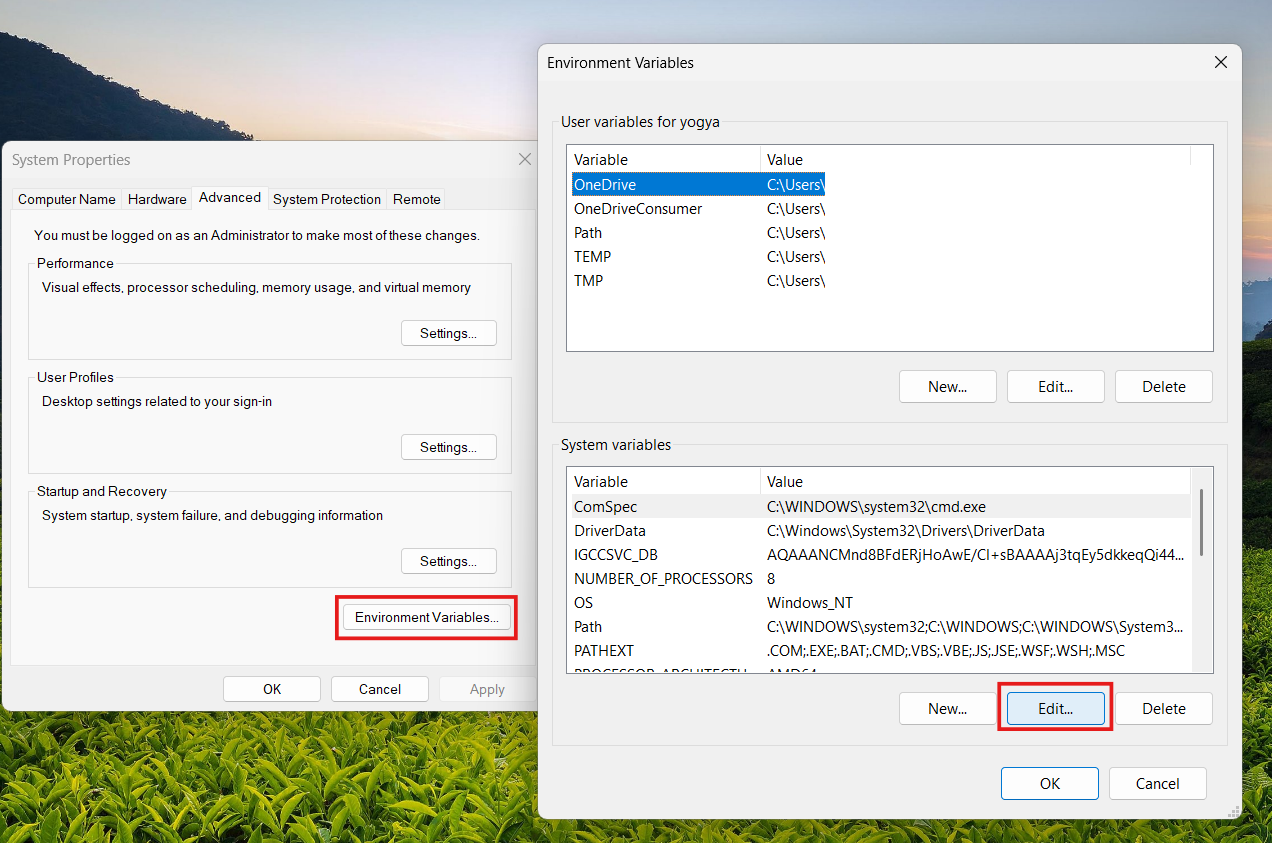
2. Edit Path.
3. Add:
C:\Program Files\Amazon\AWSCLIV2\
4. Click OK and restart Command Prompt.
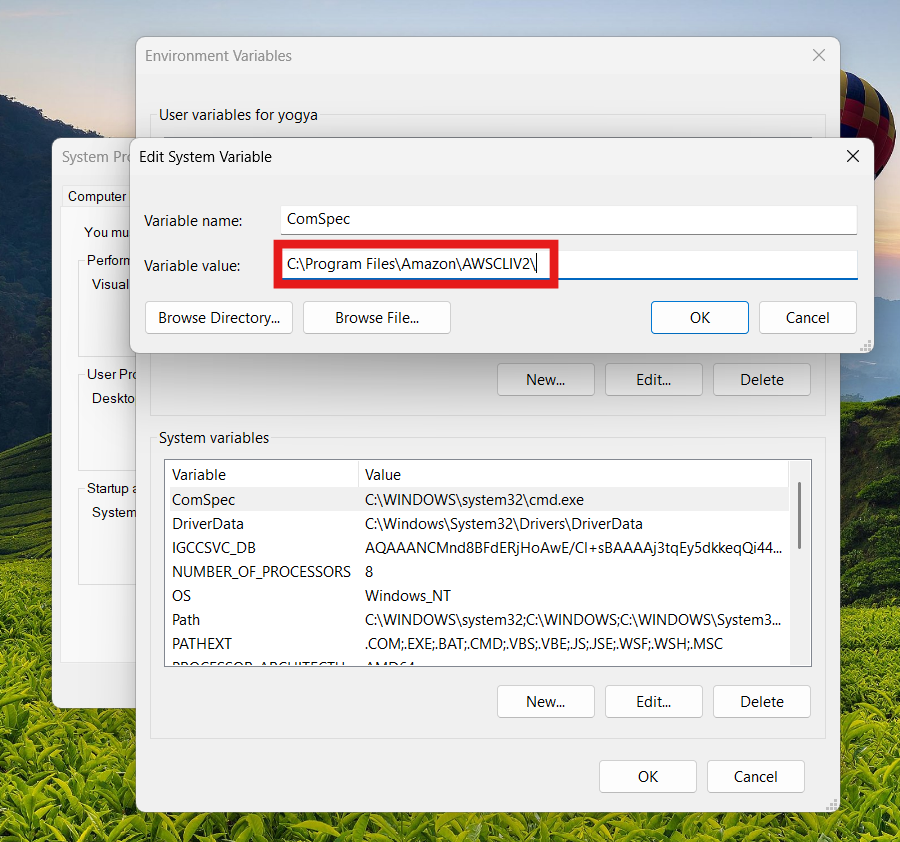
This ensures Windows can locate the AWS CLI executable.
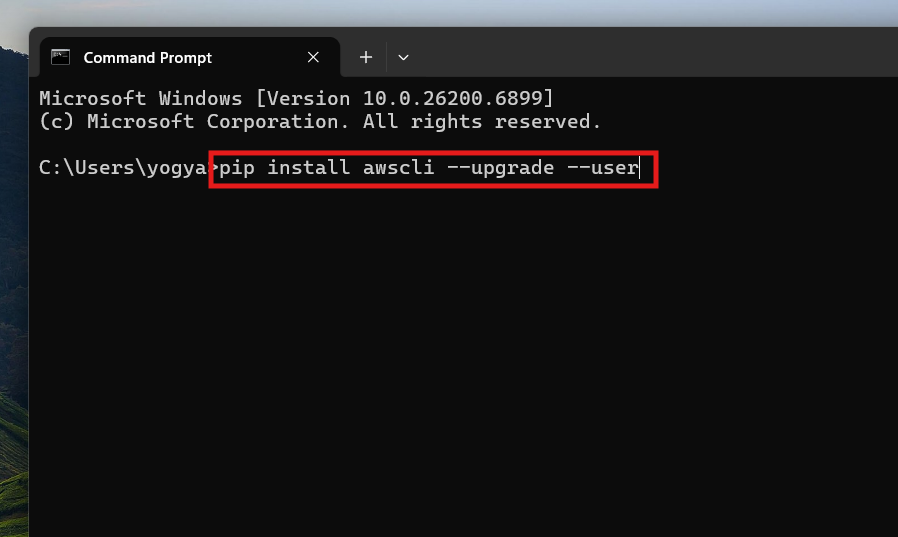
Fix 5: Install via Python (Alternative Method)
If MSI installer fails, use Python:
1. Install Python (with PATH enabled).
2. Open Command Prompt.
3. Run:
pip install awscli --upgrade --user
4. Verify using:
aws --version
This method is useful for developers who prefer package-based installations.
Summary
To install AWS CLI on Windows 11, use the official MSI installer, verify installation, and configure credentials using aws configure. If issues occur, fix PATH variables or install via Python. Once set up, AWS CLI becomes a powerful tool for managing cloud resources directly from your terminal.


