
If you see the IPv6 Connectivity – No network access error on your Windows 11 PC, this guide walks you through clear, tested fixes to restore IPv6 network access. The message usually appears when your adapter has an IPv6 address but cannot reach the router or DNS over IPv6.
Page Contents
IPv6 Connectivity – No network access error in Windows 11
Below are 6 practical fixes for the error. Try one at a time and test connectivity after each step. Use an administrator account where required.
Fix 1: Reset the TCP/IP stack and Winsock
Resetting core network stacks repairs corrupted settings that block IPv6 traffic.
1. Open Command Prompt as administrator.
2. Run netsh int ip reset and press Enter.
3. Then, run netsh winsock reset and press Enter.
4. After that, run ipconfig /flushdns and press Enter.

5. Restart your PC and test IPv6 connectivity.
Fix 2: Toggle IPv6 from adapter settings using Control Panel
While it may be available to some, but some Windows 11 builds hide the old Network adapter options page in Settings. When this happens, you can still reach the list of adapters through the Control Panel and toggle IPv6 from there. This refresh often clears temporary IPv6 configuration issues.
1. Press Windows + R, type ncpa.cpl, and press Enter. The Network Connections window will open.
2. Right-click your active network adapter (Wi-Fi or Ethernet) and select Properties.

3. In the list, uncheck Internet Protocol Version 6 (TCP/IPv6) and click OK.
4. Wait 10 seconds, open Properties again, recheck Internet Protocol Version 6 (TCP/IPv6), and select OK.

5. Restart your PC and test IPv6 connectivity.
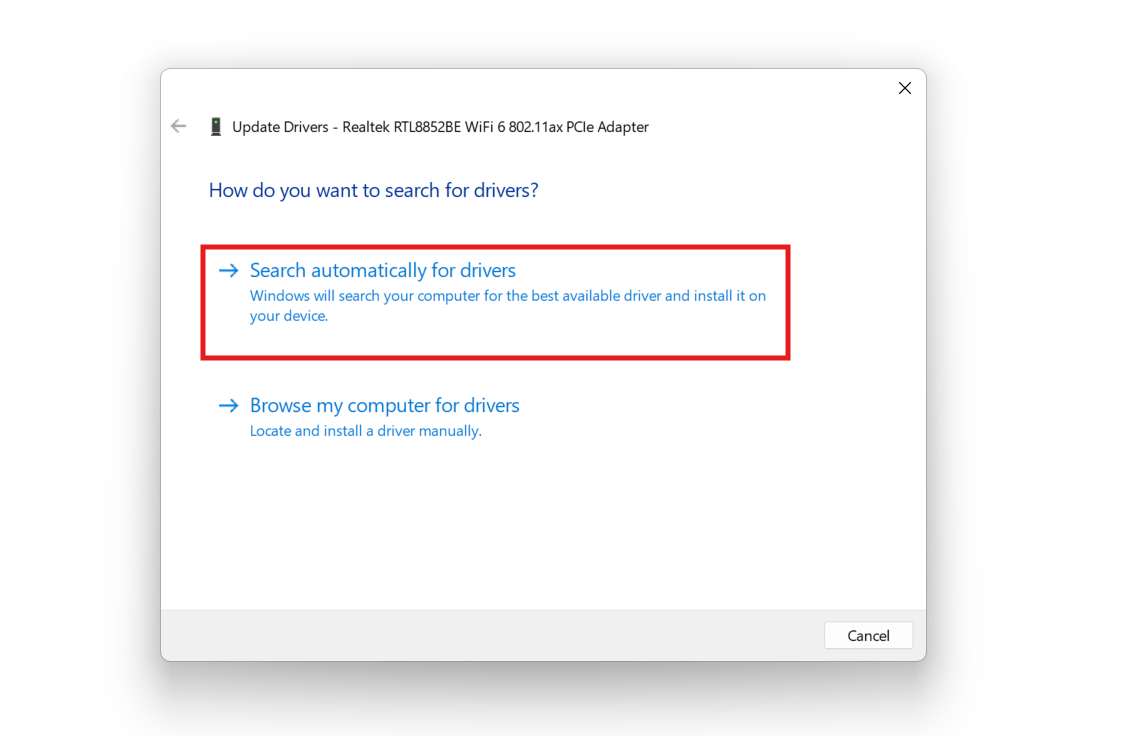
Fix 3: Update or reinstall the network driver
Old or faulty drivers often disrupt IPv6 operations.
1. Open Device Manager and expand Network adapters.
2. Right-click your adapter and select Update driver.
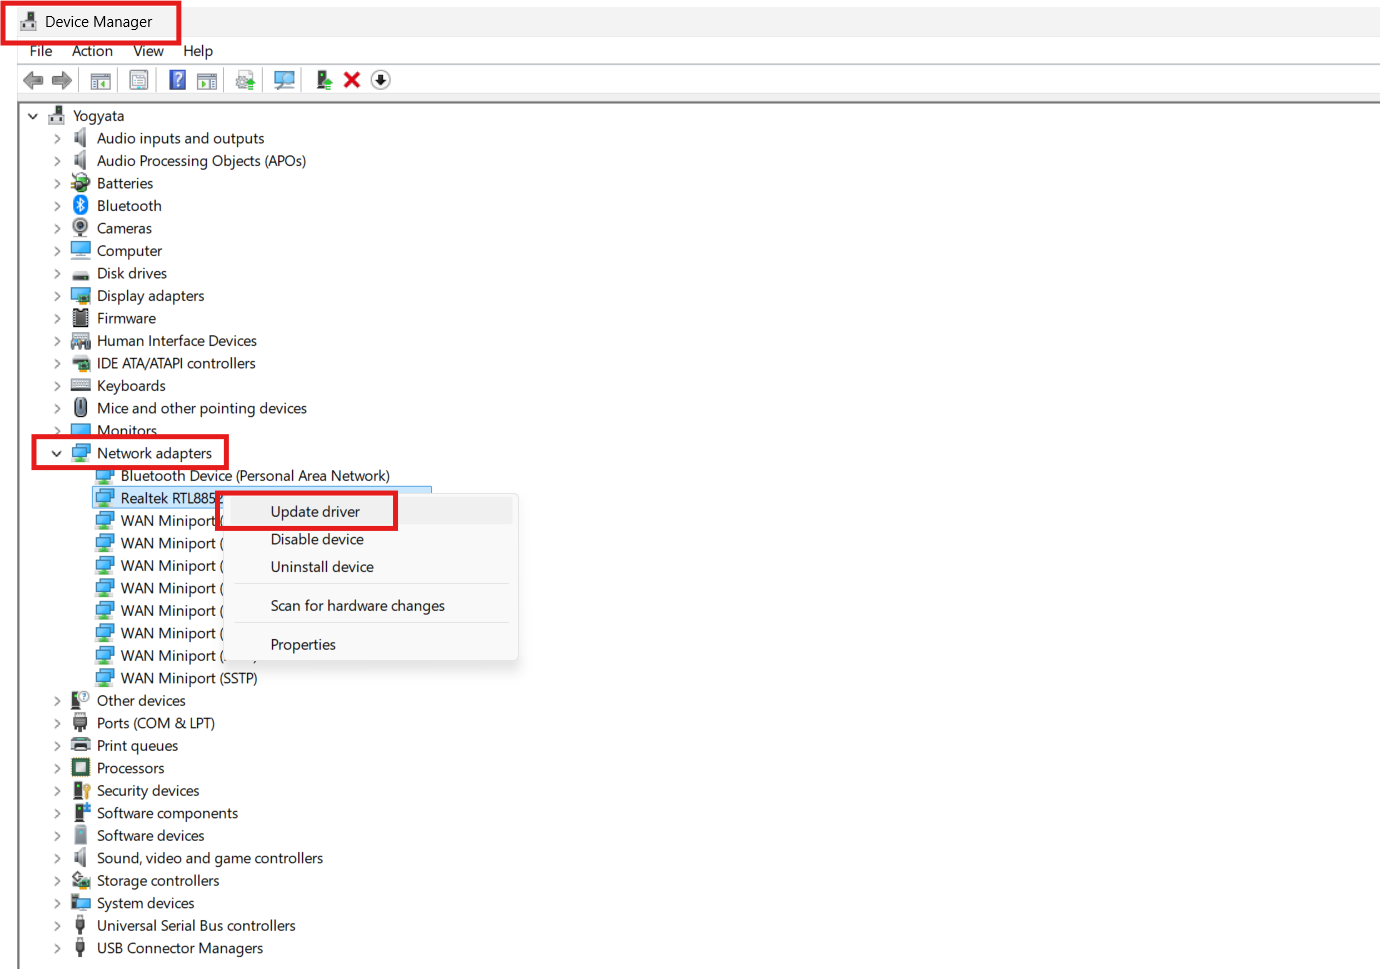
3. Then, choose Search automatically.
4. If updating fails, choose Uninstall device, then restart so Windows reinstalls the driver.
4. Test IPv6 after the reinstall.
Fix 4: Release/renew IP and reset DNS settings
Refreshing your addresses can clear assignment or DNS issues affecting IPv6.
1. Open Command Prompt as administrator.
2. Run ipconfig /release then ipconfig /renew after that.
3. Then, run ipconfig /flushdns.
4. Check connectivity again.

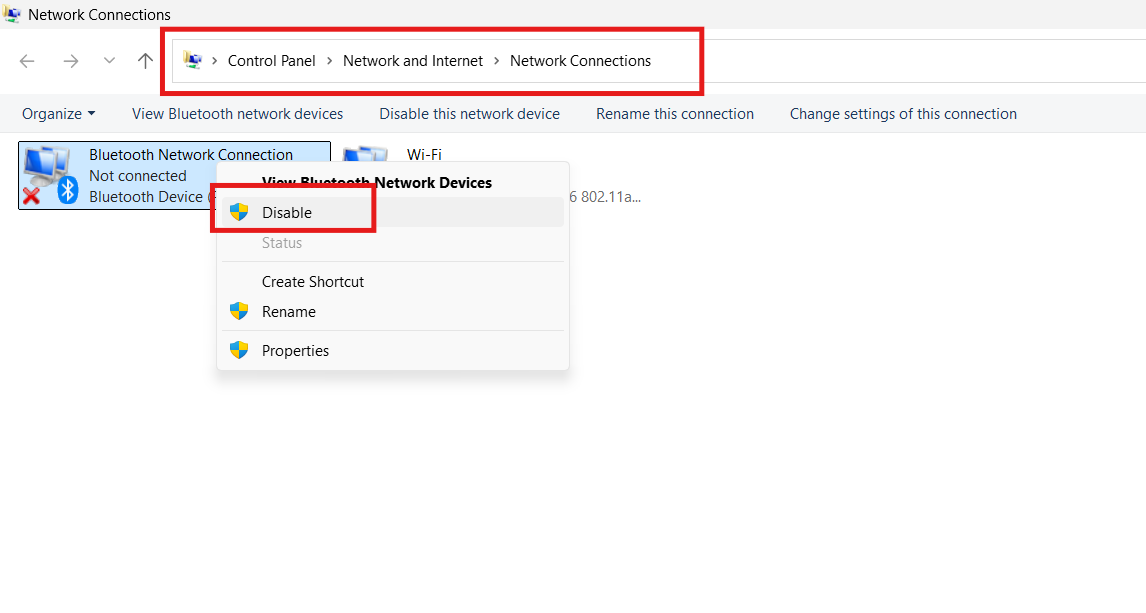
Fix 5: Disable VPNs and virtual adapters temporarily
VPN clients and virtual NICs can create routing conflicts for IPv6.
1. Disconnect or disable any VPN client.
2. Open Network Connections and disable unused virtual adapters by right-clicking on them.
3. Restart the network service or reboot and test IPv6.
Fix 6: Check router IPv6 settings and DHCPv6
If the router misconfigures IPv6, every client can show no access.
1. Log into your router’s admin page.
2. Verify IPv6 is enabled and DHCPv6 is correctly configured.
3. Reboot the router after saving changes and test a connected device.
Quick tips
1. Use ping.google.com to test IPv6 reachability.
2. If only IPv4 is required, you can safely disable IPv6 temporarily.
3. Contact your ISP if router settings are unclear or IPv6 service is required.


![The mapped network drive could not be created [Detailed fix]](https://www.kapilarya.com/assets/Network-Drive-768x511.jpg)

![Stop sharing a folder in Windows 11 [Guide]](https://www.kapilarya.com/assets/Network-768x522.png)
Thank you – super clear instructions and problem solved :)