
If you need to remove the primary account from Outlook in Windows 11, this short guide shows three practical ways to do it without wrecking your profile. The primary account is the first Exchange/Office 365 account added to a profile and, by design, cannot be removed unless it’s the only account in that profile.
Page Contents
Remove Primary account from Outlook [3 safe ways]
Before you start, back up your mail files. If you want the easiest, cleanest result, creating a new profile and setting the preferred account as primary is usually fastest.
Fix 1: Create a new Outlook profile (recommended)
Creating a new profile is the most reliable way to remove the primary account. It lets you choose a new primary account during setup. This works for all Outlook desktop clients, even when the Mail CPL is not registered.
1. Close Outlook completely.
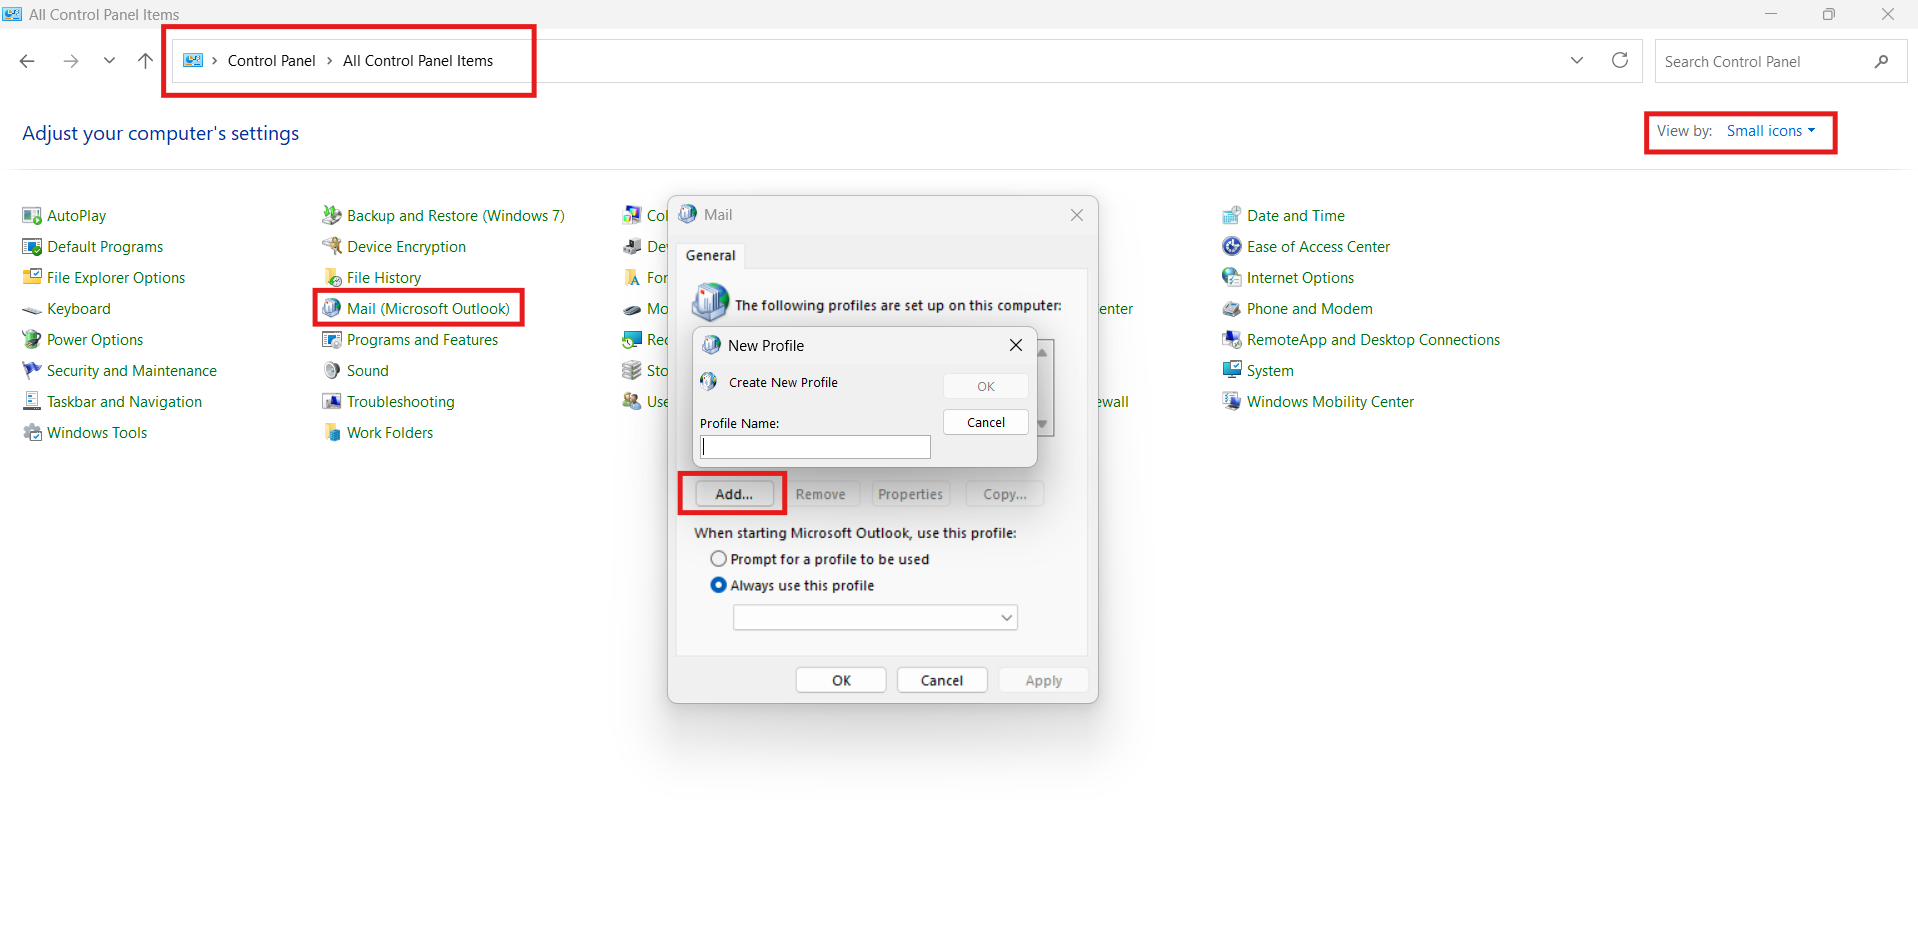
2. Open the Control Panel (search for it in Start).
3. Set View by to Small icons and select Mail (Microsoft Outlook).
4. Select Show Profiles and click Add.
5. Enter a profile name and add the email account you want to set as the new primary.
6. Once added, select Always use this profile and choose the new profile.
7. Optionally, remove the old profile after confirming everything works.
Fix 2: Add a PST and set it as default (keeps profile settings) to remove primary account from Outlook
Adding a PST file lets you change the default data file so another account acts like primary. Use this when you want to keep existing profile settings but change which account appears first.
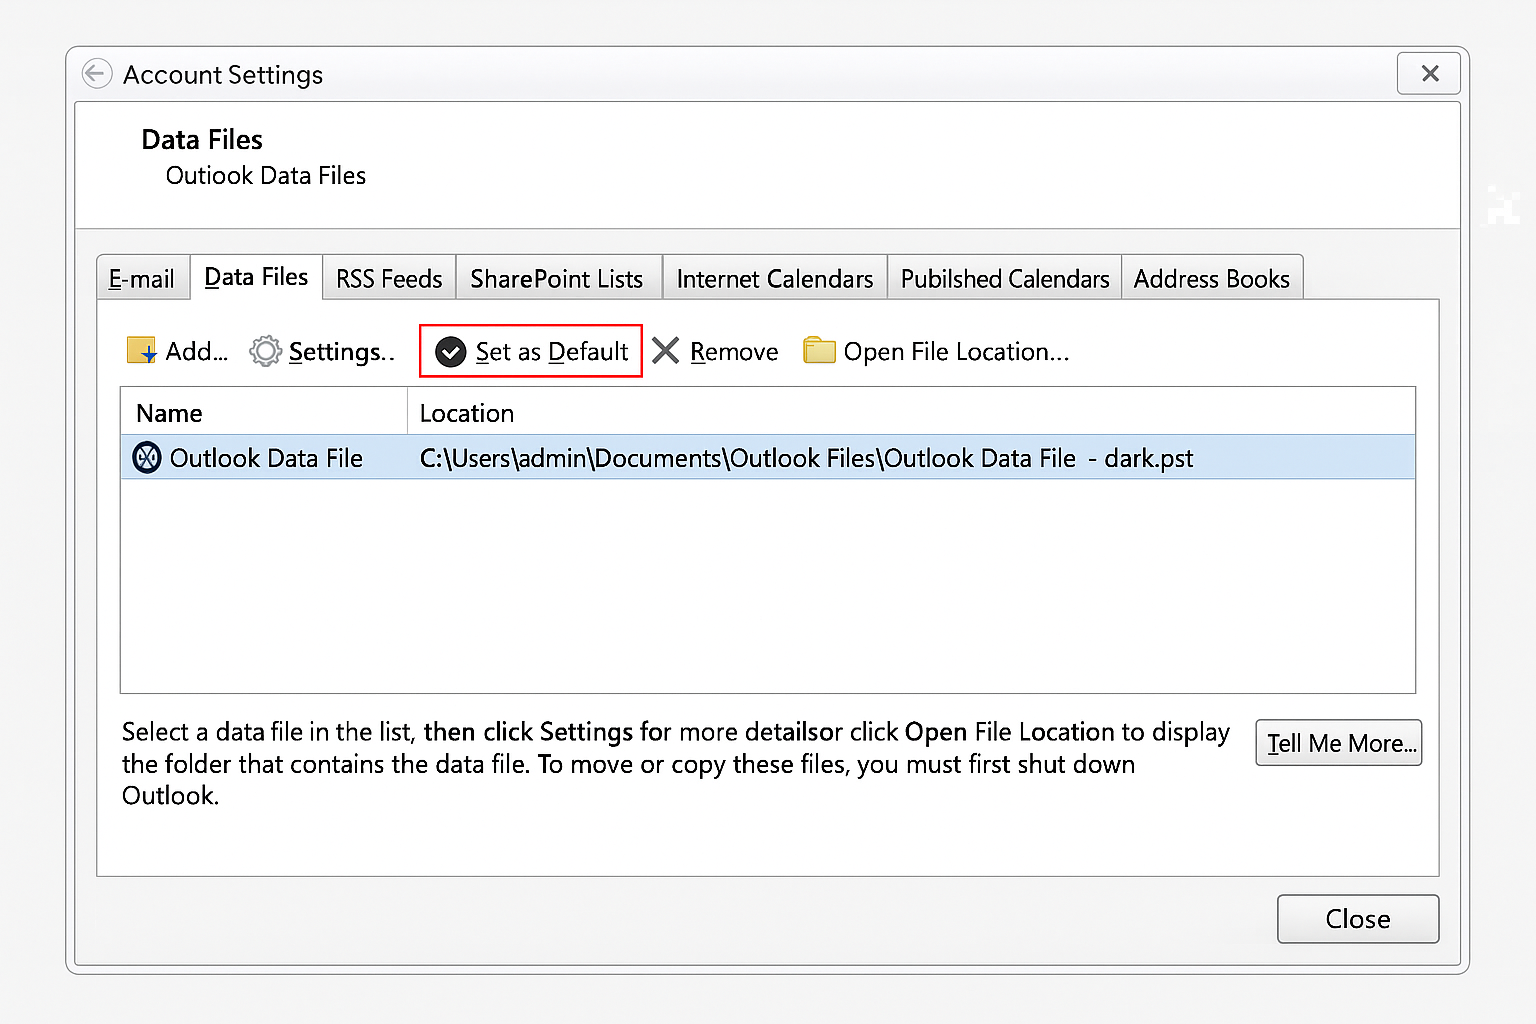
1. Open the Mail control panel (control mlcfg32.cpl) and click Data Files.
2. Click Add, create or select a PST, and click Set as Default.
3. Go to the Email tab, add the new account you want, then set its OST as default and restart Outlook.

Fix 3: Edit the registry to remove the primary entry (advanced)
Registry edits let you remove the primary account key, but they are risky. Back up the registry first. Use this option only if you understand registry editing and other options are unsuitable.
1. Open Registry Editor and navigate to
HKEY_CURRENT_USER\Software\Microsoft\Office\<version>\Outlook\Profiles\<your profile>
2. Find the binary value 001f6641 and confirm the email alias inside.
3. Delete that value and the related folder on the left, then open the Mail control panel and set the desired account as default.
4. Restart Outlook and verify.
Quick tips
- Always back up PST/OST files and the registry before making changes.
- If Exchange accounts exist, remove secondary Exchange accounts first when trying to remove a primary.
- If unsure, create a new profile; it’s safer and reversible.
