OneDrive comes preinstalled with Windows 11 and automatically syncs files, photos, and folders to Microsoft’s cloud storage. While many users find it useful, others prefer to remove it completely to stop syncing, reduce background activity, or free up system resources.
Page Contents
Uninstall OneDrive Completely in Windows 11
Simply unlinking your account does not fully uninstall the app, so you may still see OneDrive running in the background. Below are the most effective methods to completely remove OneDrive from Windows 11.
Method 1: Uninstall OneDrive from Settings
This is the easiest and safest method for most users. Windows 11 treats OneDrive as a regular installed application, so it can be removed through the Apps section. This method removes the app but keeps your locally stored files untouched.
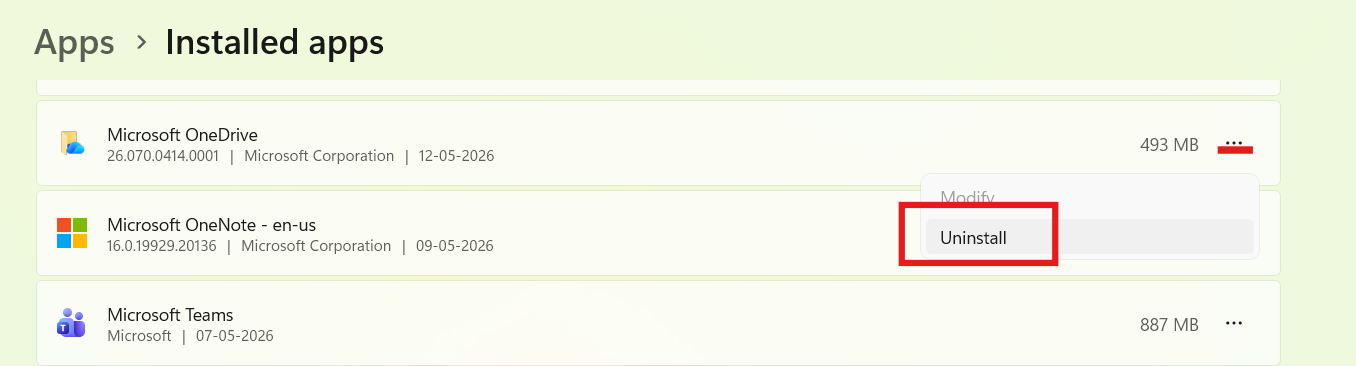
1. Open Settings and go to Apps. Click Installed apps.
2. Search for Microsoft OneDrive.
3. Click the three dots beside it.
4. Select Uninstall.
5. Confirm the removal.
After uninstalling, OneDrive will stop syncing automatically. You may need to restart your PC to remove background processes fully.
Method 2: Uninstall OneDrive Using Command Prompt
If the Settings method fails, Command Prompt can force-remove OneDrive. This method is useful when OneDrive refuses to uninstall normally or keeps reinstalling itself. This completely removes the OneDrive application files. It also stops OneDrive startup processes immediately.
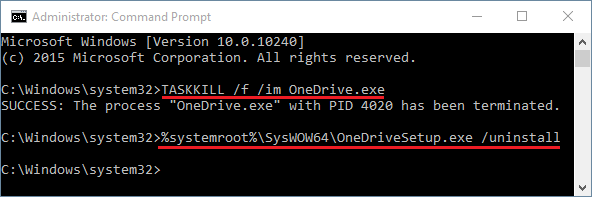
1. Open Command Prompt (Admin) using search.
2. Run:
taskkill /f /im OneDrive.exe
3. Then run one of these commands:
For 64-bit Windows:
%SystemRoot%\SysWOW64\OneDriveSetup.exe /uninstall
For 32-bit Windows (use this if you’re on Windows 10):
%SystemRoot%\System32\OneDriveSetup.exe /uninstall
Method 3: Disable OneDrive via Group Policy
If you don’t want to uninstall OneDrive but want it disabled completely, Group Policy works well. This prevents OneDrive from launching or syncing files. This disables OneDrive integration across Windows. It is especially useful on work or shared PCs.
1. Press Win + R, type gpedit.msc.
2. Navigate to:
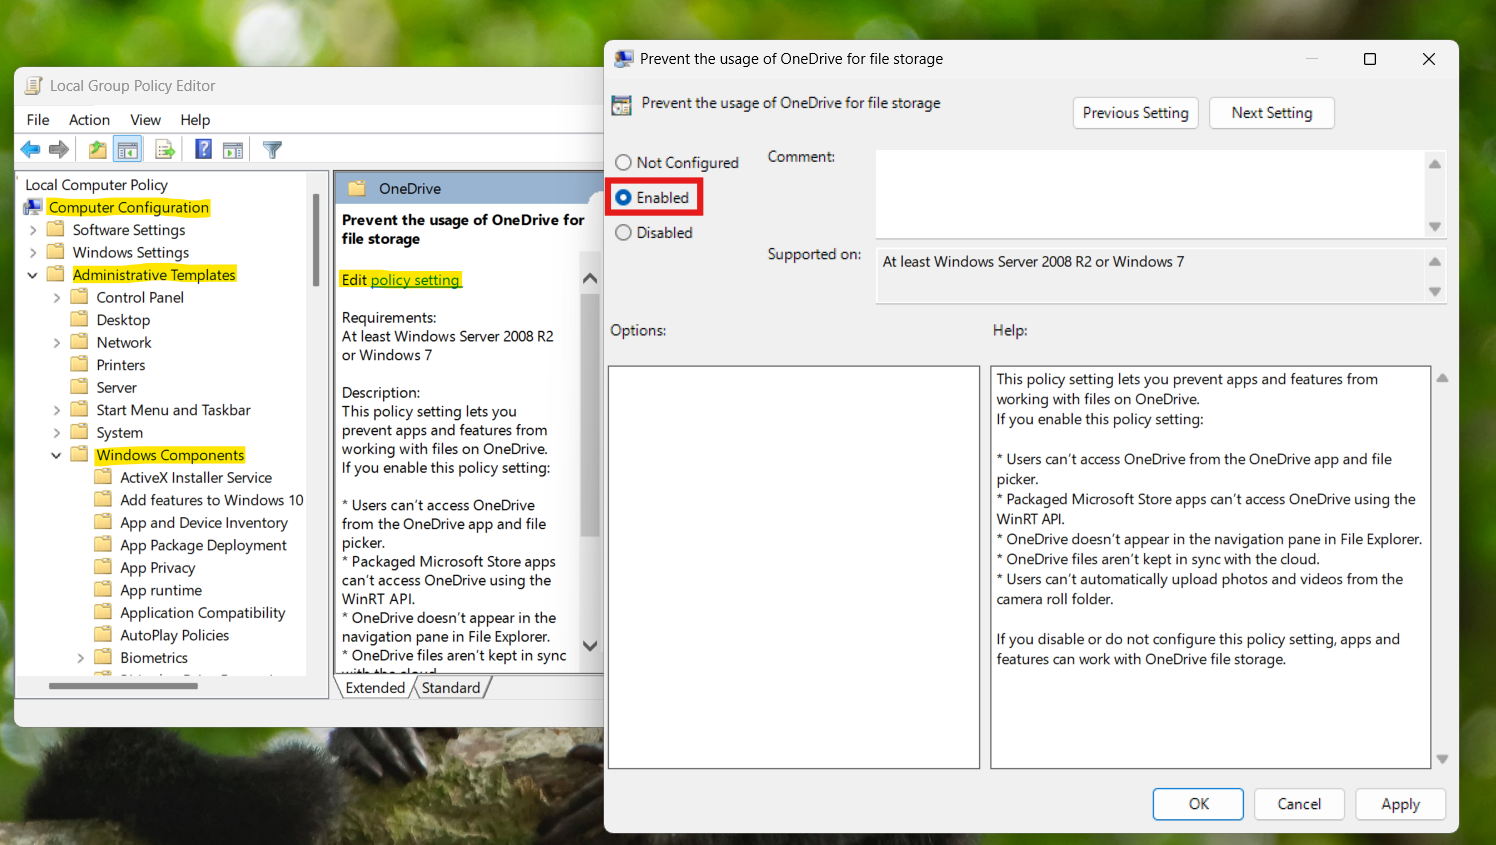
Computer Configuration, then Administrative Templates, and click on Windows Components, and then go to OneDrive.
3. Double click on Prevent the usage of OneDrive for file storage.
4. Set it to Enabled.
Method 4: Remove OneDrive Leftover Folders
Even after uninstalling, some leftover files and folders may remain. Cleaning these removes unnecessary data and frees storage space. You may need administrator permission to remove some folders. Restart your PC afterward to finalize the cleanup.
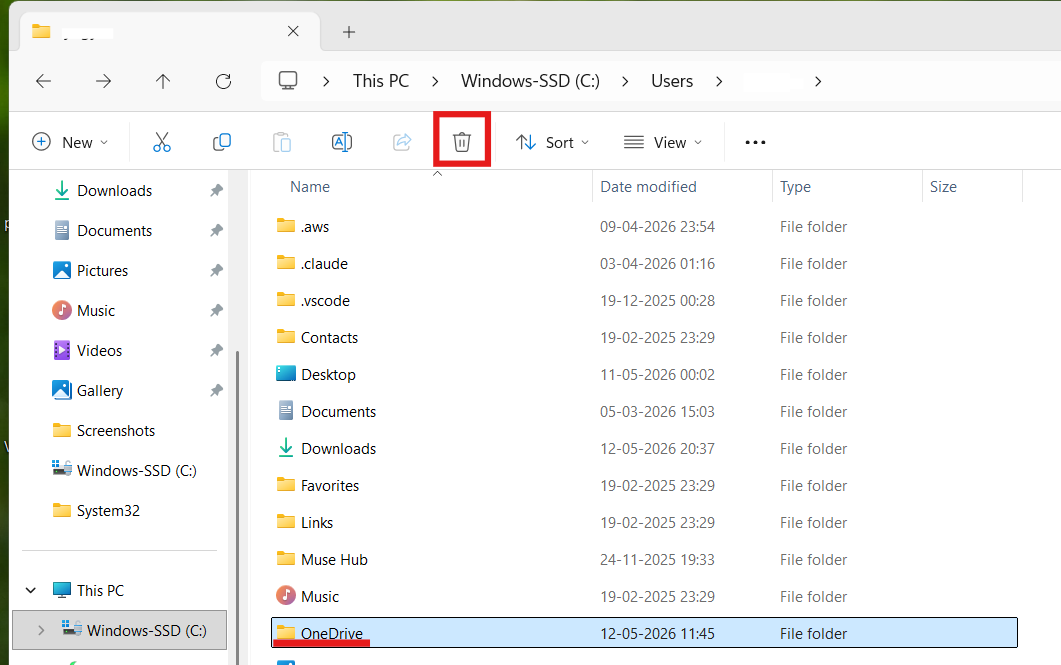
Delete these folders if they exist:
C:\Users\YourName\OneDrive
C:\ProgramData\Microsoft OneDrive
C:\Program Files\Microsoft OneDrive
Method 5: Remove OneDrive from File Explorer
Sometimes, OneDrive still appears in File Explorer even after uninstalling. This happens because registry entries remain active. This method removes the OneDrive icon from Explorer navigation.
1. Press Win + R, type regedit.
NOTE: Be careful while editing the registry, edit only content mentioned here.
2. Navigate to:
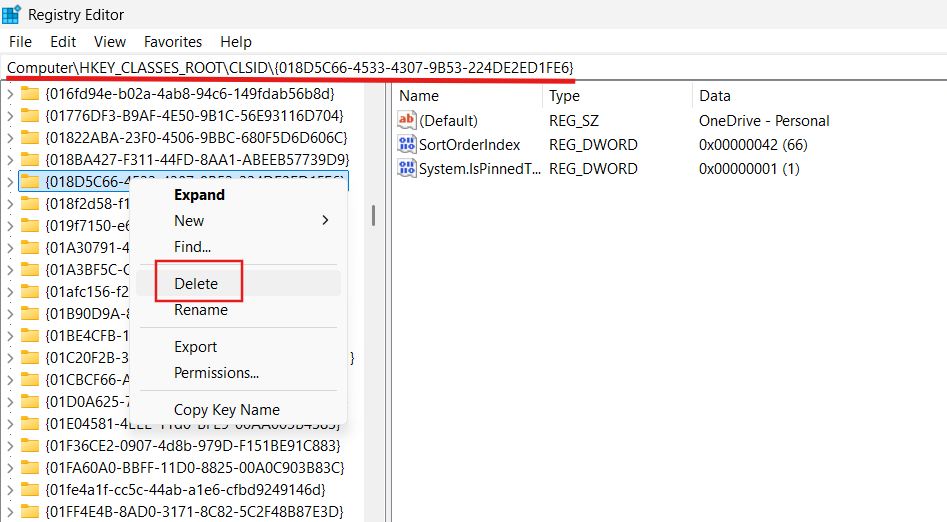
HKEY_CLASSES_ROOT\CLSID
3. Look for this OneDrive registry key:
{018D5C66-4533-4307-9B53-224DE2ED1FE6}
4. Right-click the key and select Delete.
5. Also check this path:
HKEY_CLASSES_ROOT\Wow6432Node\CLSID
6. Delete the same key there as well if it exists:
{018D5C66-4533-4307-9B53-224DE2ED1FE6}
7. Restart File Explorer or reboot your PC.
Summary
You can completely uninstall OneDrive in Windows 11 using Settings, Command Prompt, or Group Policy. Removing leftover folders and registry entries ensures the app disappears fully from File Explorer and startup services. For most users, uninstalling through Settings is enough, while advanced methods help remove deeper integration completely.