
If you compare Office editions with one other, you will find that in each successive edition, Microsoft has added a considerable number of features. Now the question is that do we use all of these features? Answer is most probably No for this! But we must admit that Microsoft has not made Office for a specific class of users. They have provided these features for all users, some may be useful to some, while not useful to some others. So basically, implementation of these new users is beneficial overall, if we take account of general public.
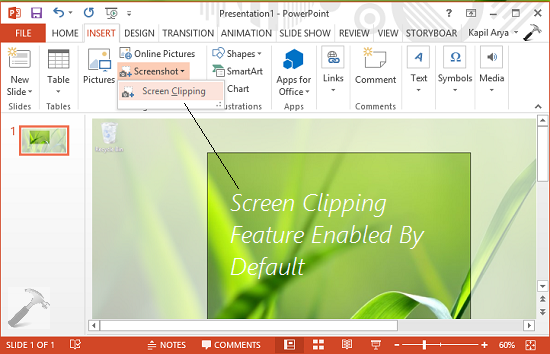
Okay, so lets talk about one such feature available in Office 2013 and may in later ones also. This feature is Screen Clipping and it’s supposed to insert screenshot of current screen into current document, when you use it. This is the same feature works like the native screen capturing feature Microsoft OneNote or of Windows; i.e. pressing  + PrtSc or + Fn + PrtSc captures whole screen.
Hence in the dilemma of same features, some users may find it confusing. So in case if you never use the in-built screen clipping feature in Office; and instead prefer Windows native screen capturing feature, here is how to disable the former one:
How To Disable Screen Clipping In Office 2013
Registry Disclaimer: The further steps will involve registry manipulation. Making mistakes while manipulating registry could affect your system adversely. So be careful while editing registry entries and create a System Restore point first.
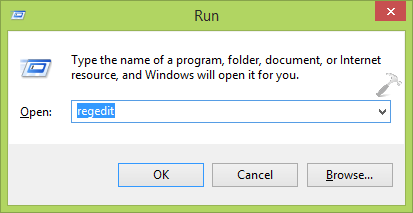
1. Press + R and put regedit in Run dialog box to open Registry Editor (if you’re not familiar with Registry Editor, then click here). Click OK.
2. In the left pane of Registry Editor, navigate here:
HKEY_CURRENT_USER\Software\Policies\Microsoft
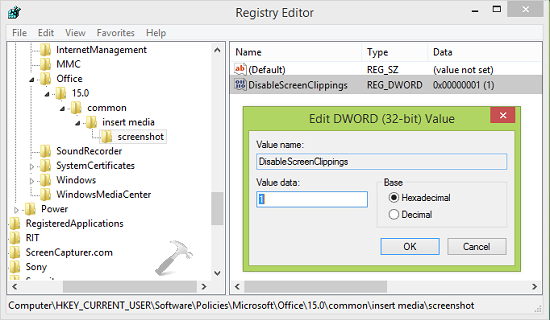
3. In the left pane of above mentioned location, right click Microsoft key and select New -> Key. Name the newly created key as Office. Similarly create sub-key 15.0 to Office key. Again create sub-key to 15.0 and name it common. Moving on, similarly create sub-key to common and name it insert media and lastly create sub-key to insert media and give it screenshot name. So when you highlight screenshot key, you must be at HKEY_CURRENT_USER\Software\Policies\Microsoft\Office\15.0\common\insert media\screenshot. Now come to the right pane of this registry location.
4. In the right pane, right click and select New -> DWORD Value. Rename this newly created DWORD (REG_DWORD) as DisableScreenClippings and double click it. Put the Value data as 1 now and click OK. Finally, close Registry Editor and open any Office component, you will see that Screen Clipping feature has been disabled already:
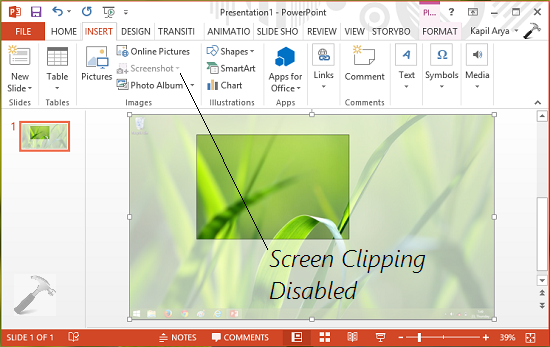
That’s it! In case if you want to enable this feature again in future, simply delete the DisableScreenClippings DWORD or change its Value data to 0. FYI, this is common method to disable Screen Clipping for all Office 2013 components at once.
Go here to learn how to prevent Internet usage in Office 2013.


Hi Kapil,
Is there a way to disable the Screen Clippings for MSO 2010/2013 for all users using a specific computer. The users have different account.
^^ Try creating the DWORD under HKEY_LOCAL_MACHINE\Software\Policies\Microsoft\Office\15.0\common\insert media\screenshot instead of HKEY_CURRENT_USER\Software\Policies\Microsoft\Office\15.0\common\insert media\screenshot and see if that helps.
Hi Kapil,
the registry entry that you’ve provided, is it only for MSO 2013? How about if disabling the screen clipping for MSO 2010, what would be the registry entry?
Thanks.
Hi Kapil,
I was able to find the registry key for MSO 2010. However, I’ve tried your advise and added the registry key in HKEY_LOCAL_MACHINE however, the screen clipping did not disabled.
^^ Okay, I’ve rechecked it on my system and I do agree that the policy is not configurable/supported on computer/machine side. This means that setting can be configured only for user configuration as described above. Thanks for your efforts on this! :)
Hi kapil,
How to disable screen recording option in MS PowerPoint . Tried adding the same kind of registries as mentioned above for screen recording, but not working.
I’ve tried this registry fix and it doesn’t seem to apply
Any way to disable screen recording feature in 2013 ??
Hi Kapil.
Thanks for your information!!
I’ve tried to disable screenshots and screen recording in MSO 2016
But it doesn’t work.
Can you help me?
HI
thanks for the information do we have option with machine level option because if we enable this policy with user level then another person can use this option. so we have any other option to disable this.
Thankyou!!
^^ Good question! I guess the GPO for this setting is only available at user level. Can you please check at Computer Configuration > Administrative Templates > Microsoft Office > Disable Items in User Interface, if you can spot Turn off screen clipping setting there.
Hi,
can you please write a powershell script for below
Computer\HKEY_CURRENT_USER\Software\Microsoft\Office\16.0\Common\insert media\screenshot
DisableScreenClippings=1
we have key till common , need to add insert media and screeshot key and add value.
how can we disable this using script ?