The users of Windows 11 /10 can face the issue of corrupt Windows Registry while running the system. Corrupted Windows Registry can lead to problems while restarting, shutting or booting the PC. Thus, this article provides some detailed solutions which will allow the users to fix Corrupt registry in Windows 11/10.
Page Contents
Fix Corrupt registry in Windows 11/10
There may be several reasons for the presence of the issue of Corrupt registry in Windows. These may vary between corrupted system, malware issues, hardware problem, etc. Thereafter, let us check all the fixes for solving the problem of corrupt registry in details.
Fix 1: Restoring the registry from Backup
If the users backed up the registry beforehand, then they can restore the registry from backup to fix corrupt registry in Windows. Follow the steps for doing the same.
Step 1- Open the Registry Editor.

Step 2- Next, go to File > Import.
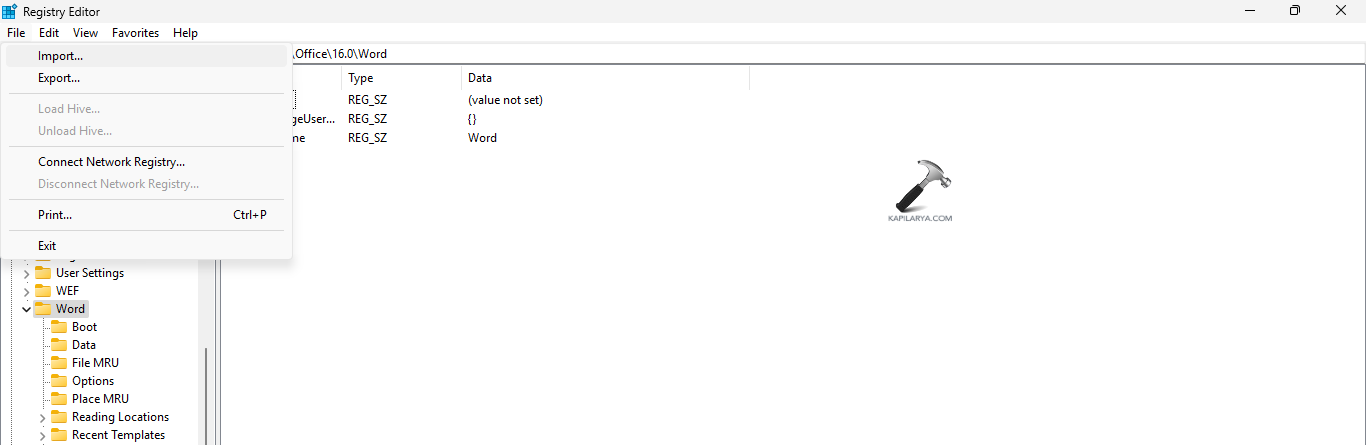
Step 3- Now, select the REG file for restoring to the registry and select Open.

Step 4- After the import of the REG file(s) is successful, press OK to the messages that may next appear in the screen.
Step 5- Lastly, restart the PC for saving all the changes and check if the registry key(s) is restored.
Fix 2: Running the Windows Error Checking tool
If the above fix do not work, then the users should check the disk drives. Corrupted drives may also cause the issue. For, checking the hard disks, follow the steps given below-
Step 1- Open File Explorer. Now, go to This PC and right-click the drive consisting of the errors (mostly C).
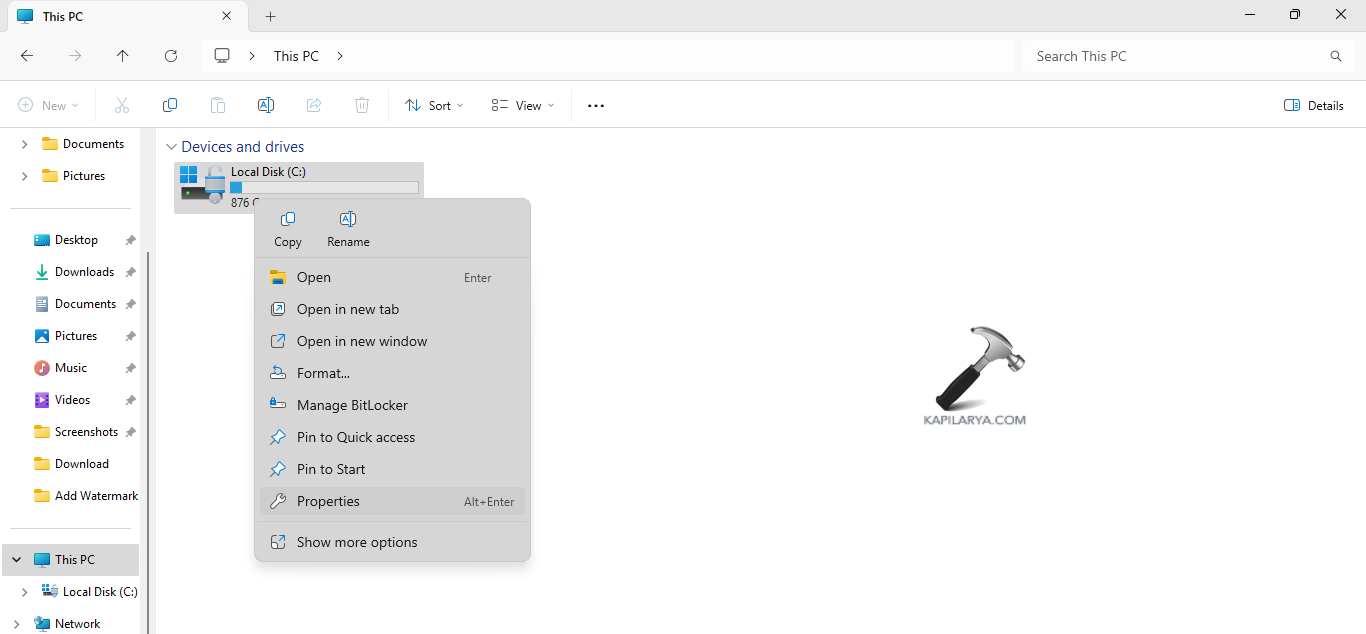
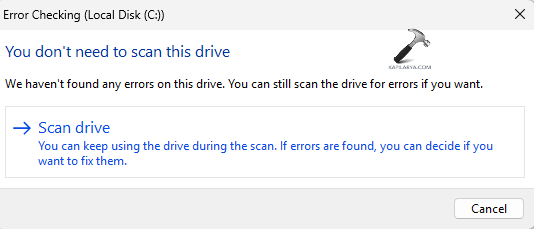
Step 2- Press Properties > Tools > Check. Next, select Scan drive.

Step 3- After the completion of the scan, restart the PC. This should fix the issue.
Fix 3: Ending all processes before shutting down
The users should also consider terminating any application which may hinder the process of shutting down before closing the PC using the steps below.
Step 1- Open Task Manager. Go to Processes.
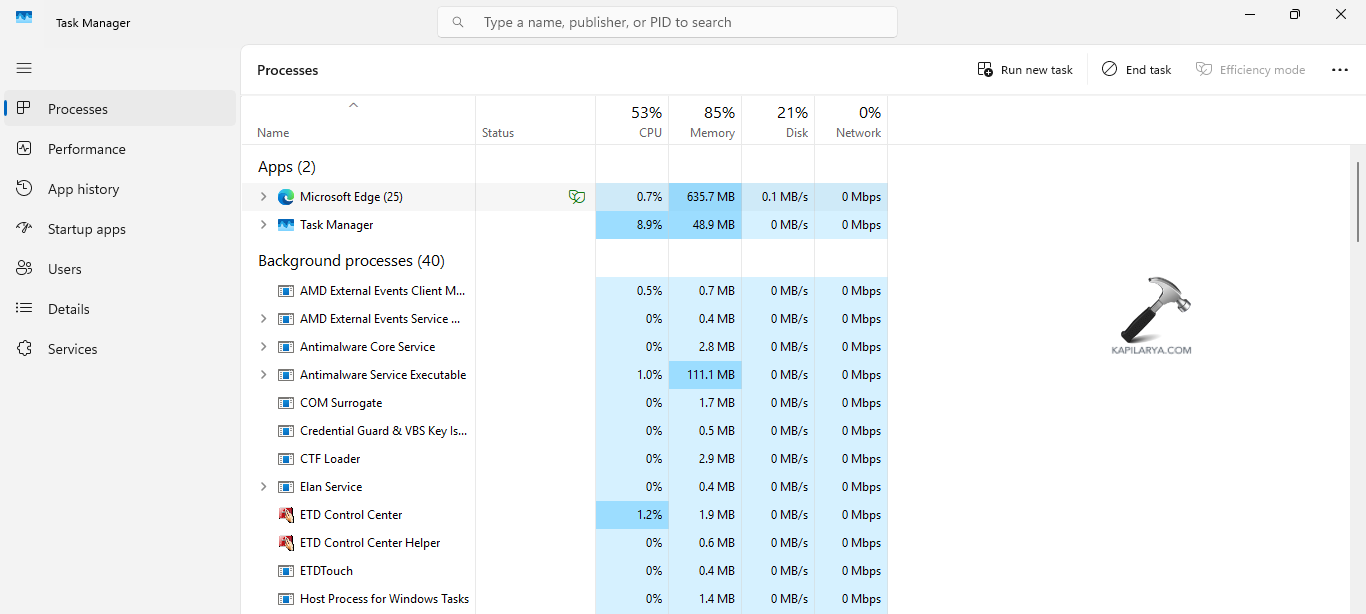
Step 2- Next, choose the app with the problem and select End task.
Fix 4: Running SFC scan
Running a System File Checker scan can help the users in solving the aforementioned issue easily. Therefore, follow the steps given below to run the SFC and solve the issue.
Step 1- At first, open Command Prompt and run it as an administrator.
Step 2- Next, copy and paste the prompt given below for running a SFC scan and select Enter.
sfc /scannow
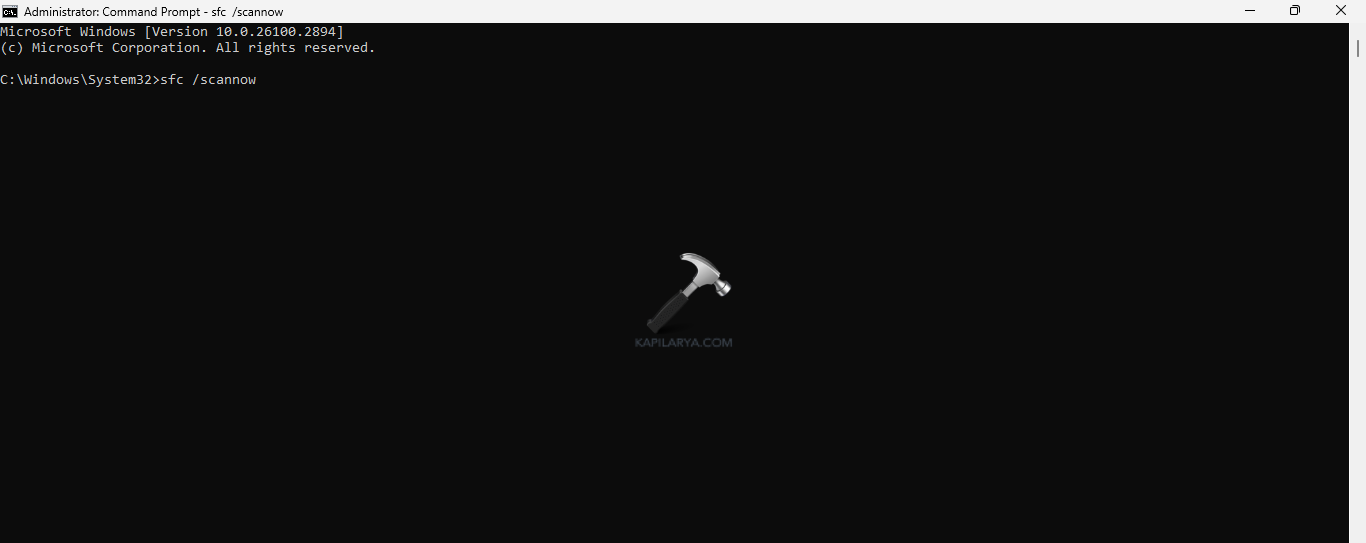
Step 3- Restart the PC and check if this solves the issue.
Fix 5: Reversing Overclocking
Some users overclock their CPU for increasing the PC’s performance. This also causes issues while closing the PC. Thus, follow the steps below for reversing the overclocking.
Step 1- At first, go to Control Panel.
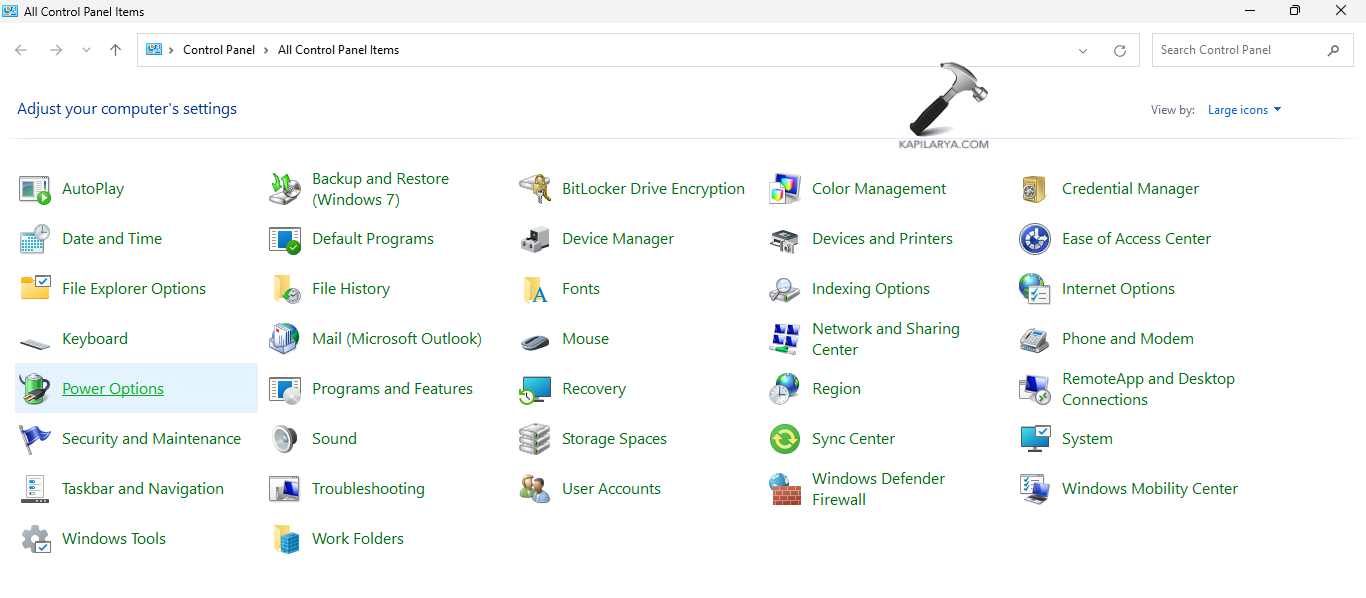
Step 2- Next, go to Power Options.
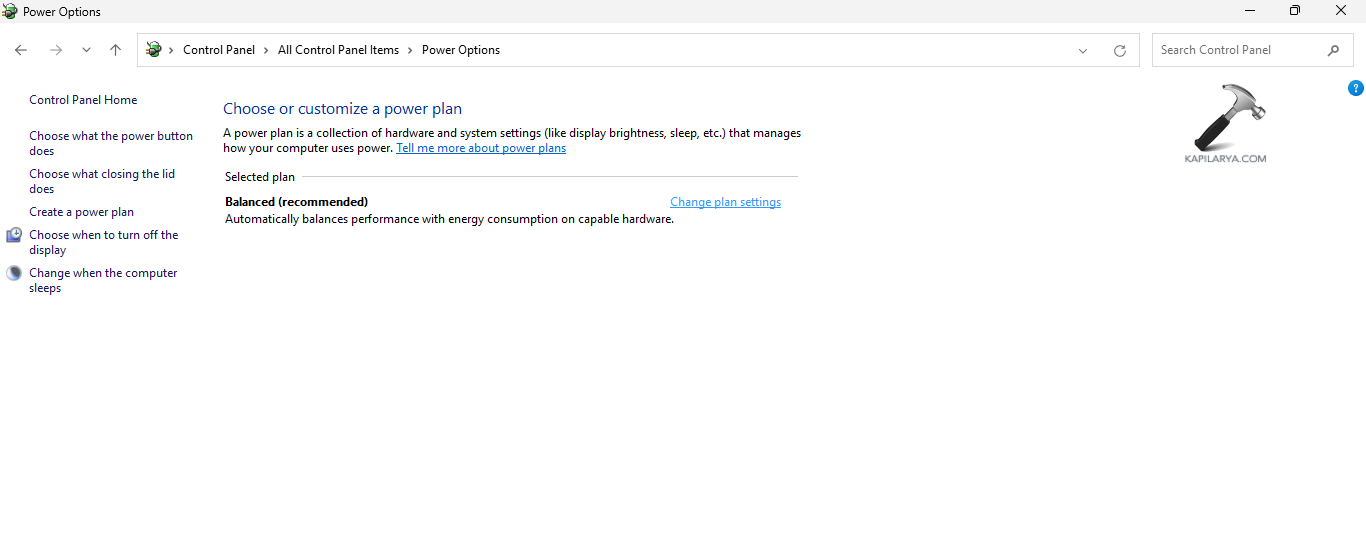
Step 3- Now, select Change plan settings > Change advanced power settings.
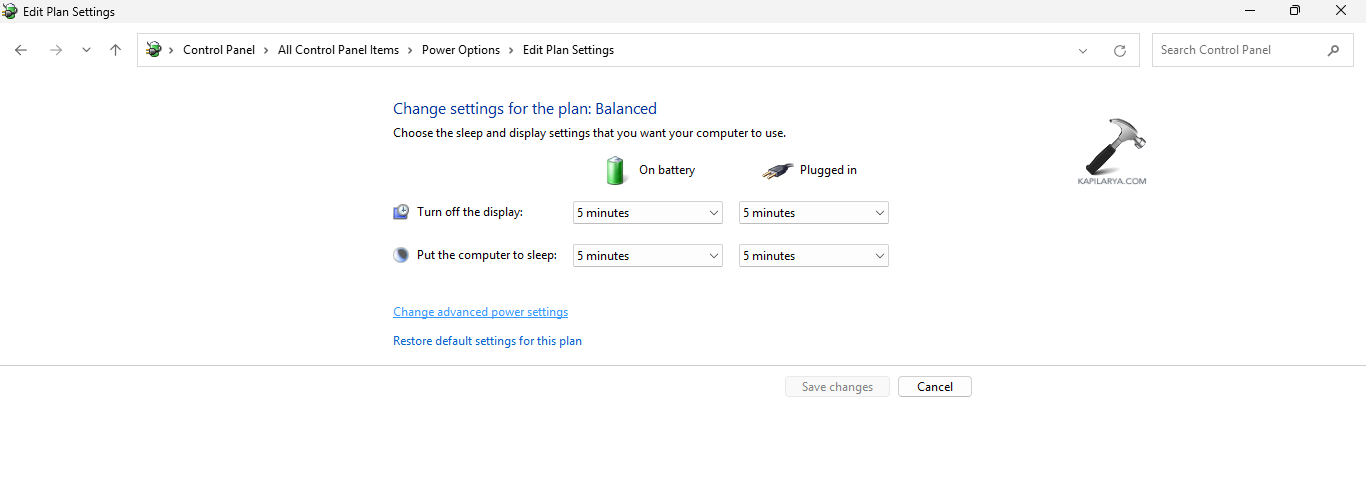
Step 4- Check for Processor power management. Doble-click it and expand it.
Step 5- Expand Minimum processor state and Maximum processor state.
Step 6- If the states of these processors are set to 100%, change them to 99%.
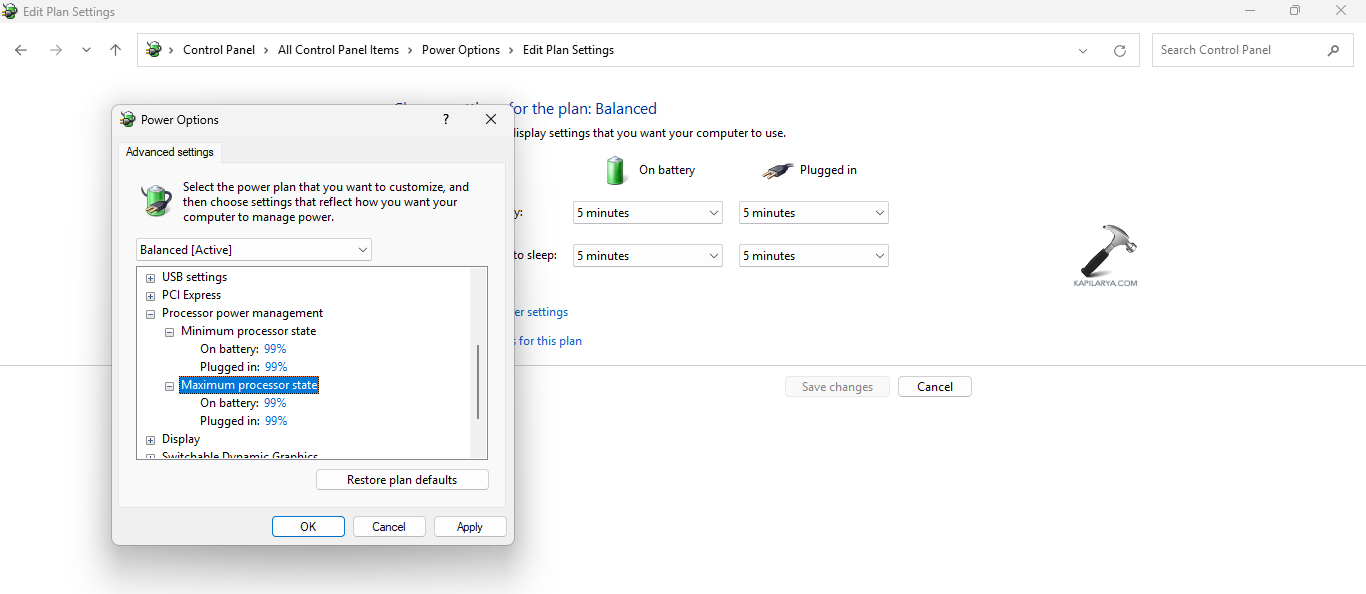
Step 7- Lastly, select Apply and OK for saving all the changes.
Remember to uninstall any CPU overclocking software installed previously for adjusting CPU to completely disable CPU overclocking.
Fix 6: Resetting the PC
Another fix which the users can try to fix this problem is through resetting the PC. But, before resetting the PC, ensure to back up all the files of the PC and transfer them to an external device. This will help in keeping all the data safe. Now, follow these steps to reset the PC-
Step 1- Firstly, go to Settings > System > Recovery.
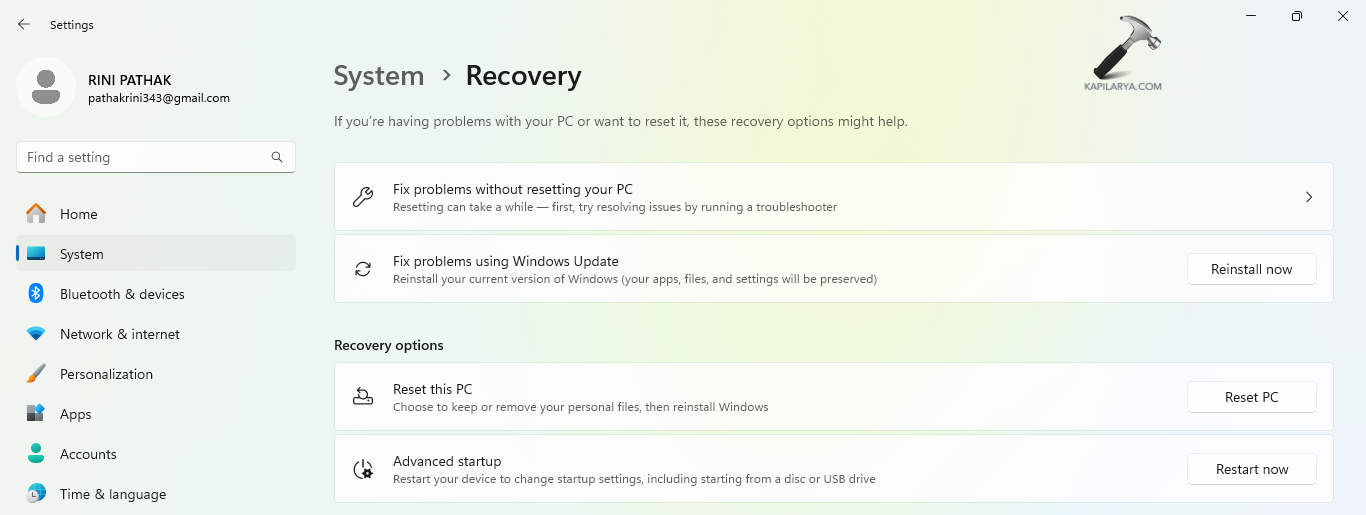
Step 2- Thereupon, below the Recovery option, select the Reset PC button close to Reset this PC.
Step 3- Now, a blue pop-up window will open. As per requirement, choose either “Keep my files” or “Remove everything”.
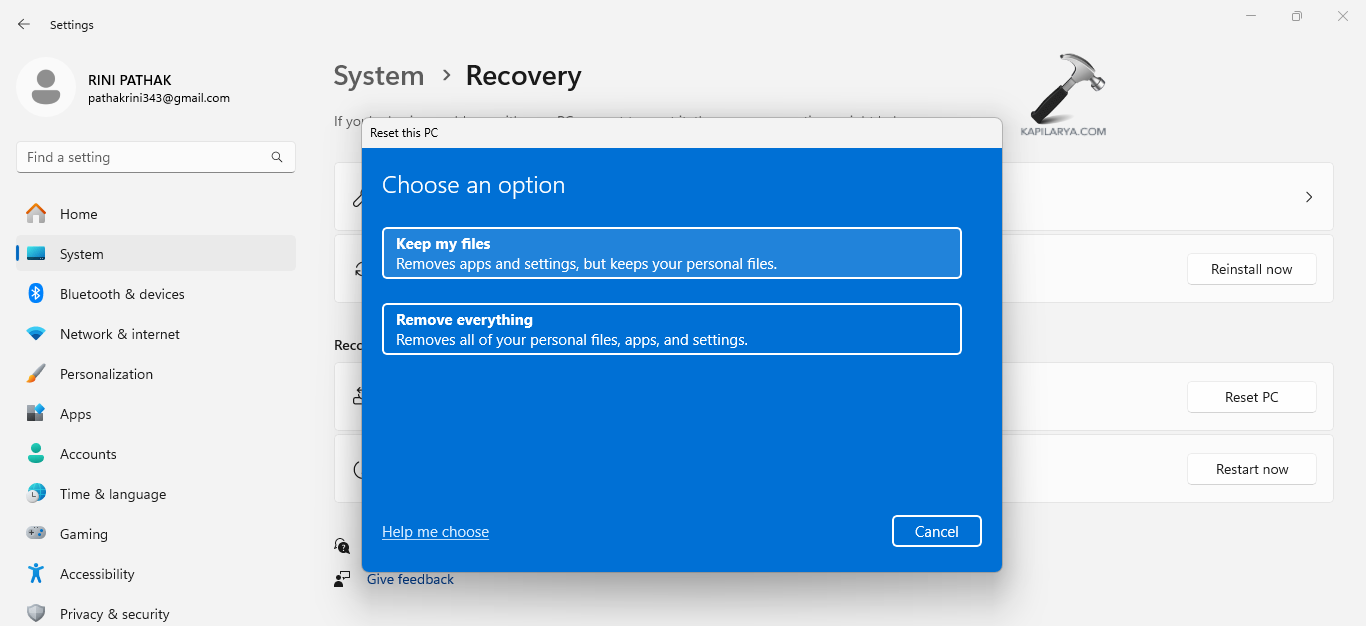
Step 4- Lastly, follow the prompts that appears on the Window screen and reset the PC.
Fix 7: Restoring PC to a previous state
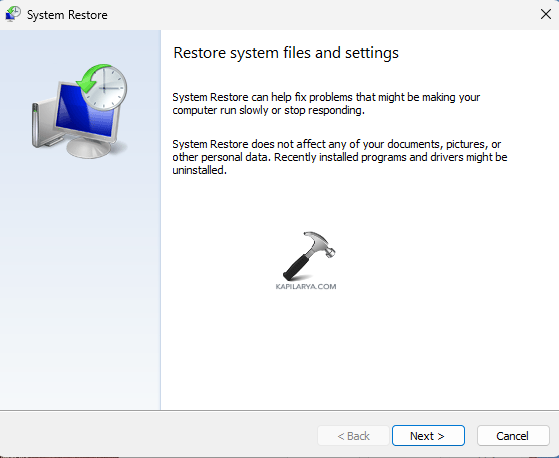
Creating a System Restore Point or using an already created one will aid in restoring the computer to its starting point and fix the issue. Now, complete the given steps to perform System Restore-
Step 1- Go to the Start menu. Next, type create a restore point and open the result.
Step 2- From the System Properties window, select the System Restore option.
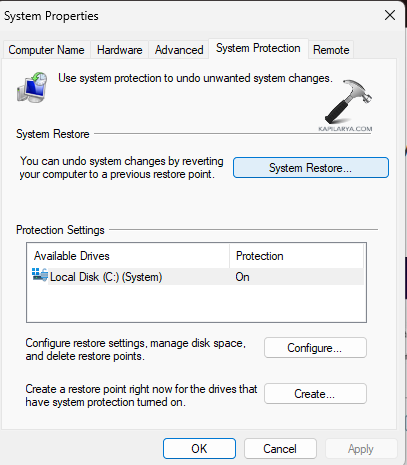
Step 3- Select Next on the System Restore Window.
Step 4- A list of all the previously created Restore points will appear on the screen. Choose the required restore point.
Step 5- Furthermore, choose the Restore point and select Next as per the date, name and time. Moreover, if the desired restore points are not visible, select Show more restore points.

Step 6- Choose the desired drive that is to be restored and click Next.
Step 7- A final pop-up window will appear. It will consist of the selected restore point, the to-be affected drive. It will also contain a warning telling to create a password reset disk.
Step 8- Finally, select the Finish button. This will restart the Windows 11 PC and begin the process of System Restore. After the restoration process, see if the issue is resolved.

Fix 8: Reviewing Event Viewer
Event viewer showcases events which might consist of errors. Thus, checking the event viewer will allow the users to know what is the problem with their hardware and help them fix the problem. Now, check the instructions below for doing the same.
Step 1- Firstly, open Event Viewer.
Step 2- Now, expand Windows Log and select System.

Step 3- Check for error events which may contain a red “X” symbol. The error events which are associated with registry may have details regarding issues accessing or loading registries. Event IDs of 9, 11, 15, etc. in the system event logs are a symbol of serious hardware issues in the PC.
Fix 9: Updating BIOS
The last fix which the users can attempt is updating the BIOS if available. This will help to update any outdated version of BIOS and in return solve the problem.
Step 1- At first, go to Settings > Windows Update > Advanced Options > Optional Updates to check for BIOS updates.

Step 2- Next, download and install the correct version of BIOS for the system if any BIOS updates are available.
Hope that this helps the users!