We all know Windows PowerShell has been part of Windows since long time. You can use this this tool to automate some scripting operations, re-register app packages, list and install Windows Updates manually, evaluate Windows Experience Index, scan your Windows etc.
Windows PowerShell can be truly helpful when other options are lengthy and as an IT admin, it could save your time by doing tasks with much perfection and capability. However, if at any time you feel the need to disable Windows PowerShell either temporary or permanently, this guide is for you.
You can use any of the methods mentioned below to enable or disable Windows PowerShell any time.
Page Contents
Enable/Disable Windows PowerShell In Windows 10
Method 1 – Using Turn Windows Feature On Or Off
1. Search for ‘Turn Windows Features on or off‘ using Windows Search or Cortana and pick same from search results.
2. In the Turn Windows Features on or off window, uncheck the Windows PowerShell option. Also uncheck sub-options to Windows PowerShell and click OK.
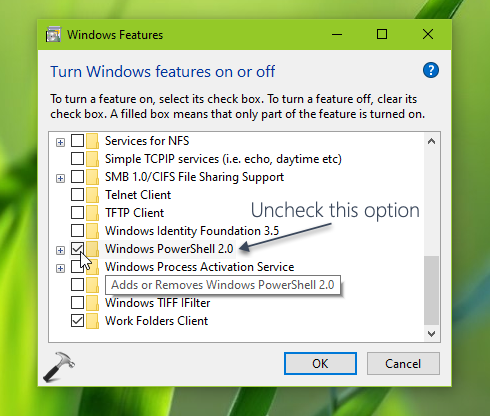
This is the simplest method to enable/disable Windows PowerShell anytime in Windows.
Method 2 – Using Software Restriction Policies
1. Open Windows PowerShell and then open Task Manager. Go to Details tab, right click on powershell.exe and select Open file location.
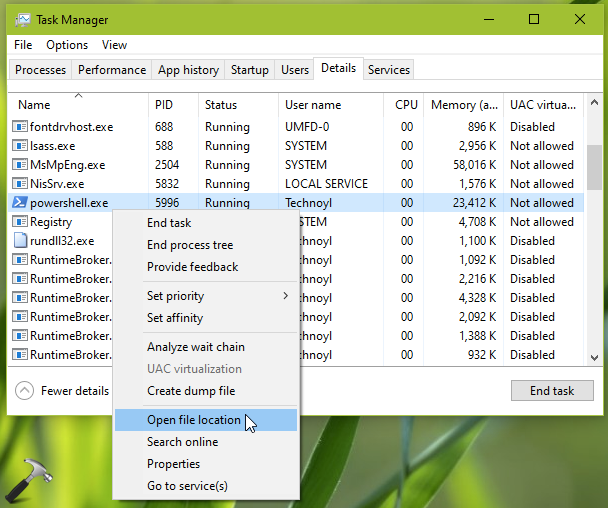
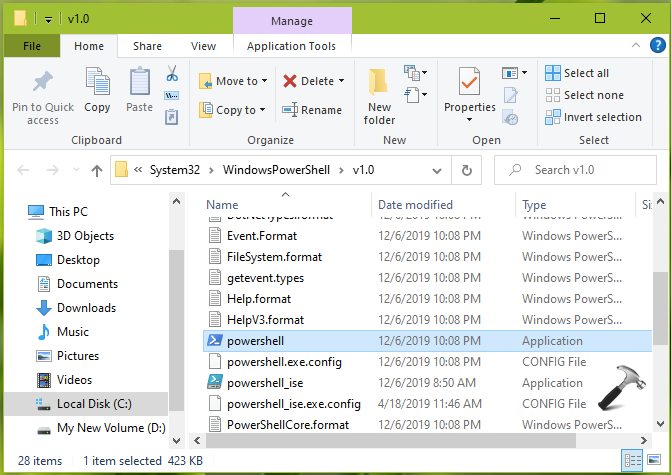
2. Note down that location of powershell.exe file.
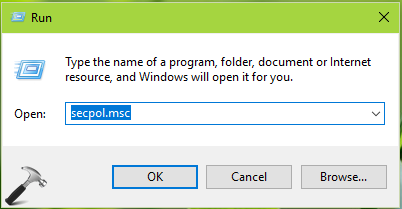
3. Press  + R and put
 secpol.msc in Run dialog box. Click OK to open Security Policy snap-in.
4. Then in Security Policy snap-in window, navigate here:
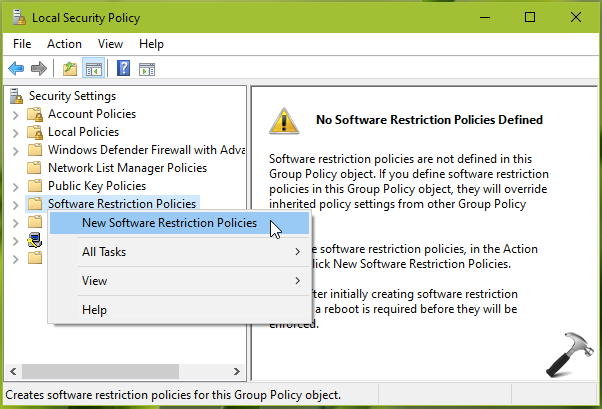
Security Settings > Software Restriction Policies
5. Right click on Software Restriction Policies folder and select New Software Restriction Policies option. This will automatically create new restriction policies.
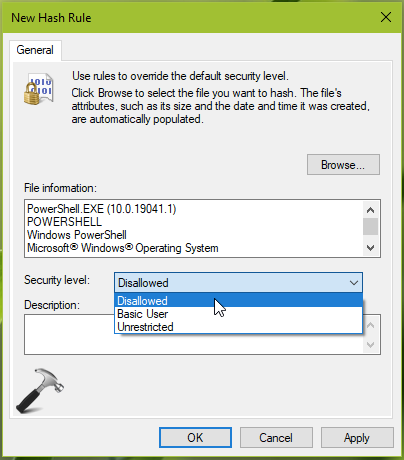
6. Now Software Restriction Policies folder has a sub-folder named Additional rules. Click on it and in the corresponding right pane, right click and select New Hash Rule option.

7. Under New Hash Rule window, use Browse button to locate powershell.exe file, we got in step 2. Then for Security level drop-down, select Disallowed and click Apply followed by OK.
8. Close Security Policy snap-in.
Reboot your system and after that you’ll find Windows PowerShell is disabled now.
To re-enable Windows PowerShell, you can simply check its option (Method 1) or remove its restriction policy (Method 2).
That’s it!
Related: Replace Windows PowerShell With Command Prompt On Start Button Context Menu